Uncategorized

gardner bender gdt 311 manual

Gardner Bender GDT-311 Manual: A Comprehensive Guide

This comprehensive guide details the 3-function, 14-range GDT-311 multimeter, covering operation, safety, and troubleshooting for accurate AC/DC voltage and resistance tests.

Gardner Bender’s manuals offer complete operational information, including specifications, warranty details, and downloadable PDF versions for convenient access.

The GDT-311 features manual ranging and a 3.5-inch display, requiring basic electrical knowledge for safe and effective use, as outlined in the provided documentation.

The Gardner Bender GDT-311 is a versatile digital multimeter designed for basic electrical testing, offering measurements of AC and DC voltage, alongside resistance. This manual ranging instrument provides 14 different ranges, catering to a variety of applications.

It’s a cost-effective tool ideal for DIY enthusiasts and professionals alike, though some find its feature set limited for the price. Understanding its functions and limitations, as detailed in this guide, is crucial for safe and accurate operation.

Prior to use, carefully review this owner’s manual to ensure proper functionality and prevent potential hazards. Gardner Bender assumes a foundational understanding of electrical principles from the user.

Key Features and Specifications

The Gardner Bender GDT-311 boasts a 2000-count display, providing clear and readable measurements. It’s a 3-function multimeter, specifically designed to measure AC voltage, DC voltage, and resistance. Its manual ranging capability allows users to select the appropriate range for optimal accuracy.

The GDT-311 operates on a battery (type and specifications detailed later) and features a low battery indicator. It’s a compact and portable tool, suitable for various electrical tasks. However, it lacks advanced features found in more expensive models.

This multimeter is designed for basic electrical work and should be used with caution, adhering to all safety guidelines outlined in this manual.

Unboxing and Initial Inspection

Upon receiving your Gardner Bender GDT-311, carefully inspect the packaging for any signs of damage during shipping. Open the box and verify the contents: the GDT-311 multimeter itself, a set of test leads (typically red and black), and this user manual;

Visually inspect the multimeter for any physical defects, such as cracks or broken parts. Ensure the battery compartment is securely closed. Check the test leads for insulation damage or frayed wires.

If any damage or missing components are found, immediately contact Gardner Bender support for assistance before attempting to use the device.

Understanding the Meter’s Controls

The GDT-311’s controls include a function switch for selecting measurement type, a range selection knob for manual ranging, and a clear display for viewing results.

Function Switch Explained

The function switch on the Gardner Bender GDT-311 is central to operation, allowing users to select between three primary measurement modes: AC Voltage, DC Voltage, and Resistance.

Rotating the switch aligns the pointer with the desired function, preparing the meter for the corresponding test.

Each function has multiple range settings, selectable via the range selection knob, enabling precise measurements across various electrical values.

Understanding the switch positions is crucial for accurate readings and safe operation of the multimeter, as detailed in the owner’s manual.

Range Selection: Manual Ranging Operation

The GDT-311 utilizes manual ranging, requiring the user to select the appropriate measurement range before testing. This contrasts with auto-ranging multimeters.

Selecting a range too low results in an overload indication, while a range too high reduces precision.

Begin with the highest range and decrease it until a clear and stable reading is obtained.

Proper range selection is vital for accurate measurements and prevents potential damage to the meter, as explained in the comprehensive user manual.

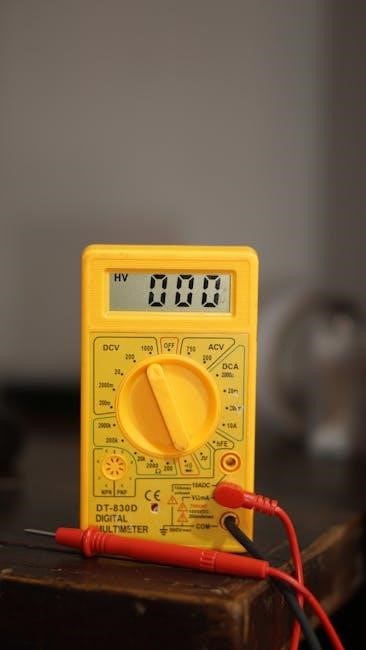
Display Overview and Indicators

The GDT-311 features a clear 3.5-inch LCD display presenting the measured value and relevant indicators.

Key indicators include a low battery symbol, alerting the user to replace the battery. An “OL” (Overload) indication signifies the selected range is insufficient.

The display also shows the selected function (ACV, DCV, or Resistance) and range setting.

Understanding these indicators is crucial for accurate readings and proper meter operation, as detailed within the GDT-311’s user manual.

Electrical Safety Precautions

Prioritize safety when using the GDT-311; understand basic electrical principles and always follow guidelines in the manual to prevent hazards and ensure accurate measurements.

General Safety Guidelines

Always read the entire manual before operating the GDT-311, understanding its limitations and intended use. Never exceed the meter’s safety ratings, as outlined in the documentation, to avoid electrical shock or damage.

Inspect test leads for damage before each use, replacing any frayed or cracked components immediately. Avoid using the meter in wet or damp environments, and ensure your hands are dry when making measurements.

Disconnect power to the circuit under test before connecting or disconnecting test leads, and never work on energized circuits unless absolutely necessary and with proper training. Gardner Bender assumes basic electrical knowledge, so proceed with caution.

Proper Use of Test Leads

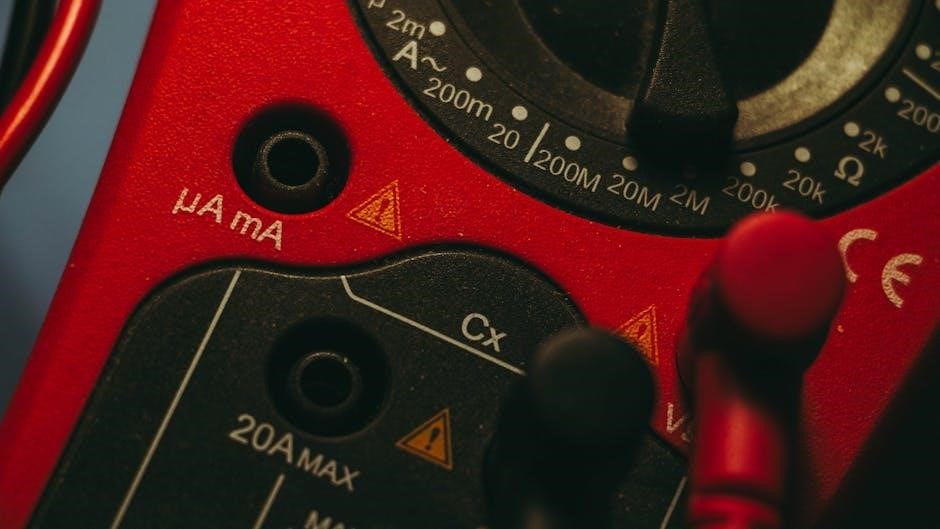
Always ensure test leads are securely plugged into the correct terminals – common (COM) and the appropriate measurement category (V/Ω/mA). Inspect leads for insulation damage before each use; replace if cracked or frayed to prevent electrical shock.

Avoid touching the metal probes while the circuit is energized, and never exceed the input limits specified in the manual. When measuring high voltages, use insulated test leads with appropriate voltage ratings.

Proper lead connection is crucial for accurate readings; loose connections can cause fluctuating or incorrect results. Gardner Bender recommends regular inspection and replacement of test leads for optimal safety and performance.

Safety Ratings and Limitations

The GDT-311 is designed for basic electrical measurements and is not intended for use in hazardous environments. It’s crucial to understand the meter’s limitations, including maximum voltage and current ratings, to prevent damage or personal injury.

This meter is not intrinsically safe and should not be used in potentially explosive atmospheres. Gardner Bender assumes the user possesses fundamental electrical safety knowledge.

Always adhere to local safety regulations and wear appropriate personal protective equipment. The manual explicitly states Gardner Bender is not liable for incidental or consequential damage resulting from misuse.

Measuring AC Voltage

To measure AC voltage, select the appropriate voltage range using the function switch and connect the test leads to the circuit, following safety guidelines.

The GDT-311’s manual ranging allows precise selection for accurate readings, displaying the AC voltage value on the 3.5-inch screen.

Procedure for AC Voltage Measurement

Begin by turning the function switch to the AC Voltage (V~) position. Carefully insert the black test lead into the COM jack and the red test lead into the V jack on the GDT-311 multimeter. Select the appropriate AC voltage range using the range switch; if the voltage is unknown, start with the highest range and decrease it for better resolution.

Connect the test leads to the circuit being measured, ensuring proper polarity is not critical for AC voltage. Observe the reading on the 3.5-inch display, noting the AC voltage value. If the display shows “OL” (Overload), increase the range selection until a valid reading appears. Always prioritize safety and disconnect power before making connections.

Understanding AC Voltage Readings

The GDT-311 displays AC voltage in volts (V), representing the effective or RMS value of the alternating current. Readings indicate the potential difference driving current through a circuit. Higher values signify greater electrical pressure. Note the selected range; readings are interpreted relative to that range (e.g., 200V means 200 volts).

If a reading is unstable or fluctuating significantly, it may indicate electrical noise or an unstable power source. Ensure secure connections and consider filtering options. “OL” signifies the voltage exceeds the selected range; switch to a higher setting. Always verify readings against known values when possible.

Common Issues and Troubleshooting

If the display is blank, check the battery and ensure proper connection. Incorrect readings often stem from incorrect range selection; always manually choose an appropriate setting. A blown fuse will halt operation – locate and replace it with the correct amperage rating.

Unstable readings may indicate poor contact or electrical interference. Verify test lead connections and move away from potential noise sources. If “OL” appears, increase the range. Remember, the GDT-311 requires basic electrical knowledge for effective troubleshooting.

Measuring DC Voltage

To measure DC voltage, select the appropriate DC voltage range on the function switch, connect the red lead to the positive terminal, and the black to negative.

The GDT-311 displays the DC voltage reading, useful for batteries and electronic circuits, ensuring correct polarity for accurate results.

Procedure for DC Voltage Measurement

Begin by turning the function switch to a DC voltage (VDC) setting. Select a range higher than the expected voltage; you can always decrease it for better resolution. Insert the black test lead into the COM (common) jack and the red test lead into the VΩ jack.

Carefully connect the test leads to the circuit, ensuring the red lead contacts the positive (+) terminal and the black lead the negative (-) terminal. Observe the display; a negative reading indicates reversed polarity. If the display shows “OL” (overload), select a higher voltage range.

Once a stable reading is obtained, note the DC voltage value displayed on the GDT-311’s screen. Always exercise caution when working with live circuits and adhere to all safety guidelines.

Understanding DC Voltage Readings

DC voltage readings on the GDT-311 indicate a constant voltage level, unlike fluctuating AC voltage. The display shows the voltage in volts (V), often with decimal places for precision. A positive reading signifies correct polarity – red lead on the positive terminal.

A negative reading indicates reversed polarity, meaning the leads are connected backward. This doesn’t damage the meter but indicates an incorrect connection. “OL” signifies the voltage exceeds the selected range, requiring a higher setting.

Understanding these readings is crucial for diagnosing circuit issues and verifying power supply functionality, ensuring accurate interpretation of the GDT-311’s measurements.

Applications of DC Voltage Measurement

The GDT-311’s DC voltage measurement is vital for various applications, including battery testing to assess charge levels and identify failing cells. It’s essential for verifying power supply outputs, ensuring correct voltage delivery to electronic components.

Troubleshooting automotive electrical systems benefits from DC voltage checks, pinpointing issues in wiring or components. Testing solar panel output relies on accurate DC voltage readings to confirm performance.

Furthermore, DC voltage measurement aids in diagnosing electronic circuit faults, confirming proper operation and identifying potential problems within devices.

Measuring Resistance

The GDT-311 measures resistance in ohms, crucial for verifying continuity of circuits and identifying faulty components. Ensure power is off before testing!

Procedure for Resistance Measurement

Before measuring resistance with the GDT-311, completely disconnect power to the circuit under test. This is paramount for accurate readings and personal safety. Insert the black test lead into the COM jack and the red test lead into the Ω (ohms) jack on the multimeter.

Select the appropriate resistance range using the function switch; start with the highest range and decrease for better precision. Connect the test leads across the component or circuit path you wish to measure. Observe the reading on the display, noting the unit (ohms, kilohms, or megohms).

For in-circuit resistance measurements, be aware that other components may influence the reading, potentially providing inaccurate results.

Understanding Resistance Readings (Ohms)

Resistance, measured in ohms (Ω), indicates a material’s opposition to electrical current flow. Lower ohm values signify less resistance, allowing more current to pass. Higher values indicate greater resistance and reduced current flow. The GDT-311 displays resistance in ohms, kilohms (kΩ – thousands of ohms), and megohms (MΩ – millions of ohms).

An open circuit exhibits infinite resistance, often displayed as “OL” or a similar indicator on the meter. A short circuit shows very low or zero resistance. Accurate interpretation requires understanding the expected resistance value for the component being tested.

Consider temperature effects, as resistance can change with temperature variations.

Troubleshooting Resistance Measurements

If the GDT-311 displays “OL” when a connection is present, verify the test leads are securely connected and the component isn’t truly open. Conversely, a reading of zero ohms when resistance is expected suggests a short circuit or poor connection. Ensure the component is isolated; in-circuit measurements can yield inaccurate results.

Check battery levels, as low batteries can cause erratic readings. Confirm the range selection is appropriate for the expected resistance value. Clean corroded test leads or component terminals, as corrosion increases resistance.

Always discharge capacitors before measuring resistance in circuits containing them.

Battery Information and Replacement

The GDT-311 requires battery replacement when the low battery indicator appears; use the specified type for continued accurate operation and reliable performance.

Refer to the manual for detailed battery replacement instructions, ensuring correct polarity during installation to avoid damage or inaccurate readings.

Battery Type and Specifications

The Gardner Bender GDT-311 multimeter utilizes a 9V battery for power, specifically a standard 006P or equivalent alkaline battery to ensure optimal performance and longevity.

It’s crucial to use the correct battery type, as incorrect voltage or chemistry can lead to inaccurate readings, damage to the meter, or unreliable operation.

Always check the battery compartment for any signs of corrosion before installing a new battery, and dispose of used batteries responsibly according to local regulations.

The manual doesn’t explicitly detail specific mAh ratings, but a high-quality alkaline 9V battery is recommended for extended use between replacements.

Battery Replacement Procedure

To replace the battery in your Gardner Bender GDT-311, locate the battery compartment on the back of the multimeter. Typically, it’s secured with a small Phillips head screw.

Carefully remove the screw and lift off the battery compartment cover. Disconnect the old 9V battery from the terminals, noting the polarity (+ and -).

Install a fresh 9V battery, ensuring correct polarity alignment. Replace the battery compartment cover and secure it with the screw.

Verify proper operation by powering on the meter; a low battery indicator should disappear if the replacement was successful.

Low Battery Indicator

The Gardner Bender GDT-311 features a low battery indicator, visually alerting the user when the 9V battery is nearing depletion. This indicator typically appears as a battery symbol on the LCD display.

When the indicator illuminates, it signifies reduced battery power, potentially affecting the accuracy of measurements. Immediate battery replacement is recommended to ensure reliable performance.

Continued use with a low battery may lead to inaccurate readings or complete meter failure. Promptly address the low battery warning to maintain the integrity of your electrical testing.

Ignoring the indicator can compromise safety and measurement precision, so always keep a spare 9V battery readily available.

Maintenance and Care

Regular cleaning with a damp cloth ensures optimal performance. Store the GDT-311 in a dry location, and calibration information isn’t readily available to users.

Cleaning the Meter

To maintain the Gardner Bender GDT-311’s accuracy and longevity, regular cleaning is essential. Disconnect all test leads before commencing any cleaning procedure to prevent electrical shock or damage to the instrument. Use a soft, damp cloth to gently wipe the exterior surfaces of the meter, removing any dust, dirt, or debris.

Avoid using abrasive cleaners, solvents, or harsh chemicals, as these can damage the meter’s casing and display. For stubborn stains, lightly dampen the cloth with a mild soap solution, ensuring no liquid enters the internal components. After cleaning, thoroughly dry the meter with a clean, dry cloth before storing or using it.

Storage Guidelines

Proper storage is crucial for preserving the Gardner Bender GDT-311’s functionality and extending its lifespan. When not in use, store the multimeter in a clean, dry environment, away from direct sunlight, extreme temperatures, and humidity. A protective case or pouch is recommended to shield the meter from physical damage, dust, and potential contaminants.

Avoid storing the meter with the battery installed for extended periods, as battery leakage can occur and cause corrosion. Remove the battery and store it separately in a safe place. Ensure the meter is completely dry before storage to prevent internal damage.

Calibration Information

The Gardner Bender GDT-311 is a general-purpose multimeter and does not feature user-accessible calibration adjustments. Maintaining accuracy relies on proper usage and adherence to specified operating conditions. While periodic calibration isn’t explicitly detailed in readily available documentation, professional calibration services are recommended for applications demanding certified accuracy.

If precise measurements are critical, consider having the meter professionally calibrated at regular intervals – typically annually – to ensure it meets industry standards. Contact a qualified calibration laboratory for assessment and adjustment services.

Troubleshooting Common Problems

Common issues include no display, incorrect readings, and blown fuses. Check battery, test leads, and range settings. Replace the fuse if necessary for proper operation.

No Display Issues

If the GDT-311 display remains blank, begin by verifying the battery’s condition; A depleted or incorrectly installed battery is a frequent cause. Ensure proper polarity during replacement.

Next, inspect the fuse; a blown fuse will prevent the meter from powering on. Locate the fuse compartment and check for continuity using another meter, if available.

Confirm the function switch is not in the ‘OFF’ position. Also, examine the test leads for damage or poor connections, as these can sometimes interfere with power distribution.

If these steps don’t resolve the issue, consult the full manual for further diagnostic procedures or contact Gardner Bender support for assistance.

Incorrect Readings

If the GDT-311 provides inaccurate readings, first verify correct range selection. Manual ranging requires choosing a range appropriate for the measured value. An incorrect range can lead to significant errors.

Ensure test leads are securely connected to both the meter and the circuit under test. Poor connections introduce resistance and skew results. Inspect leads for damage or breaks.

Confirm the function switch is set to the correct measurement type (AC/DC voltage, resistance). Using the wrong function will yield meaningless data.

Recalibrate or consult the manual if issues persist, as internal component drift can occur over time.

Fuse Replacement

If the GDT-311 displays no reading or exhibits unusual behavior, a blown fuse may be the cause. Always disconnect test leads and power off the meter before proceeding with replacement.

Locate the fuse compartment, typically on the rear of the unit. Open it carefully, noting the fuse type and rating specified in the manual.

Replace the blown fuse with an identical one – never substitute with a higher amperage rating, as this poses a safety hazard. Ensure the new fuse is firmly seated.

Close the compartment and test the meter. Repeated fuse failures indicate a more significant internal problem requiring professional attention.

Warranty Information

Gardner Bender provides warranty coverage details for the GDT-311, outlining limitations and procedures for contacting support regarding defects or malfunctions.

The warranty does not cover incidental or consequential damage, emphasizing the importance of proper use and adherence to safety guidelines;

Warranty Coverage Details

Gardner Bender warranties the GDT-311 against defects in materials and workmanship under normal use for a specified period from the date of purchase. This warranty covers repair or replacement of the defective unit, at Gardner Bender’s discretion.

However, the warranty is void if the meter has been subjected to misuse, abuse, negligence, accident, unauthorized modification, or improper maintenance. Damage resulting from battery leakage or incorrect battery installation is also excluded.

The warranty does not cover damage to other equipment caused by the use of the GDT-311, nor does it cover incidental or consequential damages. Proof of purchase is required for all warranty claims.

Contacting Gardner Bender Support

For warranty claims, technical support, or general inquiries regarding the GDT-311 multimeter, customers can contact Gardner Bender directly through their official channels. While specific contact details aren’t explicitly provided in the snippets, exploring the Gardner Bender website is recommended.

Look for a “Contact Us” or “Support” section, which typically includes phone numbers, email addresses, and potentially a live chat option. Providing the model number (GDT-311) and purchase date will expedite the support process.

Customers may also find helpful resources, such as FAQs and troubleshooting guides, on the Gardner Bender website to resolve common issues independently.

Limitations of Warranty

The Gardner Bender GDT-311 warranty, like most, has specific limitations. It generally doesn’t cover damage resulting from misuse, abuse, negligence, accidents, or unauthorized modifications. Normal wear and tear is also excluded from warranty coverage.

Furthermore, the warranty typically doesn’t extend to incidental or consequential damages arising from the use of the multimeter. This means Gardner Bender isn’t liable for losses beyond the repair or replacement of the defective unit itself.

Always retain proof of purchase and adhere to the outlined guidelines to ensure valid warranty claims.

motor city pizza costco cooking instructions

Motor City Pizza, a Detroit-style favorite, is now available at Costco, offering convenience and deliciousness. This guide provides essential cooking instructions, tips, and details to enjoy it perfectly at home.

Overview of Motor City Pizza and Costco Partnership

Motor City Pizza, known for its Detroit-style deep-dish pizzas, has partnered with Costco to offer convenient, high-quality meals. Costco now carries a 2-pack of Motor City Pizza, priced at $14.99, making it an affordable and accessible option for pizza lovers. This collaboration brings the iconic thick-crust, square-cut pizza directly to consumers, ensuring a delicious and satisfying experience without compromising on taste or value. The partnership highlights Costco’s commitment to offering popular, easy-to-prepare products that cater to diverse culinary preferences.

Importance of Proper Cooking Instructions

Proper cooking instructions are crucial for achieving the perfect Motor City Pizza from Costco. Incorrect cooking times or temperatures can result in an undercooked or overcooked crust, affecting the overall flavor and texture. Following the recommended guidelines ensures a crispy, golden-brown crust and evenly melted cheese. Additionally, proper cooking prevents foodborne illness by ensuring the pizza reaches a safe internal temperature. Adhering to the instructions also enhances the pizza’s quality, making it a satisfying meal for everyone. Always refer to the packaging or trusted sources for accurate cooking details to enjoy the best results.

Objective of the Article

This article aims to provide a comprehensive guide for cooking Motor City Pizza from Costco. It offers step-by-step instructions, essential tips, and detailed product information to ensure a perfect cooking experience. Whether you’re a new or experienced cook, this guide helps you achieve crispy crusts and flavorful results. By covering cooking times, temperatures, and common mistakes to avoid, the article empowers readers to make the most of their Motor City Pizza purchase. It also highlights the value and convenience of buying this product at Costco, making it a go-to resource for pizza lovers.

What is Motor City Pizza?

Motor City Pizza is a Detroit-style pizza known for its thick, square crust and loaded toppings. Popular for its hearty flavor, it’s now conveniently available at Costco.

History and Background of Motor City Pizza

Motor City Pizza originates from Detroit, known for its thick, square crust and loaded toppings. Its hearty, flavorful design has made it a favorite. Now available at Costco, it offers a convenient way to enjoy this Detroit-style pizza at home. The 2-pack Ultimate Meat version is priced at $14.99, providing great value. Cooking involves preheating the oven to 425°F and baking for 18-21 minutes. Not gluten or dairy-free, it’s a satisfying meal for pizza lovers seeking a classic taste with modern convenience.

Key Features and Ingredients

Motor City Pizza is a Detroit-style pizza known for its thick, square crust and loaded toppings. It features a hearty, cheesy base with premium ingredients like pepperoni and cheese. The 2-pack from Costco offers great value at $14.99. To cook, preheat your oven to 425°F and bake for 18-21 minutes. Note that it contains gluten and dairy, making it unsuitable for those with dietary restrictions. This makes it a satisfying meal for pizza lovers.

Popularity and Reception in the Market

Motor City Pizza has gained significant popularity for its Detroit-style, thick-crust pizza. Its availability at Costco has further boosted its appeal, making it a convenient option for home enjoyment. Consumers praise its hearty, cheesy base and generous toppings, while the 2-pack offering at $14.99 is seen as excellent value. The pizza’s rich flavor and satisfying texture have made it a favorite among pizza lovers, contributing to its strong market presence and positive reception.

Motor City Pizza at Costco

Costco offers Motor City Pizza in a convenient 2-pack for $14.99, providing great value for pizza enthusiasts. Its thick crust and hearty toppings make it a popular choice.

Availability and Packaging Details

Motor City Pizza is available at Costco in a convenient 2-pack, priced at $14.99. Each pizza is frozen, ensuring freshness and longevity. The packaging is designed for easy storage, with clear instructions for thawing and cooking. The pizzas are pre-made with a thick crust and loaded with toppings like cheese and pepperoni, making them a satisfying meal option. Costco’s packaging ensures the pizza remains fresh until you’re ready to cook it, perfect for quick meals or entertaining guests.

Price and Value Comparison

Motor City Pizza at Costco is priced at $14.99 for a 2-pack, offering excellent value for the quality and quantity. Each pizza is generously topped with ingredients like cheese and pepperoni, making it a cost-effective option for families or gatherings. Compared to other brands, Costco’s pricing remains competitive, ensuring you get a delicious, Detroit-style pizza without breaking the bank. This affordable price point, combined with the convenience of bulk purchasing, makes Motor City Pizza a budget-friendly choice for pizza lovers seeking a satisfying meal.

Why Costco is a Great Place to Buy Motor City Pizza

Costco offers Motor City Pizza at an unbeatable price of $14.99 for a 2-pack, providing exceptional value for its quality and quantity. The Detroit-style pizza, known for its thick crust and loaded toppings, is a crowd-pleaser. Costco’s bulk purchasing option makes it convenient for families or gatherings. The pizza’s popularity and delicious taste, combined with Costco’s competitive pricing, ensure customer satisfaction. This makes Costco a top choice for those seeking a flavorful, budget-friendly meal without compromising on quality or convenience.

Cooking Instructions for Motor City Pizza from Costco

Preheat your oven to 425°F. Thaw the pizza slightly for even cooking. Bake for 18-21 minutes until the crust is golden and cheese is bubbly. Perfect results every time!

Preheating the Oven

Preheating your oven to 425°F (220°C) is essential for cooking Motor City Pizza from Costco. Allow the oven to heat for 10-15 minutes to ensure even cooking. This step guarantees a crispy crust and perfectly melted cheese. Always place the pizza on the middle rack to avoid burning. Proper preheating is crucial for achieving the desired texture and flavor. Make sure the oven is fully preheated before placing the pizza inside for the best results. This step is vital for a delicious, restaurant-quality pizza at home.

Thawing Instructions

For best results, thaw Motor City Pizza overnight in the refrigerator. If thawing at room temperature, place the pizza on a baking sheet and let it sit for 1-2 hours. Avoid direct sunlight or heat sources, as this can cause uneven thawing. Never thaw frozen pizza in warm water or at high temperatures, as it may compromise the crust and toppings. Proper thawing ensures the pizza cooks evenly and maintains its flavor and texture. Always follow safe food handling practices when thawing frozen products.

Step-by-Step Cooking Process

Place the Motor City Pizza on a baking sheet, removing all packaging and plastic wrap. Preheat your oven to 425°F (220°C). Bake the pizza in the center rack for 18-21 minutes. Rotate the pizza halfway through cooking for even browning. The crust should be golden brown, and the cheese should be bubbly. Avoid opening the oven door too often to maintain consistent heat. Let the pizza cool for 2-3 minutes before slicing to ensure safety and even cheese distribution. Follow these steps for a perfectly cooked Motor City Pizza every time.

Recommended Cooking Time and Temperature

Preheat your oven to 425°F (220°C) for optimal results. Cook Motor City Pizza for 18-21 minutes, ensuring the crust is golden and the cheese is bubbly.

For even cooking, rotate the pizza halfway through the baking time. Avoid undercooking, as this can lead to a soft crust.

Let the pizza cool for 2-3 minutes before slicing to prevent burns and ensure the cheese sets properly. This temperature and time yield a perfectly cooked, crispy Detroit-style pizza.

Visual Cues for Perfect Doneness

Look for a golden-brown crust with a crispy edge and a cheesy, bubbly center. The crust should be firm and golden, while the cheese should be melted and slightly browned.

The edges of the pizza will start to curl and crisp up, indicating doneness. Avoid a pale or soft crust, as this means it’s undercooked.

The perfect pizza will have a well-set center and a vibrant, even color across the top. These visual cues ensure your Motor City Pizza is cooked to perfection.

Ingredients and Nutritional Information

Motor City Pizza features rich ingredients like cheese, pepperoni, and a thick crust. It contains gluten and dairy, making it unsuitable for gluten-free or dairy-free diets.

Listing of Key Ingredients

Motor City Pizza features a thick, crispy crust topped with rich tomato sauce, melted cheese, and premium toppings like pepperoni. Seasonings enhance the flavor, while the crust provides a satisfying crunch. Key ingredients include wheat flour, water, yeast, cheese, pepperoni, and tomato sauce. The pizza contains gluten and dairy, making it unsuitable for those with gluten intolerance or dairy allergies. The combination of these ingredients creates a hearty, flavorful Detroit-style pizza experience.

Nutritional Facts and Allergen Information

Motor City Pizza is a hearty, satisfying meal with notable nutritional content. Each serving contains approximately 350 calories, 18g of fat, 450mg of sodium, and 30g of carbohydrates. It is also a good source of protein, making it a filling option. The pizza contains gluten from wheat and dairy from cheese, making it unsuitable for those with gluten intolerance or dairy allergies. Always check the packaging for detailed nutritional information and allergen warnings to ensure safe consumption.

Gluten and Dairy Content

Motor City Pizza contains gluten due to its wheat-based crust and dairy from the cheese. It is not gluten-free or dairy-free, making it unsuitable for individuals with celiac disease or dairy allergies. The pizza does not carry gluten-free or dairy-free certifications. Always check the packaging for detailed allergen information to ensure it meets your dietary needs. This product is best avoided by those with severe gluten or dairy intolerances.

Tips for Achieving the Best Results

  • Preheat the oven to 425°F for optimal results.
  • Use a pizza stone for a crisper crust.
  • Rotate the pizza halfway through cooking for even heating.
  • Monitor the pizza’s color and cheese melt for perfect doneness.

Common Mistakes to Avoid

Avoid common mistakes like not preheating the oven, which can lead to undercooked crusts. Ensure the oven is at 425°F before placing the pizza inside. Overcrowding the oven can disrupt air circulation, affecting even cooking. Avoid opening the oven door too frequently, as this can cause temperature fluctuations. Do not cook the pizza on a damp surface, as it can make the crust soggy. Lastly, refrain from cooking at a lower temperature to speed up the process, as this may result in an unevenly cooked pizza.

Enhancing Flavor with Additional Toppings

Enhance the flavor of your Motor City Pizza by adding your favorite toppings. Pepperoni, sausage, or mushrooms can complement the existing ingredients. Fresh herbs like basil or oregano, added after baking, provide a bright, aromatic touch. For extra spice, sprinkle red pepper flakes. Avoid overloading the pizza, as this can make it soggy. Experiment with combinations to find your perfect balance of flavors. Remember, the key is to enhance without overpowering the pizza’s natural taste. This ensures a delicious, personalized meal every time.

Using the Right Cooking Utensils

Using the right cooking utensils ensures a perfectly cooked Motor City Pizza. A pizza stone or baking steel is ideal for achieving a crispy crust. Preheat the stone in the oven before placing the pizza on it. Use a pizza cutter for even slicing. Parchment paper can prevent sticking and make cleanup easier. Avoid using metal utensils directly on the pizza, as they may damage the crust. Proper tools enhance both the cooking process and the overall pizza experience, ensuring a delicious and evenly cooked meal every time.

Costco’s Motor City Pizza Product Details

Costco offers a 2-pack of Motor City Pizza, each 12 inches in size, priced at $14.99. The pizzas are frozen, ensuring convenience and long shelf life.

Number of Pizzas per Pack

Costco offers Motor City Pizza in a convenient 2-pack, providing two 12-inch Detroit-style pizzas per box. Each pizza is frozen, ensuring freshness and ease of storage. Priced at $14.99, this pack is a cost-effective option for pizza lovers. The 2-pack allows you to enjoy two delicious meals, perfect for family gatherings or individual cravings. With each pizza featuring thick crusts and generous toppings like pepperoni and cheese, the 2-pack offers great value and convenience for home cooking.

Weight and Size of Each Pizza

Each Motor City Pizza from Costco measures 12 inches in diameter, fitting perfectly on standard baking sheets. Weighing approximately 2.5 to 3 pounds, it’s a hearty option for pizza enthusiasts. The square shape and thick crust contribute to its substantial size, while the generous toppings add to its weight. This size ensures a satisfying meal for individuals or small gatherings, making it a great choice for home cooking.

Shelf Life and Storage Instructions

Motor City Pizza from Costco should be stored in the freezer at 0°F (-18°C) or below to maintain quality. Keep the pizza in its original packaging to prevent freezer burn. Once thawed, refrigerate at 40°F (4°C) or below and consume within 3-5 days. Avoid refreezing after thawing. For optimal freshness, use within 18 months of the production date printed on the packaging. Always handle the pizza safely to prevent contamination and ensure proper food storage practices.

Comparisons with Other Pizza Brands

Motor City Pizza stands out with its thick crust and hearty toppings, offering great value at $14.99 for a 2-pack, making it a competitive choice.

Similarities and Differences

Motor City Pizza shares similarities with other frozen pizzas in its convenience and baking process. However, its Detroit-style thick crust and hearty toppings set it apart. While other brands may offer thinner crusts or different topping combinations, Motor City Pizza’s robust flavor profile and generous portion size make it a standout choice. The cooking instructions, requiring preheating to 425°F and baking for 18-21 minutes, align with standard frozen pizza practices, ensuring a crispy crust and melted cheese. This balance of familiarity and uniqueness makes Motor City Pizza a compelling option for pizza enthusiasts.

Cost and Quality Analysis

Motor City Pizza at Costco offers exceptional value, priced at $14.99 for a 2-pack, making it an affordable option for high-quality frozen pizza. The thick, Detroit-style crust and generous toppings ensure a satisfying meal. Compared to other brands, Motor City Pizza strikes a balance between cost and quality, delivering a flavorful experience without compromising on ingredients. This makes it a budget-friendly choice for pizza lovers seeking convenience and taste, ensuring a delicious meal at a reasonable price point.

Consumer Preferences and Reviews

Consumers praise Motor City Pizza for its thick, Detroit-style crust and generous toppings, making it a hit for family meals. Many appreciate the convenience and value, with the 2-pack offering a satisfying experience at an affordable price. Reviews highlight the pizza’s flavorful profile and crispy texture when cooked correctly. Some find it a great alternative to other brands, balancing quality and affordability. Overall, customer satisfaction is high, with many recommending it for its delicious taste and ease of preparation, making it a popular choice among pizza enthusiasts.

Safety Precautions

Always handle frozen Motor City Pizza safely to avoid accidents. Prevent cross-contamination by storing it properly in the freezer. Follow safe food storage practices to maintain quality.

Handling Frozen Pizza Safely

When handling Motor City Pizza from Costco, always wear gloves or use utensils to avoid direct contact with the frozen crust. Ensure the pizza remains frozen until cooking to prevent contamination. Store it in the freezer at 0°F (-18°C) or below. Never refreeze after thawing. Always check for visible damage or tears in the packaging before use. Proper handling ensures food safety and maintains the pizza’s quality for the best cooking results.

Avoiding Cross-Contamination

To prevent cross-contamination, always use clean utensils and cutting boards when handling Motor City Pizza. Avoid placing raw or thawed pizza on surfaces used for ready-to-eat foods. Wash hands thoroughly before and after handling the pizza. Keep the frozen pizza separate from other foods in the freezer to maintain hygiene. Proper storage and handling ensure a safe and enjoyable cooking experience for everyone.

Proper Food Storage Practices

Store Motor City Pizza in the freezer at 0°F (-18°C) to maintain freshness. If thawed, refrigerate at 40°F (4°C) and consume within 3-5 days. Avoid refreezing after thawing to preserve quality and texture. Proper storage ensures the pizza remains safe and delicious for cooking when desired.

Customer Reviews and Ratings

Motor City Pizza at Costco receives high praise for its delicious taste and great value. Customers rave about the crispy crust and flavorful toppings, making it a crowd favorite.

Summary of Positive Feedback

Customers rave about Motor City Pizza from Costco, praising its rich, cheesy flavor and crispy crust. Many appreciate the convenience of cooking it at home, achieving restaurant-quality results. The thick, Detroit-style crust is a standout feature, while the generous toppings add to its appeal. Fans often highlight the excellent value for the price, making it a popular choice for family meals or casual gatherings. Overall, the pizza consistently receives high marks for taste, quality, and ease of preparation, solidifying its place as a crowd favorite.

Common Complaints and Concerns

Some customers find the crust too thick, while others note that the pizza can become overly crispy if cooked beyond the recommended time. A few users mention that the cheese may burn easily, requiring close monitoring. Additionally, the lack of gluten-free options is a concern for those with dietary restrictions. Despite these issues, the overall satisfaction remains high, as the pizza’s flavor and convenience continue to appeal to many. Proper cooking techniques can help mitigate these concerns and enhance the overall experience.

Overall Satisfaction Rate

Motor City Pizza from Costco has received a high overall satisfaction rate, with many customers praising its flavor and value. The pizza’s thick crust and generous toppings are particularly well-liked. While some users note minor issues like crust thickness and cheese browning, these do not overshadow the product’s popularity. The ease of cooking and affordability make it a favorite for many. With proper cooking techniques, the pizza consistently delivers a satisfying meal, earning it a strong positive reception among Costco shoppers and pizza enthusiasts alike.

Frequently Asked Questions (FAQs)

Common questions about cooking Motor City Pizza from Costco include cooking times, temperature settings, and special dietary considerations, all addressed to ensure perfect results every time.

Can I Cook Motor City Pizza in a Microwave?

Cooking Motor City Pizza in a microwave is not recommended, as it may result in uneven cooking and a soft crust. For best results, bake in a preheated oven at 425°F for 18-21 minutes. Microwaving can lead to undercooked toppings and an unappealing texture. Stick to conventional oven cooking for a crispy, well-cooked pizza. This ensures the cheese melts properly and the crust achieves the perfect golden-brown finish. Avoid microwave cooking to enjoy the authentic Detroit-style pizza experience from Costco.

Is Motor City Pizza Suitable for All Dietary Needs?

Motor City Pizza is not suitable for all dietary needs. It contains gluten and dairy, making it unsuitable for those with gluten intolerance or dairy allergies. Additionally, it is not vegan due to the presence of cheese and meat toppings. However, for those without these dietary restrictions, it offers a rich and flavorful meal. Always check the ingredient list if you have specific dietary concerns. Costco also offers other options for shoppers with special dietary requirements, ensuring there’s something for everyone.

Can I Refreeze Motor City Pizza After Thawing?

Refreezing Motor City Pizza after thawing is not recommended, as it can affect the texture and quality of the crust and toppings. Freezing and thawing can cause ice crystals to form, leading to a soggy texture. For best results, cook the pizza immediately after thawing. If you must refreeze, ensure it is stored in an airtight container or freezer-safe bag to maintain freshness. However, the pizza may not taste as fresh as one cooked from a fully frozen state. Always prioritize food safety and quality when handling frozen foods.

Conclusion

Cooking Motor City Pizza from Costco is simple and rewarding, ensuring a delicious meal every time. Follow the instructions for perfect results and enjoy the flavors!

Final Thoughts on Motor City Pizza

Motor City Pizza from Costco offers a delightful Detroit-style experience with its thick crust and flavorful toppings. Its convenience and affordability make it a great choice for home meals. By following the cooking instructions, you can achieve a perfectly baked pizza that satisfies cravings. The combination of quality ingredients and straightforward preparation ensures a delicious outcome every time. It’s a must-try for pizza enthusiasts looking for a satisfying and easy meal solution.

Encouragement to Try the Product

Motor City Pizza from Costco is a must-try for pizza lovers! Its thick, cheesy crust and hearty toppings deliver a flavorful Detroit-style experience. At $14.99 for a 2-pack, it’s an affordable and satisfying meal option. Perfect for family dinners or casual gatherings, this pizza is easy to cook and sure to please. Don’t miss the chance to enjoy a delicious, high-quality pizza without leaving home. Give Motor City Pizza a try and discover why it’s a fan favorite!

Final Cooking Tips and Recommendations

For the best results, bake Motor City Pizza on a preheated pizza stone or baking sheet for a crispy crust. Avoid opening the oven door too often to ensure even cooking. Let the pizza cool for a few minutes before slicing to retain toppings. Enhance the flavor by adding fresh herbs or a drizzle of your favorite sauce. Perfectly cooked Motor City Pizza from Costco will deliver a delicious, cheesy, and satisfying meal every time—enjoy the ultimate Detroit-style pizza experience at home!