
Intex Sand Filter Manual: A Comprehensive Guide
Navigating pool maintenance can be complex, but this manual simplifies Intex sand filter operation. Troubleshooting issues like sand leaks or pressure fluctuations is covered,
along with setup and seasonal care. This guide ensures a sparkling clean pool all season long!
Understanding Your Intex Sand Filter
Your Intex sand filter is the heart of your pool’s cleaning system, efficiently removing debris and impurities to maintain crystal-clear water. Unlike cartridge filters, sand filters utilize a bed of specialized sand to trap particles as water passes through. This process provides excellent filtration and requires less frequent cleaning compared to other types.
However, understanding its components and operation is crucial for optimal performance. The filter consists of a tank, pump, valves, and pressure gauge. The pump circulates water, the valves control flow direction for filtration and backwashing, and the pressure gauge indicates filter condition.
A key aspect is recognizing that a properly functioning sand filter shouldn’t release sand into the pool. If you observe sand escaping, it signals a problem requiring immediate attention, potentially involving disassembly and inspection as suggested by online resources. Regular maintenance, including backwashing and eventual sand replacement, is vital for continued efficiency. Familiarizing yourself with these elements will empower you to keep your pool pristine.
What is a Sand Filter and Why Use One?
A sand filter is a water purification system that uses a bed of sand to remove impurities. Water is pumped through the sand, trapping particles like dirt, leaves, algae, and even small insects. This makes it a highly effective method for keeping pool water clean and healthy. Compared to cartridge filters, sand filters offer a larger capacity for holding debris, reducing the frequency of cleaning.
Why choose a sand filter? They are known for their efficiency and relatively low maintenance. While cartridge filters require regular cleaning or replacement, sand filters only need periodic backwashing – a process of reversing the water flow to flush out accumulated dirt. This makes them a convenient option for pool owners.
However, it’s important to note that a functioning sand filter should not release sand into the pool. Any sand escaping indicates a problem needing immediate attention. Understanding this fundamental aspect is key to maintaining a clean and safe swimming environment.
Intex Sand Filter Models: An Overview
Intex offers a range of sand filter models designed to accommodate various pool sizes and needs. Popular options include the Intex 28637EG Sand Filter, suitable for smaller above-ground pools, and larger capacity models like the 28643EG for more substantial setups. These filters typically feature a six-function control valve, allowing for filtering, backwashing, rinsing, waste, recirculate, and closed system options.
Key differences between models lie in their flow rates (gallons per minute — GPM) and the amount of sand they can hold. Higher GPM ratings are ideal for larger pools requiring faster water turnover. Sand capacity directly impacts how long the filter can operate efficiently before needing backwashing;
It’s crucial to select a model appropriate for your pool’s volume. Using an undersized filter will result in inefficient cleaning, while an oversized filter may be unnecessarily expensive. Checking Intex’s official specifications and comparing them to your pool’s requirements is highly recommended before purchasing.

Installation and Setup
Proper installation is vital for optimal performance. Carefully position the filter near the pump and pool, ensuring secure plumbing connections. Following the manual’s diagrams is essential for a trouble-free setup!
Correct Placement of the Filter
Strategic filter placement significantly impacts system efficiency and longevity. Choose a level, stable surface capable of supporting the filter’s weight when filled with water and sand – this is crucial to prevent instability and potential damage. Proximity to both the pool pump and the pool itself is paramount, minimizing plumbing runs and reducing potential friction loss, which can affect water flow.
Ideally, locate the filter in a well-ventilated area, shielded from direct sunlight and extreme weather conditions. Prolonged sun exposure can degrade plastic components over time, shortening the filter’s lifespan. Protection from freezing temperatures is also vital, as ice formation can cause cracks and leaks. Ensure easy access for maintenance tasks like backwashing, cleaning, and sand replacement.
Consider the proximity to a grounded electrical outlet for the pump, adhering to all local electrical codes. Avoid placing the filter in a location prone to flooding or standing water. A concrete pad or gravel base provides a stable and well-drained foundation. Finally, leave sufficient space around the filter for comfortable operation and inspection.
Plumbing Connections: Step-by-Step
Establishing secure plumbing connections is vital for a leak-free and efficient filtration system. Begin by applying Teflon tape to all threaded connections to ensure a watertight seal. Connect the pump’s outlet to the filter’s inlet, ensuring correct flow direction – typically indicated by arrows on the filter housing. Next, attach the filter’s outlet to the pool’s return line, again verifying proper flow.
Use appropriate sized hoses and clamps, tightening them securely but avoiding over-tightening, which can damage the fittings. Inspect all connections for leaks immediately after initial setup and after each maintenance procedure. If leaks are detected, tighten the clamps or reapply Teflon tape as needed.
Pay close attention to the orientation of the multiport valve, ensuring it’s aligned correctly for proper operation. Double-check that all valves are in the closed position before starting the pump. A vacuuming device attached to the system may diminish flow, so remove it to check pressure readings.
Sand Type and Quantity Requirements
Selecting the correct sand is crucial for optimal filter performance and longevity. Intex sand filters require a specific grade of silica sand – typically #20 silica sand – with a grain size between 0.45 and 0.85 millimeters. Avoid using play sand, construction sand, or sand with clay content, as these can clog the filter and reduce its efficiency.
The quantity of sand needed varies depending on the filter model. Refer to your filter’s specifications for the exact amount. Generally, Intex sand filters require between 75 and 100 pounds of sand. Ensure the sand is clean and dry before adding it to the filter tank.
Fill the tank to the designated level, usually indicated by a fill line inside the tank. Proper sand loading is essential for effective filtration and preventing damage to the filter system. Regularly inspect the sand for clumping or channeling, which can indicate the need for cleaning or replacement.

Operation and Maintenance
Consistent upkeep ensures peak performance. Regular backwashing removes debris, maintaining flow. Monitor pressure gauges and operate in timer or manual modes for optimal water clarity and longevity.
Initial Filter Startup Procedure
Before your first use, a careful startup is crucial for optimal performance and longevity of your Intex sand filter system. Begin by ensuring all plumbing connections are secure and leak-free, as detailed in the installation section. Next, slowly fill the filter tank with water, allowing it to saturate the sand bed completely. This prevents damage during initial operation.
Once the sand is fully saturated, prime the pump according to the pump’s manual – this typically involves filling the pump housing with water. Turn on the pump and observe for any leaks around the filter connections or the pump itself. Allow the system to run for at least 24 hours continuously. This initial run circulates the water, settles the sand, and helps establish proper filtration.
During this 24-hour period, monitor the pressure gauge. It will likely fluctuate as the sand settles. After the initial run, perform a backwash cycle (refer to the ‘Backwashing’ section) to remove any fine particles dislodged during the process. Following the backwash, resume normal operation and continue to monitor the pressure gauge for stable readings within the recommended operating range. Regularly check the system for any unusual noises or vibrations, indicating potential issues.
Normal Operating Pressure Ranges
Maintaining the correct pressure is vital for efficient filtration and preventing damage to your Intex sand filter system. A typical, healthy operating pressure for most Intex sand filters falls within the range of 8-12 PSI (pounds per square inch) when the pump is running normally. This range indicates that water is flowing freely through the sand bed without excessive restriction.
However, pressure can fluctuate based on several factors, including the cleanliness of the sand, the flow rate, and the presence of debris. A slight increase in pressure is normal as the sand traps dirt and particles. If the pressure rises above 18-20 PSI, it signals that the filter is becoming clogged and requires backwashing. Conversely, a pressure reading consistently below 8 PSI may indicate a leak in the system or insufficient pump power.
Regularly monitoring the pressure gauge allows you to proactively identify potential problems. Remember to always turn off the pump before opening the filter housing for inspection or maintenance. Consistent pressure within the recommended range ensures optimal water clarity and extends the life of your filter media.
Backwashing: When and How To
Backwashing is a crucial maintenance procedure for Intex sand filters, reversing the water flow to flush out accumulated dirt and debris. You should backwash when the filter pressure gauge reads between 18-20 PSI, indicating a clogged sand bed; This process restores optimal filtration performance and prevents damage to the system.
To backwash, first turn off the pump. Set the multiport valve to the “Backwash” position. Then, turn the pump back on and allow it to run for 2-3 minutes, or until the water in the sight glass runs clear. Next, turn off the pump again, set the valve to “Rinse” and run for approximately 30-60 seconds to resettle the sand bed. Finally, return the valve to the “Filter” position and restart the pump.
Important: Always ensure the waste line is properly directed away from electrical components and landscaping. Backwashing too frequently can reduce the lifespan of the sand, so only perform it when necessary.
Filter Cleaning and Sand Replacement
Maintaining a clean filter and healthy sand bed is vital for efficient pool filtration. While backwashing removes debris, periodic deep cleaning is also necessary. Annually, disassemble the filter tank and inspect the internal components for wear or damage. Clean the laterals and manifold thoroughly, removing any accumulated buildup.
Sand replacement is recommended every 3-5 years, depending on usage and water quality. Old sand loses its filtering efficiency and can become compacted. When replacing, use the correct grade and quantity of sand specified in your Intex filter manual. Ensure the sand is thoroughly rinsed before adding it to the filter tank.
Proper sand maintenance extends the life of your filter and ensures consistently clean pool water. Neglecting these steps can lead to reduced performance, increased chemical usage, and potential system failure.

Troubleshooting Common Issues
Addressing problems promptly keeps your pool pristine. Common issues include low flow, high pressure, and sand leaks. Identifying the root cause—like a clogged filter or vacuum device—is key to resolution.
Low Water Flow: Causes and Solutions
Reduced water flow through your Intex sand filter can stem from several sources, impacting your pool’s cleanliness. A primary culprit is often a clogged filter itself, as debris accumulates within the sand bed, restricting water passage. Regularly scheduled backwashing is crucial to alleviate this. However, if backwashing doesn’t resolve the issue, a more thorough filter cleaning or even sand replacement might be necessary.

Another frequent cause is a restriction in the plumbing lines. Inspect hoses for kinks, bends, or obstructions. Ensure skimmer baskets and pump strainers are clear of leaves and debris, as these can significantly impede water intake. Furthermore, attached devices like automatic pool cleaners can diminish flow and elevate pressure; disconnecting these during normal operation can help diagnose the problem.
If the flow remains low, examine the pump itself. A failing pump or impeller can’t generate sufficient suction. Check for air leaks in the system, as air entering the lines reduces water flow. Finally, verify that the multi-port valve is correctly positioned for filtration. Addressing these potential issues systematically will restore optimal water flow and maintain a healthy pool environment.
High Pressure Readings: Identifying the Problem
Elevated pressure readings on your Intex sand filter gauge signal a restriction within the system, demanding immediate attention. The most common cause is a dirty filter – accumulated debris within the sand bed hinders water flow, increasing pressure. Backwashing is the first line of defense, reversing the water flow to dislodge trapped particles. However, consistently high pressure even after backwashing indicates a deeper issue.
Inspect the system for obstructions in the plumbing lines. Kinks in hoses, closed valves, or debris lodged within pipes can all contribute to increased pressure. As noted, vacuuming devices attached to the system can also cause pressure to rise; removing them is a simple diagnostic step. A clogged skimmer basket or pump strainer restricts water intake, forcing the pump to work harder and raising pressure.
Less frequently, the problem lies within the filter itself. Caked sand, or sand that has become too fine, can impede water flow. In such cases, a thorough filter cleaning or sand replacement may be necessary. Ignoring high-pressure readings can damage the filter and pump, so prompt investigation is vital.
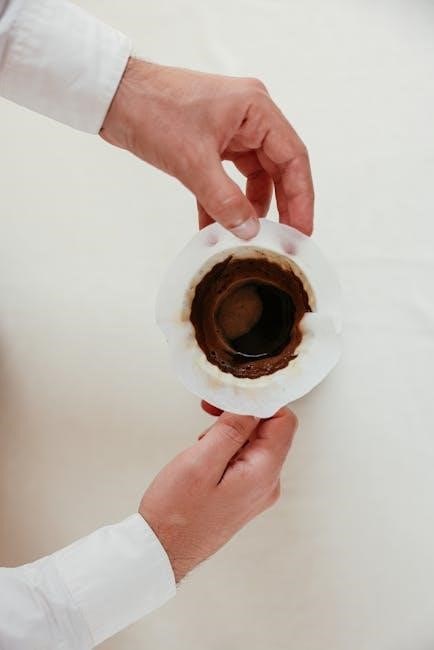
Sand Leaking from the Filter: Diagnosis and Repair

Discovering sand leaking from your Intex sand filter is concerning, indicating a breach in the filtration system. The primary culprit is often a compromised lateral – the internal pipes distributing water through the sand bed. These can crack or become disconnected, allowing sand to escape with the backwash water. A visual inspection, requiring disassembly of the filter, is usually necessary to pinpoint the damaged lateral(s).
Another potential source of leaks is a faulty multiport valve. This valve controls the direction of water flow, and worn seals or cracks can allow sand to bypass the filtration process. Examine the valve carefully for any visible damage or signs of leakage. The tank itself can also develop cracks, though this is less common.
Repair typically involves replacing the damaged component. Laterals are relatively inexpensive and easy to replace, while a multiport valve replacement is more involved. If the tank is cracked, replacement of the entire filter unit is usually the most practical solution. Always ensure the system is depressurized before attempting any repairs.

Pump Not Priming with Sand Filter
A pump failing to prime after installing or backwashing an Intex sand filter is a common frustration. This usually indicates air trapped within the pump housing or suction lines, preventing it from drawing water. First, verify the water level in the pool is adequate – the pump needs sufficient water to operate effectively.
Next, check for air leaks in the suction plumbing between the skimmer or main drain and the pump. Loose connections or damaged pipes can introduce air into the system. Tighten all fittings and inspect for cracks. Ensure the pump basket is clean and free of debris, as obstructions can restrict water flow.

Priming the pump manually is often necessary. Open the pump lid, fill the pump housing with water using a hose, and replace the lid tightly. Then, turn on the pump and allow it to run until it draws water and establishes a steady flow. If the pump still fails to prime, a vacuuming device attached to the system may be diminishing flow.

Advanced Topics
For optimal pool care, explore timer versus manual operation modes. Proper winterization safeguards your Intex filter from damage. Understanding parts replacement extends its lifespan, ensuring consistently clear water.
Using a Vacuuming Device with the Filter
Integrating an automatic pool cleaner, such as an Intex auto pool cleaner, with your sand filter system offers convenience, but requires careful attention to avoid operational issues. A common symptom of using a vacuuming device while the filter is running is a noticeable reduction in water flow and a corresponding increase in pressure, potentially pushing the pressure gauge into the yellow zone.
This occurs because the vacuuming device adds extra load to the filtration system, restricting water movement. If you observe diminished flow and elevated pressure, the first step is to immediately disconnect the vacuuming device from the system. Observe the pressure gauge after disconnection; a significant drop from the yellow zone back into the green zone confirms the vacuuming device was the culprit.
It’s crucial to remember that sand filters have a limited capacity. Overloading them with additional demands, like a vacuum cleaner, can compromise their efficiency and potentially lead to damage. Always monitor the pressure gauge when using a vacuuming device and be prepared to temporarily halt vacuuming if the pressure rises excessively. Consider vacuuming during periods of lower filter demand or adjusting the vacuuming schedule to prevent overloading the system. Regular filter maintenance, including backwashing, is even more important when utilizing a vacuuming device.
Operating Modes: Timer vs. Manual
Intex sand filters offer flexibility in operation through two primary modes: Timer and Manual. Understanding the benefits of each allows you to optimize filtration based on your pool’s needs and usage patterns.
Manual mode provides complete control, enabling you to start and stop the filter as desired. This is ideal for short periods of heavy pool use, like after a party, or when addressing a sudden influx of debris. However, it requires consistent monitoring and active operation.
Timer mode automates the filtration process, allowing you to set specific run times. This is the preferred method for consistent, everyday filtration. Program the timer to run the filter for an adequate duration each day – typically 8-12 hours – to maintain water clarity and hygiene. The timer ensures continuous filtration without requiring constant attention.
Consider your pool’s usage when selecting a mode. For consistent cleanliness, timer mode is recommended. For targeted cleaning or infrequent use, manual mode offers greater control. Experiment to find the optimal settings for your specific pool and lifestyle, always monitoring filter pressure and water clarity.
Winterizing Your Intex Sand Filter
Proper winterization is crucial to protect your Intex sand filter from freezing temperatures and potential damage. Failing to do so can lead to costly repairs in the spring.
First, thoroughly backwash the filter to remove any accumulated debris. Then, disconnect all plumbing connections and drain any remaining water from the filter tank, pipes, and pump. Leaving water inside can cause cracking due to ice expansion.
Remove the drain plug from the filter tank and ensure it’s completely empty. Consider using an air compressor to blow out any residual water in the lines. Store the drain plug in a safe place for reinstallation in the spring.
Finally, cover the filter and pump with a protective tarp or store them indoors in a dry location. This shields them from the elements. Remember to also winterize your pool itself following separate guidelines to ensure a smooth spring reopening.
Intex Filter Parts and Replacement
Maintaining your Intex sand filter often requires replacing worn or damaged parts. Common components needing attention include the sand, filter media, multiport valve, and pump components.
Sand replacement is typically needed every 3-5 years, depending on usage. Use the correct grade and quantity of sand as specified in your filter’s manual. The multiport valve may require occasional rebuild kits or complete replacement if it develops leaks or malfunctions.
Pump impellers, seals, and motors can also wear out over time. Regular inspection can identify potential issues before they lead to complete failure. Intex offers a wide range of replacement parts, readily available online and at pool supply stores.
When ordering parts, always verify compatibility with your specific filter model number. Utilizing genuine Intex parts ensures optimal performance and longevity. Don’t hesitate to consult the manual or contact Intex customer support for assistance with part identification and installation.