Blog

manual for brinkmann smoke n grill

The Brinkmann Smoke N Grill is a versatile outdoor cooking solution, combining grilling and smoking functionalities․ It offers durable construction, user-friendly design, and comprehensive manual guidance for optimal performance and safety․

1․1 Overview of the Brinkmann Smoke N Grill

The Brinkmann Smoke N Grill is a charcoal-based smoker and grill designed for outdoor cooking․ It combines smoking and grilling functionalities, offering a durable and user-friendly design․ Ideal for enthusiasts, it provides flavorful cooking experiences with easy operation․ The grill features a robust construction, making it suitable for year-round use․ Its versatility allows for smoking, grilling, and preparing various dishes efficiently․

1․2 Importance of Using the Manual

Using the Brinkmann Smoke N Grill manual is essential for safe and effective operation․ It provides detailed assembly instructions, safety precautions, and maintenance tips to ensure optimal performance․ The manual helps users understand proper cooking techniques and troubleshooting, maximizing the grill’s lifespan and cooking results․ By following the guidelines, users can avoid potential hazards and enjoy a seamless cooking experience․

Key Features and Benefits

The Brinkmann Smoke N Grill combines grilling and smoking, offering durable construction, anodized surfaces for resistance, and long smoking sessions up to 4-7 hours, ensuring great flavor and ease of use․

2․1 Components of the Brinkmann Smoke N Grill

The Brinkmann Smoke N Grill includes a smoker chamber, grilling racks, a drip pan, and a charcoal pan․ It features a dome lid with a handle assembly and a heat indicator for temperature monitoring․ Additional components include a water pan for moisture control and an ash guard to protect surfaces from heat damage and discoloration․ These parts work together to ensure efficient cooking and easy maintenance․

2․2 Unique Design and Functionality

The Brinkmann Smoke N Grill features a unique design that seamlessly combines smoking and grilling capabilities․ Its durable construction includes anodized surfaces for enhanced oxidation resistance and longevity․ The grill’s water pan and charcoal system allow for precise temperature control, ensuring flavorful smoking․ The dome lid and heat indicator enable easy monitoring of cooking conditions, while the removable drip pan simplifies cleanup․ This design ensures versatile, efficient, and safe outdoor cooking experiences for enthusiasts․

Safety Precautions

Ensure safe operation by following all warnings and instructions in the manual․ Keep the smoker out of children’s reach and store it in a dry location indoors when not in use․

3․1 General Safety Guidelines

Always follow the manual’s safety instructions to avoid accidents․ Keep the smoker out of children’s reach and store it indoors in a dry location when not in use․ Use a drip pan or ash guard to protect surfaces from heat damage and ensure proper ventilation․ Regularly inspect the unit for damage and perform repairs only as instructed․ Properly dispose of all packaging materials and follow local regulations for waste disposal․

3․2 Avoiding Common Hazards

To ensure safe operation, always use a drip pan or ash guard to prevent surface damage․ Avoid overheating by maintaining proper ventilation and never leave the grill unattended․ Keep flammable materials away and use heat-resistant gloves when handling hot components․ Regularly clean up ashes and drippings to prevent fires․ Never plug in the smoker before it is fully assembled and ready for use, as this can cause electrical hazards․

Assembly and Setup

Begin by unpacking and inventorying all components․ Follow the manual’s step-by-step instructions for assembling the smoker and grill․ Ensure all hardware is securely installed․

4․1 Unpacking and Inventory

Start by carefully unpacking the Brinkmann Smoke N Grill and verifying all components against the manual’s inventory list․ Ensure the smoker body, grills, water pan, charcoal pan, and hardware are included․ Check for any damage or missing parts․ Refer to the manual for a detailed list of items․ If any components are missing or damaged, contact customer support immediately․ This step ensures a smooth assembly process․

4․2 Step-by-Step Assembly Instructions

Begin by attaching the legs to the smoker body using the provided screws․ Next, install the heat indicator on the dome lid and secure the handle assembly․ Place the water pan and charcoal pan inside the smoker, ensuring proper alignment․ Attach the grill grates and assemble any additional accessories․ Follow the manual’s diagrams for precise instructions․ Double-check all connections to ensure stability and safety before first use․

Operating Instructions

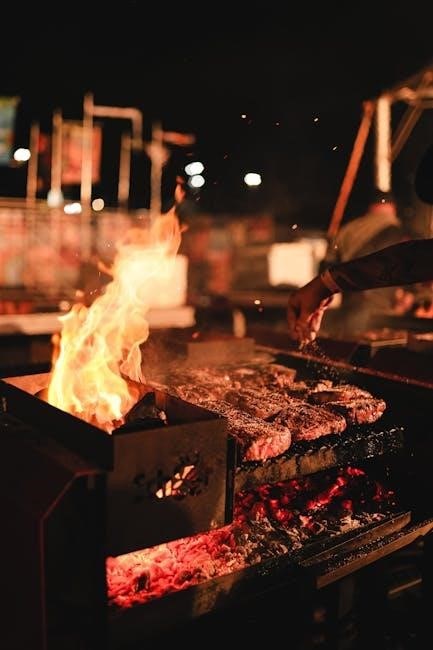
Preheat the smoker by lighting charcoal and adjusting vents for desired temperature․ Add wood chips for flavor, place meat on grates, and monitor heat levels for optimal cooking results․

5․1 Preparing for Use

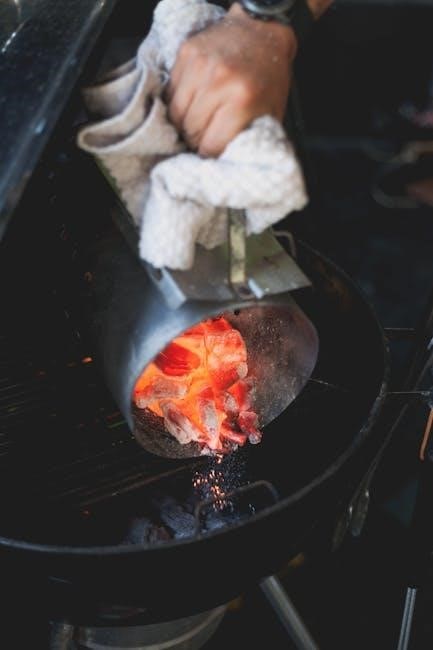
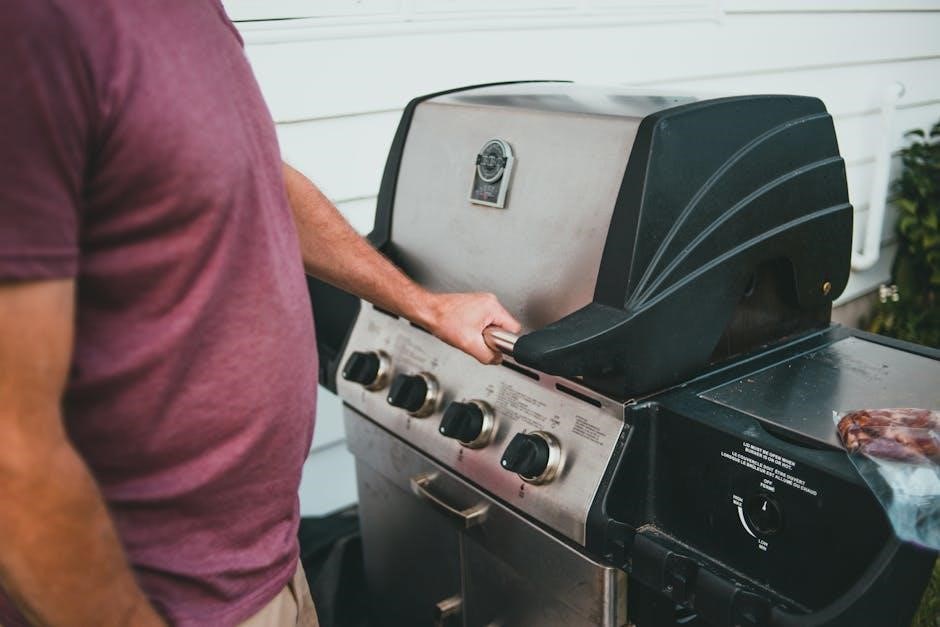
Before using the Brinkmann Smoke N Grill, ensure it is properly assembled and placed on a heat-resistant surface․ Inspect all components for damage and clean any residue․ Preheat the grill by lighting charcoal and adjusting vents for airflow․ Arrange charcoal and wood chips as desired, then season the grates․ Allow the unit to reach the optimal temperature before adding food․ Always refer to the manual for specific setup instructions to ensure safe and effective operation․

5․2 Smoking and Grilling Techniques

The Brinkmann Smoke N Grill excels in both smoking and grilling․ For smoking, use low temperatures (200-250°F) and wood chips for flavor․ Place meat on the grates, ensuring proper airflow․ For grilling, preheat to medium-high heat and sear meats for a crispy texture․ Adjust vents to control temperature and smoke levels․ Use the water pan to maintain moisture and enhance flavor; Monitor food closely to achieve perfect doneness, and always follow the manual’s guidance for best results․

Maintenance and Cleaning

Regular cleaning is essential for optimal performance․ Remove ashes and food residue after each use․ Use a wire brush to clean grates and ensure the drip pan is emptied․ Store the grill in a dry location to prevent rust and maintain longevity․

6․1 Cleaning After Each Use

After each use, remove ashes and food residue using a wire brush․ Clean grates with a mild soap solution and rinse thoroughly․ Empty the drip pan and wash it with soap and water․ Wipe down exterior surfaces to prevent grease buildup․ Allow all parts to dry completely before storing to avoid rust and maintain hygiene for the next use;

6․2 Long-Term Storage and Care

Store the Brinkmann Smoke N Grill in a dry, protected location when not in use․ Cover it to shield from dust and moisture․ Clean and drain the water pan thoroughly before storage․ Ensure all parts are dry to prevent rust․ Regularly inspect for wear and tear, and address any issues promptly․ Proper storage and care will ensure the grill remains in excellent condition for future use․

Troubleshooting Common Issues

Troubleshooting common issues with your Brinkmann Smoke N Grill involves checking for proper ventilation, ensuring the charcoal is lit correctly, and cleaning grease buildup․ Regular maintenance helps prevent issues and ensures optimal performance․

7․1 Identifying and Solving Problems

Identifying issues with your Brinkmann Smoke N Grill starts with monitoring performance․ Common problems include uneven heating, low smoke production, or malfunctioning temperature controls․ Check for proper ventilation, ensure the charcoal is lit correctly, and verify that wood chips or chunks are adequately placed․ Clean grease buildup regularly and ensure all vents are free from blockages․ Refer to the manual for specific solutions, such as adjusting dampers or replacing worn-out parts․ Regular maintenance can prevent many issues․

7․2 Repair and Replacement Tips

For repairs, identify worn-out parts like grates, dampers, or heat indicators․ Replace them with authentic Brinkmann components for optimal performance․ Regularly clean and inspect the unit to prevent damage․ Lubricate moving parts and tighten loose connections․ For complex issues, consult a professional or contact Brinkmann support․ Always disconnect power before attempting repairs․ Proper tools and safety precautions ensure safe and effective maintenance․ Regular upkeep extends the lifespan of your Brinkmann Smoke N Grill․

Accessories and Enhancements

Enhance your Brinkmann Smoke N Grill experience with recommended accessories like grill covers, flavoring woods, and drip pans to improve functionality and protect your investment․

8․1 Recommended Accessories

To enhance your Brinkmann Smoke N Grill experience, consider essential accessories like a durable grill cover, flavoring woods, and a drip pan/ash guard․ These additions protect your grill, maintain cleanliness, and elevate the smoking process․ A grill cover shields the unit from weather, while flavoring woods add unique smoky flavors․ The drip pan/ash guard ensures easy cleanup and prevents heat damage, making maintenance straightforward and efficient for long-term use․

8․2 Upgrades for Improved Performance

Upgrading your Brinkmann Smoke N Grill can enhance its efficiency and durability․ Consider adding a heat indicator for precise temperature control or a handle assembly for easier lid management․ An anodized surface upgrade improves oxidation resistance and longevity․ Additionally, using high-quality wood chips and proper ventilation can optimize smoking performance․ Regular maintenance and storage in a dry location further ensure optimal functionality and extend the product’s lifespan․

The Brinkmann Smoke N Grill is a top choice for outdoor cooking, offering durability and a user-friendly design․ The manual ensures safe and optimal use, providing essential guidance for assembly, operation, and maintenance․ By following the instructions and experimenting with smoking times and wood types, you can achieve delicious, professional-grade results at home․

9․1 Summary of Key Points

The Brinkmann Smoke N Grill manual provides essential guidance for assembly, operation, and maintenance, ensuring safe and optimal use․ It emphasizes proper setup, cleaning, and storage to prolong the product’s lifespan․ By following the manual’s instructions, users can master smoking and grilling techniques, achieving flavorful and professional-grade results․ Regular maintenance and adherence to safety precautions are crucial for enhancing performance and ensuring longevity․

9․2 Final Tips for Optimal Use

For the best experience with your Brinkmann Smoke N Grill, always follow the manual’s safety guidelines and maintenance tips․ Experiment with different wood types for unique flavors and ensure proper ventilation during use․ Regularly clean and store the grill to maintain its performance․ By adhering to these practices, you’ll enjoy consistent, delicious results and extend the lifespan of your smoker and grill combination․

traxxas xl5 manual

The Traxxas XL-5 Manual is your comprehensive guide to understanding and optimizing the performance of your electronic speed control. Discover its innovative features‚ from low-voltage detection to waterproof design‚ and learn how to install‚ operate‚ and maintain your ESC effectively. This manual ensures proper usage and troubleshooting‚ helping you maximize your RC experience.

Overview of the Traxxas XL-5 Electronic Speed Control

The Traxxas XL-5 Electronic Speed Control is a high-performance component designed for RC vehicles‚ offering full-proportional speed control and reliable operation. It features a low-voltage detection system to protect batteries and ensure safety. The waterproof design enhances durability‚ making it suitable for various conditions. Compatible with multiple RC models‚ the XL-5 delivers smooth and precise control‚ ideal for both novice and experienced users. Its robust construction and advanced features make it a trusted choice for enthusiasts seeking consistent and efficient performance in their RC setups.

Importance of the Manual for Proper Usage

The Traxxas XL-5 Manual is essential for understanding the electronic speed control’s features‚ ensuring safe and optimal operation. It provides detailed instructions for installation‚ programming‚ and troubleshooting‚ helping users avoid potential errors. The manual highlights key functions like low-voltage detection and waterproof design‚ while also offering maintenance tips to extend the ESC’s lifespan. By following the guide‚ users can maximize performance‚ prevent damage‚ and enjoy a seamless RC experience. It serves as a vital resource for both beginners and experienced enthusiasts to get the most out of their XL-5.

Key Features of the Traxxas XL-5

  • Low-Voltage Detection System: Monitors battery voltage to prevent damage and ensure safe operation.
  • Full-Proportional Speed Control: Provides precise throttle and braking control for smooth performance.
  • Waterproof Design: Enhances durability and allows operation in wet conditions without compromising functionality.

Low-Voltage Detection System

The Traxxas XL-5 features an advanced Low-Voltage Detection System‚ designed to monitor battery voltage continuously. This system prevents over-discharge‚ protecting both the battery and the ESC from potential damage. When the voltage drops below a safe threshold‚ the ESC alerts the user‚ ensuring timely intervention. This feature is crucial for maintaining performance and longevity‚ especially during high-drain operations. By safeguarding your power source‚ the XL-5 enhances reliability and extends the life of your RC components.

Full-Proportional Speed Control

The Traxxas XL-5 boasts Full-Proportional Speed Control‚ delivering precise and smooth throttle response. This feature allows for seamless acceleration and deceleration‚ giving drivers greater control over their RC vehicle. Whether navigating tight corners or accelerating on open terrain‚ the XL-5 ensures responsive performance. The system also supports forward‚ reverse‚ and braking functions‚ making it versatile for various driving styles. This advanced control enhances the overall RC experience‚ providing drivers with confidence and accuracy behind the wheel.

Waterproof Design for Enhanced Durability

The Traxxas XL-5 features a waterproof design‚ ensuring enhanced durability and performance in various conditions. This robust construction protects the ESC from moisture‚ making it ideal for all-terrain RC adventures. The waterproofing safeguards against splashes‚ mud‚ and light water exposure‚ maintaining reliability. However‚ it’s important to note that while the XL-5 is waterproof‚ other components like the TQ transmitter are not. Proper care and maintenance will extend the life of your speed control‚ ensuring optimal performance in wet or dusty environments. This feature is a testament to Traxxas’ commitment to building resilient products. Always handle with care to maximize its lifespan.

Installation and Setup Guide

The Traxxas XL-5 Manual provides detailed instructions for proper installation‚ including wiring diagrams and connector guidelines. Follow the guide to ensure smooth operation and optimal performance. Always refer to the manual for step-by-step setup instructions to avoid errors and maximize functionality. Proper installation is key to achieving the best results with your electronic speed control.

Wiring Diagram and Connector Instructions

The Traxxas XL-5 Manual includes detailed wiring diagrams to ensure correct connections between the ESC‚ motor‚ and battery. Use high-quality connectors to prevent power loss. Follow the color-coded wiring guide for precise installation. The manual emphasizes avoiding standard connectors‚ as they may restrict current flow. Instead‚ opt for Traxxas gold connectors for optimal performance. Proper wiring ensures smooth operation‚ prevents overheating‚ and extends the lifespan of your electronic speed control. Always double-check connections before powering up the system to avoid potential damage or malfunction. Adhere strictly to the provided instructions for a safe and efficient setup.

Choosing the Right Location for the Speed Control

Proper placement of the Traxxas XL-5 ESC is crucial for optimal performance and durability. Mount the speed control in a secure‚ dry location to protect it from water and moisture. Ensure it is away from excessive heat sources‚ such as the motor or exhaust. Choose a spot with good airflow to prevent overheating. The ESC should be easily accessible for maintenance and adjustments. Secure it firmly to avoid movement during operation. This placement ensures reliable operation‚ extends lifespan‚ and maintains your RC model’s performance. Always follow the manual’s guidelines for ideal positioning.

Operating the Traxxas XL-5

Mastering the Traxxas XL-5 involves smooth throttle control for acceleration and deceleration. Use the SET button to power on/off and engage low-voltage detection for safe battery monitoring.

Basic Throttle and Braking Operations

For basic operation‚ press the SET button until the light turns green. Pull the throttle trigger for forward motion and push it forward to brake. To reverse‚ release the trigger to neutral after braking‚ then push it forward again. Ensure brakes are applied before reversing. For smooth braking‚ hold the trigger at the desired level without pumping. Pumping may engage reverse unexpectedly. Always disconnect the battery for storage to maintain optimal performance and safety.

Understanding Operating Modes and Profiles

The Traxxas XL-5 offers multiple operating modes to suit different driving conditions. To change modes‚ press and hold the SET button until the light blinks red‚ indicating the desired mode. Mode 1 blinks once‚ Mode 2 twice‚ and so on. Each mode adjusts settings like braking strength and acceleration. Proper mode selection ensures optimal performance. Always ensure the light turns green for full operation. Improper mode selection or shutdown can damage the system‚ so follow manual instructions carefully for safe and efficient use.

Troubleshooting Common Issues

Diagnose motor and servo malfunctions by checking connections and battery voltage. Address battery and connector problems promptly to avoid damage. Contact Traxxas support for unresolved issues.

Diagnosing Motor and Servo Malfunction

Locate the source of the issue by checking all wiring connections and ensuring proper battery voltage. If the motor or servo fails to respond‚ inspect the radio system‚ crystals‚ and connectors for damage or misalignment. Verify that the ESC is fully powered on and functioning correctly. If no issues are found‚ reset the ESC or refer to the troubleshooting section for advanced diagnostic steps. Contact Traxxas support if problems persist after basic checks.

Addressing Battery and Connector Problems

Always use compatible batteries and ensure they are fully charged before operation. Check connectors for cleanliness and secure connections. Avoid using standard connectors‚ as they may restrict current flow. Traxxas recommends using gold-plated connectors for optimal performance. If issues arise‚ disconnect the battery and inspect for damage or corrosion. Replace worn-out connectors and ensure proper polarity. Store batteries separately from the ESC when not in use to prevent accidental power drain or electrical issues.

Maintenance and Care Tips

Regularly clean the ESC and connectors to ensure optimal performance. Store batteries in a cool‚ dry place and avoid overcharging. Inspect connectors for wear and damage‚ replacing them as needed to prevent electrical issues. Always disconnect batteries during storage to preserve longevity and prevent corrosion. Keep the speed control away from moisture to maintain its waterproof integrity and overall durability.

Cleaning and Storage Recommendations

Regularly clean the XL-5 ESC using a soft cloth to remove dirt and debris. Avoid harsh chemicals or liquids‚ as they may damage the components. For storage‚ disconnect the battery and place it in a cool‚ dry location away from direct sunlight. Ensure all connectors are clean and secure to prevent corrosion. Inspect the ESC and wiring for signs of wear or damage before storing. Proper storage and maintenance will extend the lifespan of your Traxxas XL-5 and ensure optimal performance when in use.

Updating Firmware and Software

Keeping your Traxxas XL-5 firmware and software up to date is crucial for optimal performance. Use the Traxxas Link application to download and install the latest updates. Ensure your model is registered and connected via USB for a seamless update process. Always follow the on-screen instructions carefully to avoid interruptions. A stable internet connection is recommended. After updating‚ restart your system to apply changes. For further assistance‚ contact Traxxas support or refer to the official website for detailed instructions.

The Traxxas XL-5 manual is an essential resource for maximizing your RC experience. For further assistance‚ visit the Traxxas website or explore resources on ManualsLib. Thank you for choosing Traxxas!

Final Thoughts on the Traxxas XL-5 Manual

The Traxxas XL-5 manual is a comprehensive guide designed to enhance your RC experience. It provides detailed instructions for setup‚ operation‚ and troubleshooting‚ ensuring optimal performance. With its clear layout and user-friendly tone‚ the manual caters to both beginners and experienced enthusiasts. By following the guidelines‚ you can maximize the potential of your XL-5 ESC while maintaining its durability. Traxxas’ commitment to quality and support shines through in this essential resource‚ making it indispensable for anyone owning this electronic speed control.

Accessing Additional Manuals and Support

For comprehensive guidance‚ the Traxxas XL-5 manual is available online as a downloadable PDF. Visit websites like ManualsLib or Traxxas’s official support page for easy access. Additional resources include troubleshooting guides and FAQs. Contact Traxxas customer service for personalized assistance. Online forums and RC communities also offer valuable insights and user experiences. Ensure to explore these resources to maximize your understanding and enjoyment of the XL-5 electronic speed control.

guides choice

Guide’s Choice is a framework for aligning user needs with design solutions, emphasizing empathy and understanding. It bridges the gap between user wants and true needs, ensuring products resonate deeply with their audience by focusing on underlying motivations and behaviors.

1.1 Importance of Understanding User Needs

Understanding user needs is fundamental to creating effective solutions. It allows designers to move beyond surface-level wants and address deeper, often unspoken pain points; By uncovering true needs, products can align with user goals, fostering trust and satisfaction. This insight ensures designs resonate on a practical and emotional level, making them more impactful and user-centered.

1.2 Relevance in UX Design and Beyond

Understanding user needs is pivotal in UX design, ensuring empathy-driven solutions that balance vision with practicality. Beyond UX, this approach shapes product development and business strategy, driving innovation and user satisfaction. It fosters trust and loyalty, making it indispensable for creating meaningful experiences that resonate across industries and disciplines.

The Challenge of Understanding User Needs

Users often struggle to articulate their true needs, influenced by biases, emotions, and familiarity. Distinguishing between needs and wants is a constant, intricate challenge for designers.

2.1 The Difficulty in Distinguishing Needs from Wants

Users often express wants rather than needs, influenced by biases, emotions, and familiarity. True needs may remain unspoken, making it challenging to identify and prioritize them effectively in design processes.

2.2 Impact of Biases and User Limitations

Biases and limitations significantly influence user feedback, as individuals are often unaware of their true needs. Emotional responses, familiarity, and cognitive constraints shape their input, making it challenging to extract actionable insights. Designers must look beyond surface-level requests to uncover deeper motivations and address unspoken needs effectively, ensuring solutions align with user goals rather than just their expressed wants.

Methods to Uncover User Needs

Effective methods include user testing, feedback analysis, and observation, helping uncover hidden needs and motivations behind user behaviors and preferences.

3.1 User Testing and Feedback Analysis

User testing involves observing users interacting with a product to identify pain points and unmet needs. Feedback analysis goes beyond surface-level reactions, diving into motivations and expectations. By combining these methods, designers gain insights that align solutions with user priorities, ensuring the final product meets both explicit and implicit demands. This dual approach fosters a deeper understanding of user behavior and decision-making patterns.

3.2 Surveys, Interviews, and Observation Techniques

Surveys and interviews provide direct insights into user preferences and pain points, while observation techniques reveal unspoken needs. Open-ended questions in surveys encourage honest feedback, and interviews allow for deeper exploration of user motivations. Observing users in real-world contexts offers a unique perspective on behavior and decision-making, helping to uncover needs they may not articulate. These methods collectively paint a comprehensive picture of user requirements, guiding effective design decisions.

Balancing User Feedback with Design Vision

Balancing user feedback with design vision requires empathy and creativity. While users provide valuable insights, literal requests may not align with long-term goals. Designers must interpret feedback, translating it into solutions that meet both user needs and strategic objectives, ensuring the final product is intuitive, functional, and innovative.

4.1 The Pitfall of Literal User Requests

Literally fulfilling user requests can lead to misaligned solutions, as users often articulate wants rather than needs. This pitfall arises because users may not fully understand their underlying motivations or the broader design vision. By focusing solely on stated requests, designers risk creating features that fail to address the real problems or enhance the overall user experience. It’s crucial to interpret feedback critically and translate it into meaningful, impactful solutions.

4.2 Creative Interpretation of Feedback

Effective design requires creatively interpreting user feedback to uncover latent needs. By asking “why” and understanding motivations, designers can move beyond literal requests to develop innovative solutions. This approach balances empathy with vision, ensuring products meet both user expectations and long-term goals. It transforms feedback into a guide for creating meaningful experiences, rather than strict directives, fostering a deeper connection between users and the final product.

The Role of Empathy in User Research

Empathy is crucial in user research, enabling deeper understanding of needs and motivations. It helps uncover unspoken desires by asking “why,” connecting behaviors to underlying values and goals.

5.1 Techniques for Understanding Motivations

Understanding motivations involves digging deeper into user behaviors and emotions. Techniques include asking open-ended questions, conducting observational studies, and using empathy maps to uncover underlying drivers. Observing how users interact with products reveals unspoken needs, while probing their decision-making processes helps align solutions with their values. These methods ensure designs address core motivations, not just surface-level preferences, fostering meaningful user experiences.

5.2 The Power of Asking ‘Why’

Asking “why” is a powerful tool to uncover user motivations and values. It helps designers move beyond surface-level feedback to understand the reasoning behind user behaviors. Techniques like the “5 Whys” method encourage digging deeper into needs, revealing underlying drivers. This approach fosters empathy and intuition, enabling designers to create solutions that align with user values, ultimately enhancing the overall experience and satisfaction.

Best Practices for Effective User Testing

Effective user testing involves clear objectives, open-ended questions, and observing behavior. Prioritize active listening and avoid leading questions to uncover genuine insights, refining your product iteratively.

6.1 Crafting Open-Ended Questions

Crafting open-ended questions is crucial for uncovering user needs. These questions encourage detailed responses, revealing underlying motivations and pain points. For example, asking “What challenges do you face?” instead of “Do you like this feature?” fosters deeper insights. Avoid leading questions and focus on user goals to ensure authentic feedback, enabling more informed design decisions and enhancing user satisfaction.

6.2 Observing Behavior for Deeper Insights

Observing user behavior provides rich insights into their needs. By watching how users interact with a product or service, designers can identify friction points and workarounds that reveal unspoken needs. Behavior often speaks louder than words, as users may not articulate their true needs explicitly. For instance, hesitation or repeated actions can signal underlying frustrations. These observations help designers refine solutions, ensuring they align with real user behaviors and preferences, leading to more intuitive and effective designs.

Avoiding Biases in User Research

Avoiding biases ensures accurate user insights. Recognizing common pitfalls like confirmation bias and sampling errors is crucial. Strategies like diverse participant selection and objective analysis help mitigate bias, ensuring reliable data for informed design decisions.

7.1 Recognizing Common Pitfalls

Common pitfalls in user research include confirmation bias, where preconceptions influence data interpretation, and selection bias, where participant samples aren’t representative. Anchoring bias, relying too heavily on initial feedback, and the Forer effect, overvaluing vague insights, also skew results. These biases stem from cognitive shortcuts and emotional influences, leading to inaccurate conclusions. Recognizing these pitfalls is the first step to addressing them effectively in user research.

7.2 Strategies to Mitigate Bias

To mitigate bias in user research, employ active listening and open-ended questions to avoid leading participants. Use diverse participant groups to reduce sampling bias. Conduct iterative testing and triangulate findings across methods like surveys, interviews, and observations. Encourage empathy and perspective-taking within teams. Regularly question assumptions and stay aware of personal biases. Continuous learning and reflexivity further enhance the reliability of insights, ensuring more balanced and accurate user understanding.

Case Studies and Real-World Applications

Case studies reveal how understanding user needs drives success. Examples highlight products that failed due to misalignment with user expectations, offering valuable lessons for designers and researchers.

8.1 Successful Outcomes from Understanding Needs

Understanding user needs has led to impactful outcomes in real-world applications. By leveraging user testing, surveys, and observation, companies have uncovered hidden pain points, leading to innovative solutions. For instance, a productivity app identified that users needed streamlined workflows, not just additional features. By addressing these needs, the app saw a 30% increase in user satisfaction and retention, proving that aligning design with user priorities drives success and loyalty.

8.2 Lessons Learned from Failures

Failures in understanding user needs often stem from overreliance on surface-level feedback. A notable example is a productivity app that focused on adding features users requested, only to discover later that the core need was simplification. This misalignment led to low adoption rates. The critical lesson learned is that true understanding requires digging beyond stated wants to uncover underlying motivations and pain points, ensuring solutions address real needs rather than just user demands.

Tools and Technologies for User Insight

Tools like usability testing software, analytics platforms, and feedback systems help uncover user needs by analyzing behavior, preferences, and pain points, enhancing design decision-making processes effectively.

9.1 Usability Testing and Analytics Tools

Usability testing tools like Google Analytics and Hotjar help track user behavior, identifying friction points and engagement patterns. Analytics tools provide data-driven insights, enabling designers to refine interfaces based on real user interactions. These tools support decision-making by measuring satisfaction and task completion rates, ensuring designs align with user needs and expectations for enhanced overall experiences.

9.2 Feedback Platforms and Survey Software

Feedback platforms like Typeform and SurveyMonkey enable direct user insights through structured surveys. These tools help gather qualitative data on user preferences and pain points. By analyzing feedback, designers can identify patterns and prioritize improvements. Combined with quantitative analytics, they provide a holistic view, ensuring designs meet user expectations while uncovering latent needs. This dual approach minimizes bias and enhances decision-making accuracy.

Guide’s Choice concludes by reinforcing the importance of empathy and understanding in user-centered design, ensuring meaningful experiences that align with user needs and expectations.

10.1 Reinforcing the Importance of Guide’s Choice

Guide’s Choice is a vital approach to understanding user needs, emphasizing empathy and vision. By balancing user feedback with design intuition, it ensures products meet real needs, not just wants. Using tools like open-ended questions and observation, it helps uncover deeper motivations, avoiding biases and literal interpretations. This method reinforces the designer’s role in interpreting feedback creatively, ensuring meaningful and intuitive user experiences.

10.2 Integrating Strategies for Enhanced User Experiences

Integrating strategies for enhanced user experiences involves combining user feedback with design vision. By leveraging tools like usability testing and feedback platforms, designers can gain insights into user behaviors and motivations, ensuring products align with real needs. This holistic approach fosters intuitive and meaningful interactions, creating experiences that resonate deeply with users.

Empathy and creativity are key to translating user insights into actionable design solutions. By balancing user wants with design expertise, Guide’s Choice ensures products are both functional and delightful, ultimately driving user satisfaction and loyalty.

bosch serie 6 dryer manual

Welcome to the Bosch Serie 6 Dryer Manual, your comprehensive guide to understanding and operating your Bosch tumble dryer․ This manual covers models like WTG86209EE/03 and WTW85469GR, offering detailed instructions for safe and efficient use․ Discover features like heat pump drying, condensation systems, and capacities up to 9 kg․ Explore installation, maintenance, and troubleshooting tips to optimize performance․ Download the full manual online for easy access to all information․

1․1 Overview of the Bosch Serie 6 Dryer

The Bosch Serie 6 dryer offers advanced features like heat pump and condensation drying systems, ensuring energy efficiency and gentle fabric care․ With capacities up to 9 kg, it suits various household needs․ Models like WTG86209EE/03 and WTW85469GR feature touch and rotary controls, LED displays, and quiet operation․ Designed for performance and convenience, these dryers provide customizable drying options for optimal results․

1․2 Importance of Reading the Manual

Reading the Bosch Serie 6 dryer manual is essential for safe and efficient operation․ It provides critical safety precautions, proper usage guidelines, and troubleshooting tips․ The manual details installation requirements, maintenance routines, and error code explanations, ensuring optimal performance․ By following the instructions, users can extend the appliance’s lifespan and prevent potential hazards․ Access the manual online for convenient reference․

Safety Instructions

Always follow the safety instructions in your Bosch Serie 6 dryer manual to ensure safe operation․ Proper installation, ventilation, and maintenance are crucial to prevent hazards․ Keep flammable materials away and avoid overloading the dryer․ Regularly clean filters and vents to maintain efficiency and safety․ Adhere to the manufacturer’s guidelines to minimize potential risks․

2․1 General Safety Precautions

Always read and follow the Bosch Serie 6 dryer manual’s safety guidelines․ Ensure proper installation and ventilation to prevent hazards․ Keep children away from the dryer while it is in operation․ Avoid placing flammable materials near the appliance․ Regularly clean the fluff filter and condenser to maintain efficiency and safety․ Never overload the dryer, as this can cause damage or pose a fire risk․ Adhere to these precautions to ensure safe and efficient operation․

  • Keep the dryer out of reach of children․
  • Avoid using flammable materials near the appliance․
  • Ensure proper ventilation in the room․
  • Regularly maintain the dryer’s components․

2․2 Intended Use of the Dryer

The Bosch Serie 6 dryer is designed for drying fabrics like cotton, linen, and synthetic materials․ It is suitable for household use, with models offering capacities up to 9 kg․ Use the dryer for its intended purpose only, ensuring clothes are compatible with the selected drying program․ Always follow the guidelines in the manual for optimal performance and safety․

  • Suitable for cotton, linen, and synthetic fabrics․
  • Do not dry delicate or woolen items without a protective bag․
  • Ensure the dryer door is closed during operation․

Installation and Setup

Proper installation ensures safe and efficient operation of your Bosch Serie 6 dryer․ Choose a well-ventilated area, ensure level placement, and connect power and venting systems correctly․ Always refer to the manual for specific model instructions and safety guidelines to avoid installation errors․

3․1 Choosing the Right Location

When installing your Bosch Serie 6 dryer, select a well-ventilated, dry area away from direct sunlight․ Ensure the location is flat and stable to prevent vibration․ Avoid placing the dryer in unheated or damp spaces, as this can affect performance and safety․ Keep the dryer at least 10 cm away from walls for proper airflow and easy maintenance access․

3․2 Leveling the Dryer

Proper leveling ensures stable operation and reduces noise․ Use a spirit level to check alignment․ Adjust the dryer’s feet by turning them clockwise or counterclockwise until the appliance is perfectly horizontal․ Once leveled, tighten the lock nut to secure the feet in place․ Recheck the alignment to confirm the dryer is evenly balanced for optimal performance and safety․

3․3 Connecting the Dryer

Connect your Bosch Serie 6 dryer to a grounded electrical outlet, ensuring the voltage matches the specifications․ Proper ventilation is crucial to prevent moisture buildup․ Use the provided power cable and avoid extensions․ If required, connect the dryer to a water drainage system for condensation models․ Refer to the manual for precise instructions and ensure all connections are secure using original Bosch parts․

Operating the Bosch Serie 6 Dryer

Operate your Bosch Serie 6 dryer effortlessly using the intuitive control panel․ Select from various drying programs, monitor cycles via the LED display, and adjust settings as needed for optimal results․

4․1 Understanding the Control Panel

The Bosch Serie 6 dryer features an intuitive control panel with rotary and touch controls․ The LED display shows cycle progress and remaining time․ Models like WTG86209EE/03 and WTW85469GR offer options for selecting drying programs, adjusting settings, and monitoring cycles․ Use the control panel to choose between Intensive Dry or Gentle Dry modes, set drying time, and ensure optimal performance for your laundry needs․

4․2 Selecting the Right Drying Program

Choose from various drying programs tailored to fabric types, such as Intensive Dry for heavy-duty loads or Gentle Dry for delicate items․ Models like WTG86209EE/03 and WTW85469GR offer eco modes for energy efficiency․ Use the control panel to select options like Anti-crease or Quick Dry for specific needs․ The LED display guides you through program selection, ensuring optimal drying results for every load․

4․3 Starting and Monitoring the Drying Cycle

Press the Start/Reload button to begin the cycle․ Use the LED display to monitor progress and remaining time․ The dryer signals with a sound when the cycle ends․ For models like WTG86209EE/03, you can pause or add clothes mid-cycle․ Energy-efficient models automatically adjust settings for optimal drying․ Ensure the fluff filter is clean for uninterrupted operation and energy savings․

Maintenance and Care

Regular maintenance ensures optimal performance and energy efficiency․ Clean the fluff filter after each use and check the condenser periodically․ Follow routine care tips for longevity․

5․1 Cleaning the Fluff Filter

Regularly cleaning the fluff filter is essential for safe and efficient drying․ Open the dryer door, pull out the two-part fluff filter, and remove accumulated lint․ Rinse with water if necessary, then dry thoroughly before reinstalling․ This prevents fires and ensures optimal performance․ Clean after every use to maintain your Bosch Serie 6 dryer’s effectiveness and longevity․

5․2 Checking and Cleaning the Condenser

Regularly inspect and clean the condenser to ensure efficient drying and prevent blockages․ Locate the condenser at the back of the dryer, remove it, and wash it with water or a soft brush․ This step is crucial for maintaining energy efficiency and preventing errors․ Clean the condenser after every use to keep your Bosch Serie 6 dryer running smoothly and effectively․

5․3 Regular Maintenance Tips

Ensure optimal performance by cleaning the fluff filter after each use and checking the condenser regularly․ Inspect the door gasket for damage and clean it to maintain a tight seal․ Check the drain pump filter if your model has one, and ensure proper ventilation for efficient drying․ Regularly vacuum the interior and ensure the dryer is level․ Cleaning after each use prevents lint buildup and improves efficiency, while annual professional checks can prevent major issues and extend the dryer’s lifespan․

Troubleshooting Common Issues

Identify and resolve common problems with your Bosch Serie 6 dryer by referring to the error codes and solutions in this section․ Address issues like poor drying performance or unusual noise, ensuring optimal functionality and extending the appliance’s lifespan․

6․1 Identifying Error Codes

Your Bosch Serie 6 dryer displays error codes like E01, E02, or E03 to indicate specific issues․ E01 often relates to the fluff filter needing cleaning, while E02 may signal a condenser problem․ Refer to the manual for code meanings and solutions․ Regular checks can prevent errors, ensuring smooth operation and extending the appliance’s lifespan․ Always consult the manual or contact Bosch support for assistance․

6․2 Resolving Common Problems

Common issues with your Bosch Serie 6 dryer, such as poor drying performance or error codes, can often be resolved by cleaning the fluff filter or condenser․ Check for blockages in the ventilation system and ensure proper installation․ For persistent problems, refer to the troubleshooting section in your manual or contact Bosch customer support for professional assistance․ Regular maintenance prevents many issues․

Accessories and Additional Features

Bosch Serie 6 dryers offer optional stacking kits, built-under solutions, and laundry accessories․ These enhance functionality and organization, ensuring optimal use with detailed user manuals for guidance․

7․1 Available Accessories

Bosch Serie 6 dryers come with various accessories to enhance functionality․ These include stacking kits for washer-dryer combinations, built-under installation kits, and laundry pedestals․ Additional items like nets for delicate clothes and specialized drying racks are also available․ These accessories, detailed in the manual, help optimize space and improve drying efficiency, ensuring a tailored solution for your laundry needs․

7․2 Optional Stacking Kits

Bosch Serie 6 dryers offer optional stacking kits, enabling convenient washer-dryer combinations․ These kits are designed for specific models and ensure secure installation․ They help save space while maintaining performance․ Stacking kits are ideal for compact laundry areas, providing a practical and efficient solution for urban households․ Always use Bosch-approved kits for compatibility and safety․

Energy Efficiency and Eco Modes

Bosch Serie 6 dryers feature advanced energy-saving technologies, including heat pump systems and eco modes․ These reduce energy consumption while maintaining optimal drying performance, promoting sustainability and efficiency․

8․1 Energy-Saving Features

Bosch Serie 6 dryers are designed for energy efficiency, featuring an A++ energy rating․ They utilize advanced heat pump technology to reduce energy consumption while maintaining superior drying performance․ The LED display provides real-time cycle progress, optimizing energy use․ Sensor drying automatically adjusts settings to prevent over-drying, further enhancing efficiency and fabric protection․ Eco modes ensure minimal energy consumption without compromising results․

8․2 Using Eco Modes Effectively

Activate Eco modes on your Bosch Serie 6 dryer to minimize energy consumption․ These modes use lower temperatures and longer cycles for gentle drying․ Ideal for smaller loads, Eco modes reduce energy use by up to 30%․ Select the Eco program via the control panel for efficient drying․ Check the manual for specific Eco mode settings and benefits, ensuring optimal energy savings without compromising results․

Comparing Bosch Serie 6 Models

Bosch Serie 6 dryers vary in features like drying systems (heat pump or condensation) and capacities (up to 9 kg)․ Compare models like WTG86209EE/03 and WTW85469GR for differences in efficiency, noise levels, and advanced settings․ Refer to the manual for detailed specifications and guidance on selecting the best model for your needs․

9․1 Key Differences Between Models

Bosch Serie 6 dryer models differ in drying systems, capacities, and features․ WTG86209EE/03 uses condensation, while WTW85469GR employs heat pump technology․ Capacities range from 8 kg to 9 kg․ Controls vary, with some models offering rotary knobs and others touch interfaces․ Door hinge positions and additional features like LED displays also distinguish models, catering to varying user preferences and laundry needs․

9․2 Choosing the Right Model for Your Needs

Selecting the ideal Bosch Serie 6 dryer involves considering your laundry load size, preferred drying technology, and desired features․ If you prioritize energy efficiency, opt for heat pump models like WTW85469GR․ For larger families, the 9 kg capacity models are suitable․ Choose between condensation or heat pump systems based on your space and energy preferences․ Ensure the model aligns with your household needs for optimal performance․

Warranty and Customer Support

Bosch Serie 6 dryers come with a 2-year warranty, ensuring coverage for parts and labor․ For assistance, contact Bosch Customer Support at (800) 944-2904 or via online chat․

10․1 Understanding Your Warranty

Your Bosch Serie 6 dryer is backed by a 2-year manufacturer’s warranty, covering defective parts and labor․ This warranty begins from the purchase date and applies to domestic use․ For details, refer to the warranty certificate provided with your appliance or visit the Bosch website․ Extended warranty options may also be available for added protection․

10․2 Contacting Bosch Customer Service

For assistance with your Bosch Serie 6 dryer, contact customer service at (800) 944-2904 or chat online․ Visit the Bosch website for support options, including troubleshooting guides and warranty information․ Ensure you have your appliance model number ready for efficient service․ Bosch customer support is available to address any inquiries or concerns about your dryer․

11․1 Summary of Key Points

The Bosch Serie 6 dryer manual provides detailed guidance on installation, safety, and operation, emphasizing energy efficiency and maintenance․ It covers models like WTG86209EE/03 and WTW85469GR, highlighting features such as heat pump and condensation drying systems․ Regular cleaning of filters and condensers is stressed for optimal performance․ Troubleshooting and eco-mode usage are also addressed, ensuring users maximize efficiency and appliance longevity․ Always refer to the manual for model-specific instructions and safety precautions to ensure safe and effective operation․

11․2 Final Tips for Optimal Use

Regularly clean the fluff filter and condenser to maintain efficiency․ Use eco modes for energy savings and gentler drying․ Ensure proper installation and leveling for stable operation․ Check error codes promptly and refer to the manual for troubleshooting․ Always follow recommended drying programs for fabric care․ For best results, leave the dryer door open after use to prevent moisture buildup․ Consult the manual for model-specific advice to maximize performance and longevity․

measuring units worksheet answer key pdf

Measuring units worksheets are essential educational tools for teaching conversion skills. They provide structured exercises and answer keys‚ helping students master metric and customary units effectively.

1.1 Importance of Measuring Units in Education

Understanding measuring units is foundational for math and science education. It enhances problem-solving skills and real-world application abilities. Worksheets with answer keys provide structured practice‚ helping students master conversions and critical thinking. They build accuracy and confidence in handling metric and customary systems‚ essential for higher-level learning and future careers in STEM fields.

1.2 Overview of Worksheets with Answer Keys

Worksheets with answer keys offer a comprehensive way to practice measuring unit conversions. They cover various units‚ including length‚ mass‚ and volume‚ and cater to different grade levels. Answer keys are automatically generated and included‚ often on a separate page or within the PDF. This feature ensures accuracy and simplifies grading for educators. Worksheets are customizable‚ allowing teachers to generate unlimited exercises tailored to their curriculum needs. They provide clear instructions and structured problems‚ making them an invaluable resource for both classroom and independent learning environments.

Types of Measuring Units

Measuring units are categorized into customary (inches‚ feet‚ yards) and metric (millimeters‚ centimeters‚ meters) systems‚ essential for education and included in worksheets with answer keys in PDF format.

2.1 Customary Units (Inches‚ Feet‚ Yards‚ etc.)

Customary units are widely used in the U.S. for everyday measurements. Inches‚ feet‚ and yards are standard for length‚ while fluid ounces‚ cups‚ pints‚ quarts‚ and gallons measure capacity; Pounds and tons are used for weight. These units are often emphasized in educational worksheets‚ which include answer keys in PDF format to help students practice conversions and real-world applications. Worksheets typically cover basic conversions‚ such as inches to feet‚ and more complex problems involving multiple unit changes. They also include word problems that require labeling answers with appropriate units‚ reinforcing understanding of customary measurements in practical scenarios.

2.2 Metric Units (Millimeters‚ Centimeters‚ Meters‚ etc.)

Metric units are based on the International System of Units (SI)‚ making conversions straightforward due to their decimal-based structure. Common units include millimeters‚ centimeters‚ meters‚ and kilometers for length; grams and kilograms for mass; and liters for volume. Worksheets often focus on converting between these units using prefixes like milli- (10⁻³)‚ centi- (10⁻²)‚ kilo- (10³)‚ and mega- (10⁶). Answer keys in PDF format provide clear solutions‚ helping students master metric conversions and apply them to real-world problems‚ such as measuring distances or volumes accurately.

Creating Measuring Units Worksheets

3.1 Generating Worksheets for Different Grades

Worksheets can be tailored to various grade levels‚ ensuring age-appropriate content. For grades 2-7‚ customizable tools allow educators to create exercises in metric or customary units‚ with automatic answer keys. Teachers can adjust difficulty by selecting specific units or conversion types‚ making learning accessible and engaging for all students. This flexibility ensures that each worksheet meets the unique needs of different grade levels‚ promoting effective understanding and retention of measurement skills.

3.2 Converting Worksheets to PDF Format

Converting worksheets to PDF format is a convenient option for educators. Many online tools offer a “Create PDF” or “Make PDF Worksheet” button‚ instantly generating printable files. The PDF format ensures that worksheets maintain their layout and clarity‚ making them ideal for distribution in classrooms. Additionally‚ answer keys are often included on separate pages within the PDF‚ providing a seamless solution for teachers to review student work efficiently. This feature is particularly useful for ensuring consistency and ease of use in educational settings.

Converting Between Units

Converting between units is a fundamental skill in measurement. Worksheets often include exercises for metric and customary units‚ with step-by-step guides to ensure accuracy and understanding.

4.1 Step-by-Step Conversion Guide

A step-by-step conversion guide helps students systematically convert units. Start by identifying the source and target units. Use conversion factors or metric prefixes to adjust values. Ensure accuracy by showing all work and labeling answers correctly. For example‚ converting meters to millimeters involves multiplying by 1‚000. Always verify calculations to avoid common mistakes. Worksheets often include detailed examples and answer keys to reinforce these steps‚ making the process clear and manageable for learners of all levels.

4.2 Common Mistakes to Avoid

Common errors in unit conversion include misplacing decimal points‚ confusing metric prefixes‚ and incorrect use of conversion factors. Students often forget to adjust units properly when converting between systems. For example‚ mixing “kilo-” (1‚000) with “hecto-” (100) or incorrectly applying prefixes. Another mistake is neglecting to label answers with the correct unit. To avoid these errors‚ encourage careful reading of problems‚ precise calculation steps‚ and verification using answer keys. Practicing with worksheets helps build accuracy and confidence in unit conversion tasks.

Solving Word Problems with Measuring Units

Solving word problems involves applying unit conversion skills to real-world scenarios‚ ensuring accurate calculations and proper unit labeling. Answer keys verify solutions effectively.

5.1 Examples of Real-World Applications

Measuring units are vital in everyday situations‚ such as cooking‚ construction‚ and healthcare. For instance‚ converting cups to grams in recipes or calculating medication dosages ensures accuracy. In construction‚ measuring materials like lumber (in feet) or concrete (in cubic meters) is critical. These practical applications highlight the importance of mastering unit conversions‚ making worksheets with answer keys invaluable for real-world problem-solving. Educators use these examples to illustrate how measurement skills apply beyond the classroom‚ preparing students for future careers and daily tasks.

5.2 Tips for Accurate Problem Solving

To solve measurement problems accurately‚ start by identifying the given units and the desired units. Use conversion factors or metric maps to guide your steps. Always label answers with appropriate units to avoid errors. Double-check calculations‚ especially decimal placements‚ to ensure precision. Practicing with worksheets and reviewing answer keys helps build confidence and skill. Encourage breaking problems into smaller steps and using real-world contexts for better understanding; These strategies enhance problem-solving abilities and promote long-term mastery of unit conversions.

Using the Answer Key Effectively

The answer key provides clear solutions‚ enabling students to verify their work and understand errors. It supports learning by offering accurate conversions and step-by-step explanations‚ ensuring mastery of measurement skills.

6.1 Understanding the Answer Key Format

The answer key is automatically generated and placed on the second page of the worksheet. It provides clear‚ step-by-step solutions for each problem‚ ensuring accuracy. The format includes correct answers‚ conversion factors‚ and proper units‚ helping students identify errors and understand the correct methods. This structured approach allows educators and students to review work efficiently‚ promoting better comprehension and mastery of measurement skills.

6.2 Interpretation of conversion Results

6.2 Interpretation of Conversion Results

Interpreting conversion results involves ensuring answers are presented with appropriate units and accuracy. The answer key demonstrates how to round values correctly and highlights proper unit symbols. This clarity helps students verify their work and understand where errors may occur. By comparing their answers with the key‚ learners can identify mistakes and improve their conversion skills. The structured format of the answer key also reinforces the importance of precise communication in measurement tasks‚ ensuring consistency and accuracy in results.

Best Practices for Educators

Integrate worksheets into lesson plans‚ encourage regular practice‚ and use answer keys for feedback. Differentiate instruction to meet diverse learner needs effectively while promoting active engagement and understanding.

7.1 Integrating Worksheets into Lesson Plans

Educators can seamlessly incorporate measuring units worksheets into their lesson plans by aligning them with specific learning objectives. Begin with direct instruction on key concepts‚ then distribute worksheets for guided practice. Pair students for collaborative problem-solving‚ ensuring each has access to the answer key for self-correction. For differentiation‚ assign grade-specific worksheets‚ such as those for grades 2-7‚ and offer one-on-one support as needed. Conclude with a class discussion to address common challenges and reinforce understanding. This structured approach enhances engagement and retention‚ making complex conversions more manageable for students.

7.2 Encouraging Student Practice and Review

Regular practice is vital for mastering measuring units. Encourage students to use worksheets with answer keys to review concepts at home. Assign a mix of PDF and online exercises to cater to different learning preferences. Create a routine where students complete a set of problems each week‚ fostering consistency. Provide immediate feedback by sharing answer keys‚ allowing students to identify and correct mistakes. Offer additional resources‚ such as conversion charts‚ to support their learning journey. Consistent review ensures long-term retention and improved problem-solving skills in both metric and customary units.

Additional Resources and Tools

Explore recommended websites for downloadable PDF worksheets‚ conversion charts‚ and interactive tools. Utilize supplementary materials like video tutorials and apps to enhance learning and understanding of measuring units.

8.1 Recommended Websites for Worksheets

Several websites offer high-quality measuring units worksheets with answer keys in PDF format. Mathster‚ Corbett Maths‚ and Tutorified provide comprehensive resources for various grades. These sites feature customizable worksheets‚ conversion charts‚ and interactive tools. Mathster offers detailed answer keys‚ while Corbett Maths includes step-by-step solutions. Tutorified provides grade-specific worksheets‚ ideal for targeted practice. Additionally‚ websites like Math-Salamanders offer printable worksheets with clear instructions and answer keys. These resources are easily accessible and cater to different learning needs‚ making them invaluable for both educators and students.

8.2 Supplementary Materials for Learning

Supplementary materials like textbooks‚ online guides‚ and interactive tools enhance learning. Websites such as Mathster and Corbett Maths offer detailed conversion charts and video tutorials. Additional resources include printable charts‚ metric maps‚ and problem-solving guides. These materials help students grasp concepts like unit prefixes and decimal movements. They also provide step-by-step solutions for complex conversions‚ making learning engaging and effective. Supplementary tools are designed to complement worksheets‚ ensuring a comprehensive understanding of measuring units for students of all skill levels.

ca form 100 instructions

Understanding CA Form 100: An Overview

CA Form 100 is California’s Corporation Franchise or Income Tax Return, used by corporations to report income and calculate franchise tax liabilities, ensuring compliance with state tax laws․

Purpose of the Form

CA Form 100 serves as the primary document for corporations to report their income and calculate franchise tax liabilities in California․ Its purpose is to determine the taxable income and ensure compliance with state tax laws․ Corporations use this form to detail their financial activities, deductions, and credits․ It is essential for calculating both franchise tax and income tax, ensuring accurate reporting to the California Franchise Tax Board (FTB)․ The form is a critical component of corporate tax compliance, providing a comprehensive overview of a corporation’s fiscal obligations in the state․

Who Must File CA Form 100

CA Form 100 must be filed by corporations operating in California, including C corporations and limited liability companies (LLCs) classified as corporations for federal tax purposes․ This applies to entities conducting business or generating income within the state․ Foreign corporations with California-sourced income or business activity are also required to file․ Additionally, any organization classified as an association taxable as a corporation under federal law must submit this form․ The filing ensures compliance with California’s franchise tax and income tax regulations, as enforced by the California Franchise Tax Board (FTB)․

Key Sections of CA Form 100

CA Form 100 includes sections for reporting income, deductions, credits, and franchise tax calculations․ It also requires details on business activities and federal tax adjustments․

Schedule H (Dividend Income Deduction)

Schedule H is used to claim deductions for dividend income received by a corporation; It applies to corporations subject to California franchise or income tax․ The schedule requires details on the amount of dividends received and any eligible deductions․ Corporations must report both taxable and nontaxable dividend income, ensuring compliance with California tax laws․ Proper documentation and adherence to instructions are essential to avoid errors․ Refer to the 2024 Instructions for Form 100 for specific guidance on completing Schedule H accurately and ensuring all requirements are met․

Schedule V (Other Information)

Schedule V is used to provide additional information required for the accurate processing of Form 100․ It includes disclosures such as federal changes, adjustments, and other items not reported elsewhere․ Corporations must attach federal forms like Form 1125-A and ensure all information aligns with California tax law․ Schedule V also requires the signature of the preparer and verification of the accuracy of the data provided; Proper completion of Schedule V is crucial for compliance and avoiding delays in processing the tax return․ Refer to the 2024 instructions for detailed guidance on completing this schedule accurately․

Related Forms and Schedules

Key forms include Form 100-ES for estimated taxes, Form 100X for amended returns, and Schedule H for dividend income deductions, ensuring comprehensive tax reporting compliance․

Form 100-ES (Estimated Tax)

Form 100-ES is used by California corporations to make estimated tax payments for the current tax year․ It applies to both calendar year and fiscal year filers, with payments due quarterly․ Corporations must use black or blue ink when completing the form․ The estimated tax requirement is determined using California Revenue and Taxation Code Sections 19011, 19021, and others․ This form ensures timely payment of taxes, avoiding potential penalties․ It is essential for corporations to accurately calculate and report their estimated tax to maintain compliance with state tax regulations․

Form 100X (Amended Return)

Form 100X is used to amend a previously filed Form 100, allowing corporations to correct errors or report changes in income, deductions, or credits․ It applies to both franchise and income tax returns․ Corporations must provide detailed explanations for amendments and attach supporting documentation․ The form ensures compliance with California tax laws by updating tax liabilities․ It is essential to file Form 100X within the statute of limitations to avoid penalties․ This form is crucial for resolving discrepancies and ensuring accurate tax reporting, aligning with California Revenue and Taxation Code requirements․

California Tax Rates and Minimum Franchise Tax

California imposes a minimum franchise tax of $800 and a variable tax rate based on income․ Corporations must report and pay these taxes accurately to avoid penalties․

Calculating the Franchise Tax

California’s franchise tax is calculated based on a corporation’s net income, with a minimum tax of $800․ Corporations report income on Form 100 and apply applicable deductions․ Schedule H is used for dividend income deductions, reducing taxable income․ The tax rate applies to the remaining amount after deductions․ Ensure compliance with Revenue and Taxation Code sections for accurate calculations․ Proper documentation and timely filing are essential to avoid penalties and ensure adherence to state tax regulations․ This process ensures corporations meet their franchise tax obligations effectively․

Important Filing Dates and Deadlines

CA Form 100 must be filed by the 15th day of the 4th month after the fiscal year ends․ Extensions can be requested with Form 100-ES․

Extension Requests and Due Dates

Corporations can request an extension by filing Form 100-ES and paying the estimated tax liability․ The deadline for filing CA Form 100 is the 15th day of the 4th month after the fiscal year ends․ An automatic six-month extension is granted for filing, but the tax must be paid by the original due date to avoid penalties․ Use Form 100-ES to make estimated tax payments quarterly․ Ensure timely submissions to maintain compliance with California tax regulations․

Estimated Tax Requirements

Corporations use Form 100-ES to make estimated tax payments․ Payments are due quarterly, typically April 15, June 15, September 15, and January 15․ This ensures compliance with state tax requirements․

Using Form 100-ES

Form 100-ES is used by corporations and certain LLCs treated as C-corporations to make quarterly estimated tax payments․ Payments are due on April 15, June 15, September 15, and January 15․ Corporations must estimate their annual tax liability and remit payments in equal installments․ Use black or blue ink to complete the form, ensuring accuracy․ Only one box should be checked to indicate the payment type․ Attach required documentation, such as vouchers, to ensure compliance․ Proper use of Form 100-ES helps avoid underpayment penalties and ensures timely fulfillment of tax obligations․

Differences Between California and Federal Law

California law generally conforms to federal tax law as of January 1, 2015, but includes exceptions․ Specific state rules and Revenue and Taxation Code sections apply․

Conformity and Exceptions

California generally conforms to federal tax law as of January 1, 2015, but with notable exceptions․ The state Revenue and Taxation Code (R&TC) sections outline specific differences, such as the treatment of certain deductions and credits․ For instance, California does not conform to federal bonus depreciation rules and maintains its own guidelines for net operating losses․ Additionally, unique state-specific provisions, like the Thomas and Woolsey Wildfires exclusion, provide relief for qualified taxpayers․ These differences require careful review of R&TC sections, such as 24309․7, to ensure compliance with state tax regulations․

Special Exclusions and Credits

California offers specific exclusions, such as the Thomas and Woolsey Wildfires exclusion, allowing qualified taxpayers to exclude settlement amounts from gross income under R&TC Section 24309․7․

Wildfire Settlement Exclusion

The Wildfire Settlement Exclusion allows qualified taxpayers to exclude certain settlement amounts from gross income for taxable years beginning before January 1, 2027․ This applies to settlements related to the Thomas and Woolsey fires in Southern California․ Taxpayers must meet specific criteria outlined in California Revenue and Taxation Code (R&TC) Section 24309․7․ The exclusion is designed to provide tax relief to individuals and businesses affected by these disasters․ Proper documentation, such as settlement agreements, is required to claim this exclusion․ This provision aligns with California’s efforts to support recovery efforts while ensuring compliance with state tax laws․ For details, refer to the CA Form 100 instructions and R&TC Section 24309․7․

Audit and Compliance Considerations

Corporations must ensure accurate reporting on CA Form 100 to avoid audits․ Maintain detailed records and comply with California tax laws to support filings and reduce audit risks․

Documentation and Record-Keeping

Accurate and detailed record-keeping is essential for completing CA Form 100․ Maintain documentation supporting income, deductions, and credits, such as invoices, receipts, and bank statements․ Retain records for at least four years, as audits may require proof of reported figures․ Ensure all financial transactions are clearly documented and organized by tax year․ This includes supporting schedules like Schedule H and Schedule V․ Proper documentation helps verify compliance with California tax laws and reduces the risk of discrepancies during audits․ Refer to California Revenue and Taxation Code sections for specific requirements․

E-Filing Options and Requirements

California offers e-filing options for Form 100 through the Business E-File Program, ensuring efficient and secure submission․ Corporations must meet specific electronic filing requirements․

Business E-File Program

The California Business E-File Program allows corporations to electronically submit Form 100, streamlining the tax filing process․ It supports multiple forms, including Schedule H and Schedule V, ensuring all necessary documents are filed together․ The program offers enhanced security, faster processing, and immediate acknowledgment of submission․ Corporations can import data from tax software or use pre-filled forms to simplify the process․ Additional forms, such as Form 100X for amended returns, can also be submitted through this platform․ Businesses must meet specific electronic filing requirements to ensure compliance with state tax regulations․

tv guide boynton beach

Your comprehensive guide to TV listings in Boynton Beach, FL, covering cable, satellite, and antenna channels. Plan your entertainment and stay updated on local broadcasts and shows.

1.1 What Is a TV Guide?

A TV guide is a directory listing television programs, showtimes, and channels. It helps viewers plan their entertainment by providing detailed schedules, enabling them to organize their viewing experience effectively. This resource assists in decision-making, ensuring users stay informed about local broadcasts and never miss their favorite shows or movies.

1.2 Importance of a TV Guide for Viewers

A TV guide is essential for viewers as it provides a detailed schedule of programs, helping them plan their viewing experience. It allows users to discover new shows, avoid missing favorites, and navigate channel offerings efficiently. This resource enhances entertainment organization and ensures viewers stay informed about local broadcasts, making it an indispensable tool for TV enthusiasts.

TV Listings for Boynton Beach, FL

Comprehensive TV listings for Boynton Beach, FL, covering cable, satellite, and antenna channels. Viewers can select their service provider to access local channel schedules and programming details.

2.1 Over-the-Air TV Listings

Over-the-air TV listings in Boynton Beach provide free access to local broadcast channels. Viewers can enjoy major networks like NBC, ABC, CBS, and FOX, along with HD channels and digital frequencies. These listings are ideal for those using antennas to receive signals, offering a cost-effective way to watch local news, sports, and popular shows without subscription fees.

2.2 Cable TV Listings

Cable TV listings in Boynton Beach offer a wide range of channels, including HD and premium options. Providers like AT&T U-Verse and Comcast provide detailed schedules for local and national programming. Viewers can access entertainment, sports, and news with enhanced features like DVR and on-demand content, ensuring a diverse and convenient viewing experience tailored to individual preferences.

2.3 Satellite TV Listings

Satellite TV listings in Boynton Beach provide extensive channel options with providers like DirecTV and Dish Network. These services offer a wide range of sports, movies, and news channels, often in HD. Viewers can enjoy reliable coverage and customizable packages, including premium networks and on-demand content, making satellite TV a versatile choice for diverse entertainment needs in the area.

Popular TV Service Providers in Boynton Beach

Leading TV service providers in Boynton Beach include AT&T U-Verse, Comcast, DirecTV, and Dish Network, offering a mix of cable and satellite options for diverse viewer preferences.

3.1 AT&T U-Verse

AT&T U-Verse offers a robust TV experience in Boynton Beach, featuring a wide channel lineup, HD options, and innovative DVR capabilities. Subscribers can enjoy popular networks, sports, and on-demand content, making it a preferred choice for many residents seeking reliable and high-quality entertainment solutions in the area.

3.2 Comcast

Comcast provides Boynton Beach residents with a diverse range of TV packages, including digital channels, HD options, and on-demand services. Its extensive channel lineup covers sports, movies, and local programming, catering to various viewer preferences and ensuring a personalized entertainment experience tailored to individual needs.

3.3 DirecTV

DirecTV offers Boynton Beach residents a wide range of channels through its satellite TV service. Subscribers can enjoy HD programming, premium sports packages, and exclusive content like NFL Sunday Ticket. DirecTV’s extensive lineup includes movies, sports, and local channels, providing a user-friendly experience with flexible package options to suit diverse viewing preferences.

3.4 Dish Network

Dish Network provides Boynton Beach residents with a variety of TV packages, including HD channels, international options, and premium content. Subscribers can access local channels, sports, movies, and on-demand titles. Dish Network’s DVR technology and user-friendly interface enhance the viewing experience, offering flexibility and customization to meet diverse entertainment needs in Boynton Beach.

Local TV Stations in Boynton Beach

Explore local TV stations in Boynton Beach, including NBC, ABC, CBS, and FOX affiliates. Discover channel numbers, digital frequencies, and coverage areas for your favorite broadcasts.

4.1 NBC Stations

Boynton Beach viewers can access NBC through local affiliates like WPTV-TV (Channel 5) and WFLA-TV (Channel 8). These stations offer news, sports, and entertainment, including popular shows like Today and The Voice. WPTV-TV broadcasts on digital frequency 12, while WFLA-TV operates on digital frequency 7, ensuring clear reception for antenna users. Both stations provide essential local and national programming.

4.2 ABC Stations

Boynton Beach viewers can access ABC through local affiliate WPBF-TV (Channel 25) and WPLG-TV (Channel 10). WPBF-TV broadcasts on digital frequency 16, offering HD programming, while WPLG-TV operates on digital frequency 10. Both stations provide local news, weather updates, and popular ABC shows like Good Morning America and Grey’s Anatomy, ensuring diverse entertainment for the community.

4.3 CBS Stations

CBS stations in Boynton Beach include WFOR-TV (Channel 4) and WPEC-TV (Channel 12). WFOR-TV broadcasts on digital channel 22 with HD programming, while WPEC-TV operates on digital channel 12. Both stations offer popular CBS shows like CSI: Miami and 60 Minutes, along with local news and weather updates, catering to diverse viewer preferences in the area.

4.4 FOX Stations

FOX stations in Boynton Beach include WSVN (Channel 7) and WFLX (Channel 29). WSVN operates on digital channel 7 with HD programming, while WFLX broadcasts on digital channel 29. Both stations offer popular FOX shows like The Simpsons and Fox News, along with local news, sports, and weather updates, catering to a wide range of viewer interests.

Digital Channel Lineup in Boynton Beach

Boynton Beach’s digital channel lineup offers a comprehensive selection, including A&E on 13/425, ABC on 25 WPBF HD, and various HD and digital-only channels. A set-top box is required for digital upgrades.

5.1 Channel Numbers and Networks

Boynton Beach’s digital lineup features channels like A&E on 13/425, ABC on 25 WPBF HD, and AccuWeather on 27. Networks include Animal Planet, America TeVe, and more. Channel numbers vary by provider, with HD options available for enhanced viewing. A set-top box is often required for digital upgrades.

5.2 HD and Digital-Only Channels

Boynton Beach offers HD channels like WPBF (HD) on 25 and AccuWeather on 239. Digital-only channels include Alive TV on 21 and America TeVe on 61. Subscribers must opt for core digital TV packages to access these channels, with a set-top box required for digital upgrades, ensuring a sharper and more immersive viewing experience.

Senior TV Services in Boynton Beach

Senior TV services in Boynton Beach include Allegro Boynton Beach and Courtyard Gardens, offering digital channels and tailored entertainment for seniors, enhancing their viewing experience.

6.1 Senior TV Allegro Boynton Beach

Senior TV Allegro Boynton Beach offers tailored entertainment for seniors, featuring a variety of digital channels and HD options. This service ensures access to popular shows, movies, and local programming, providing a convenient and enjoyable viewing experience specifically designed for the senior community in Boynton Beach.
Channel lineup includes news, entertainment, and educational content, catering to diverse interests and preferences.

6.2 Senior TV Courtyard Gardens of Boynton Beach

Senior TV Courtyard Gardens of Boynton Beach provides a tailored digital cable experience for seniors, offering a variety of channels and shows. This service focuses on accessibility and user-friendly features, ensuring seniors can enjoy their favorite programs with ease. The lineup includes entertainment, news, and educational content, catering to the preferences of the senior community in Boynton Beach;
Customizable options allow residents to personalize their viewing experience, making it a convenient and enjoyable choice.

How to Access the TV Guide

Access the TV Guide Boynton Beach through online platforms or mobile apps. Sign in with Facebook or email to customize listings and enjoy personalized entertainment planning for local channels and shows.

7.1 Online Platforms

Access the Boynton Beach TV guide via online platforms like tvguide.com or TitanTV. These websites allow you to view listings by selecting your provider. Check what’s on TV today and tonight, customize your listings, and sign in with Facebook or email for a personalized experience. Easily plan your entertainment and stay informed about local broadcasts and shows.

7.2 Mobile Apps

Download mobile apps like TV Guide or TitanTV for on-the-go access to Boynton Beach TV listings. These apps let you view schedules, set reminders for favorite shows, and customize your guide. Stay updated with real-time information and never miss your preferred programs, ensuring seamless entertainment planning wherever you are.

Popular TV Shows and Movies in Boynton Beach

Discover the latest trends in TV programming and movies favored by Boynton Beach viewers. Popular shows include dramas, comedies, and reality TV, while movies range from blockbusters to independent films.

8.1 Current Trends in TV Programming

Current trends in Boynton Beach TV programming highlight a surge in reality TV, dramas, and streaming services. Viewers favor binge-worthy series and exclusive content, with growing interest in superhero franchises and original productions. Local audiences also show a strong preference for live sports and entertainment events, reflecting diverse viewing habits in the area.

8.2 Upcoming Events and Premieres

Exciting premieres in Boynton Beach include new seasons of popular shows like TNA iMPACT! and Let’s Go Luna!, airing on CH 44.3. Additionally, the Marvel Cinematic Universe (MCU) timeline reveals upcoming movie and series releases, offering viewers a packed schedule of entertainment options to look forward to in the coming months.

How to Choose the Right TV Package

Selecting the right TV package involves considering channel lineup, pricing, and additional features. Compare providers to find the best fit for your viewing preferences and budget.

9.1 Antenna TV

Antenna TV is a cost-effective option for viewers in Boynton Beach, offering free access to over-the-air channels. It provides local broadcasts, including major networks like NBC, ABC, CBS, and FOX. Ideal for those seeking basic entertainment without subscription fees, Antenna TV is perfect for viewers who prioritize local news, sports, and classic shows. It’s a great choice for budget-conscious households or those with limited viewing needs.

9.2 Cable TV

Cable TV in Boynton Beach offers a wide range of channels and services from providers like AT&T U-Verse, Comcast, and Xfinity. Subscribers can access premium networks, sports, and movies, along with HD programming. Cable TV provides reliable service, even during poor weather, making it a popular choice for viewers seeking diverse entertainment options and high-quality broadcasts.

9.3 Satellite TV

Satellite TV in Boynton Beach offers extensive channel options from providers like DirecTV and Dish Network. It ensures access to a wide range of networks, including HD channels and exclusive sports packages. Satellite TV is ideal for residents with limited cable access, providing reliable service and diverse programming options for entertainment and news.

Staying Updated with the Latest TV News

Stay informed about the latest TV news, show updates, and celebrity gossip through dedicated online platforms and mobile apps. Get real-time updates on your favorite shows and networks.

Track upcoming premieres, exclusive interviews, and behind-the-scenes insights to enhance your viewing experience. Reliable sources ensure you never miss out on trending TV news and events.

10.1 TV Guide Updates

Regular updates to the Boynton Beach TV Guide ensure viewers stay informed about schedule changes, new shows, and special events. These updates are available through the official TV Guide website and mobile apps, providing real-time notifications for show premieres and programming adjustments. Users can customize their settings to receive alerts for favorite shows, ensuring they never miss an episode or special event. Additionally, the guide often features exclusive content, such as behind-the-scenes interviews and sneak peeks, enhancing the overall viewing experience. By staying connected to these updates, audiences in Boynton Beach can always be up-to-date on the latest TV news and programming.

10.2 Celebrity and Show News

Stay updated on the latest celebrity gossip and show news in Boynton Beach. Discover exclusive interviews, behind-the-scenes insights, and updates on your favorite TV personalities. From trending series to upcoming movie releases, the TV Guide keeps you informed about popular culture and entertainment happenings, ensuring you never miss out on the latest buzz in the world of TV and celebrities.

User Experience and Tips

Enhance your viewing experience with personalized TV listings, set reminders for favorite shows, and utilize mobile apps for on-the-go access. Ensure your devices are updated for optimal performance.

11.1 Customizing Your TV Listings

Customize your TV listings by filtering channels, setting favorite shows, and organizing content. Use online platforms or mobile apps to tailor your viewing experience, ensuring easy access to preferred programs and networks.

11.2 Setting Reminders for Favorite Shows

Set reminders for your favorite shows to never miss an episode. Use TV Guide features to enable alerts for upcoming broadcasts. Track new episodes, season premieres, and special events with ease, ensuring you stay updated on your preferred programming.

The TV Guide Boynton Beach is a vital resource for viewers, offering comprehensive listings and tools to enhance your viewing experience.

12.1 Final Thoughts on TV Guide Boynton Beach

Your TV Guide Boynton Beach is a trusted resource for comprehensive listings, helping you stay updated on local broadcasts, plan your viewing schedule, and discover new shows. It ensures you never miss your favorite programs, making it an essential tool for entertainment planning in the Boynton Beach area.

social work licensing clinical exam guide

The Social Work Licensing Clinical Exam is a critical step for aspiring clinical social workers, ensuring they meet professional standards and competencies. Passing it enhances career prospects and demonstrates expertise.

Overview of the Exam’s Importance

The Social Work Licensing Clinical Exam plays a pivotal role in ensuring that professionals meet the highest standards of clinical competence and ethical practice. By assessing knowledge, skills, and judgment, it safeguards public trust in the profession. Passing the exam demonstrates a deep understanding of clinical theories, interventions, and legal requirements, which are essential for effective practice. It also aligns with professional standards set by organizations like NASW and ASWB, ensuring consistency across the field. Licensure not only enhances career opportunities but also signals to employers and clients a commitment to excellence and accountability. This exam is a cornerstone for advancing as a licensed clinical social worker.

Who Should Take the Exam?

The Social Work Licensing Clinical Exam is designed for individuals seeking to become licensed clinical social workers (LCSWs). This includes social workers who have completed their graduate-level education and are looking to advance their careers in clinical settings. It is particularly relevant for those aiming to work in mental health, healthcare, or private practice, where licensure is often required. Additionally, professionals who wish to demonstrate their expertise and commitment to high standards of clinical practice should consider taking the exam. By obtaining the LCSW credential, they gain enhanced career opportunities and the ability to work independently in clinical roles. This exam is a crucial step for those serious about professional growth in clinical social work.

Eligibility Requirements for the Clinical Exam

To qualify for the clinical exam, candidates must hold a graduate degree in social work, complete supervised clinical hours, and meet state-specific licensure prerequisites.

Educational Background and Degrees Needed

A master’s degree in social work (MSW) from a program accredited by the Council on Social Work Education (CSWE) is typically required to sit for the clinical exam. Some states may accept a bachelor’s degree for lower levels of licensure, but the clinical exam specifically requires an MSW. Coursework should cover clinical practice, human behavior, and diagnosis. Additionally, NASW and ASWB guidelines emphasize the importance of a comprehensive education that aligns with professional standards. This ensures candidates have the theoretical knowledge and practical skills necessary for clinical practice. States may also have specific educational requirements, so checking local regulations is crucial.

Supervised Experience and Hours Required

To qualify for the clinical exam, candidates must complete a minimum of 1,500 to 2,000 hours of supervised clinical experience, depending on the state. This experience must be post-graduate and directly related to clinical social work practice. Supervision must be provided by a licensed clinical social worker with expertise in the field; The experience should include direct client contact, assessment, diagnosis, and treatment planning. Documentation of these hours, including a detailed log and supervisor verification, is typically required. This hands-on training ensures candidates develop the practical skills necessary for independent clinical practice. State-specific requirements may vary, so it’s essential to verify local guidelines.

Additional State-Specific Requirements

Beyond general requirements, each state may impose additional criteria for clinical licensure. Some states demand specific coursework or exams beyond the standard clinical exam. Background checks and fingerprinting are often mandatory. Certain jurisdictions require proof of liability insurance or additional supervised hours. State-specific ethics exams or cultural competence training may also be needed. Requirements can vary significantly, so candidates must consult their state’s licensing board for precise details; Failure to meet these additional criteria can delay licensure, even if the clinical exam is passed. Researching and adhering to these state-specific demands ensures a smoother licensure process. Stay informed to avoid unexpected hurdles.

Exam Format and Content

The clinical exam evaluates knowledge and skills in social work practice, covering clinical topics and professional standards. Questions assess theoretical understanding and practical application.

Types of Questions and Test Structure

The exam features multiple-choice questions, scenario-based inquiries, and case studies to assess clinical reasoning and practical application. Questions focus on clinical assessment, intervention strategies, and ethical decision-making. The test structure ensures candidates demonstrate competence in evidence-based practices, cultural competence, and legal standards. Time management is crucial, as the exam is timed, requiring candidates to balance thoroughness with efficiency. The format is designed to evaluate both theoretical knowledge and real-world application skills, ensuring professionals are prepared for complex clinical scenarios. The structured approach helps standardize the assessment process, maintaining fairness and consistency across all candidates.

Key Topics Covered in the Exam

The exam emphasizes clinical assessment, diagnosis, and treatment planning, focusing on evidence-based practices. It covers intervention strategies for diverse populations, including children, families, and vulnerable groups. Ethical standards, cultural competence, and legal issues are also prominent. Candidates are tested on their ability to apply theoretical knowledge to real-world scenarios, ensuring they can address complex clinical challenges effectively. The exam also includes topics on mental health disorders, trauma-informed care, and case management. Understanding these areas is essential for demonstrating proficiency in clinical social work practice and meeting professional standards. The content ensures that licensed professionals are well-prepared to provide high-quality, ethical services.

Time Management and Test Duration

The clinical exam typically consists of 170 multiple-choice questions, with a 4-hour time limit. Effective time management is crucial to ensure candidates can thoroughly address each question. Strategies include allocating 1-2 minutes per question, skimming through easier questions first, and revisiting challenging ones later. Practice exams are invaluable for simulating test conditions and improving pacing. Candidates should also review study guides to identify areas needing more focus, allowing them to allocate study time efficiently. Proper time management ensures a systematic approach, reducing stress and maximizing performance. By prioritizing preparation and maintaining a steady pace, candidates can confidently complete the exam within the allotted time.

Study Materials and Preparation Strategies

Key resources include official study guides, practice exams, and simulation tools. Effective strategies involve focused study sessions, topic prioritization, and regular review of practice test results.

Recommended Study Guides and Resources

The Association of Social Work Boards (ASWB) offers official study guides tailored to the clinical exam, covering key topics like psychopathology and treatment planning. The National Association of Social Workers (NASW) provides comprehensive resources, including practice questions and flashcards. Additionally, online courses and forums, such as those hosted by NASW’s Learning Center, offer structured study plans and peer support. Many test-takers also benefit from simulation tools that mimic real exam conditions, helping them refine time management and question-answering skills. Utilizing these resources ensures a well-rounded preparation and enhances confidence in tackling the exam effectively.

Practice Exams and Simulation Tools

Practice exams and simulation tools are essential for preparing for the clinical licensing exam. The ASWB offers official practice exams that mirror the actual test format, helping candidates familiarize themselves with question types and time constraints. Simulation tools, available through various platforms, replicate exam conditions, allowing candidates to practice under timed settings. These resources help identify areas for improvement and reduce test-day anxiety. Many candidates also benefit from third-party websites offering realistic practice simulations. Regular use of these tools enhances problem-solving skills and builds confidence in applying clinical knowledge effectively. They are indispensable for refining test-taking strategies and ensuring readiness for the exam.

Effective Study Techniques for Success

Effective study techniques are crucial for success on the clinical licensing exam. Active learning strategies, such as creating concept maps and flashcards, help reinforce key concepts. Setting a structured study schedule ensures consistent preparation. Candidates should focus on understanding theoretical frameworks and their practical applications. Regular self-assessment through practice exams helps identify areas needing improvement. Collaborative learning, through study groups or online forums, provides diverse perspectives and supports deeper understanding. Additionally, mindfulness practices and time management techniques can reduce stress and enhance focus. Integrating these strategies into a comprehensive study plan maximizes retention and readiness for the exam. Consistent and deliberate practice is key to achieving success.

Understanding the Clinical Exam’s Role in Licensure

The clinical exam is a pivotal step in obtaining licensure, ensuring candidates demonstrate clinical competence and adherence to professional standards. It validates expertise, enabling social workers to practice independently.

How the Exam Aligns with Professional Standards

The clinical exam aligns with professional standards by assessing essential competencies in social work practice, ensuring ethical and evidence-based care. It evaluates knowledge in assessment, diagnosis, and treatment, reflecting NASW and ASWB guidelines. The exam’s structure mirrors real-world scenarios, promoting practical application of skills. By adhering to these standards, the exam upholds the integrity of the profession, guaranteeing that licensed social workers are equipped to provide high-quality services. This alignment ensures consistency and excellence in clinical practice, meeting the expectations of both the profession and the public. The exam serves as a bridge between education and professional practice, fostering competent and ethical social work.

The Impact of Licensure on Career Opportunities

Licensure significantly enhances career opportunities for social workers, enabling them to practice in diverse settings, including clinical, healthcare, and school environments. It is often a requirement for advanced roles, offering greater job security and higher earning potential. Licensed professionals gain credibility and can pursue specialized areas like mental health or child welfare. Additionally, licensure facilitates career mobility across states and opens doors to leadership positions and private practice. This credential is crucial for those aiming to advance their careers and make a meaningful impact in the field. It ensures social workers meet professional standards, making them more competitive in the job market.

linear ak-11 keypad manual pdf

The Linear AK-11 is a digital keyless entry system designed for access control, offering secure and reliable operation․ Its rugged cast aluminum enclosure ensures durability, while programmable entry codes provide flexibility for various applications․

1․1 Overview of the System

The Linear AK-11 is a digital keyless entry system designed for access control applications․ It features a rugged cast aluminum enclosure, programmable entry codes (1-6 digits), and two relay outputs․ The system supports up to 480 programmable codes, making it ideal for gates or doors․ Its durable construction and user-friendly interface ensure reliable operation in various environments, providing secure and efficient access control solutions․

1․2 Importance of the Manual

This manual is essential for understanding and utilizing the Linear AK-11 keypad’s full potential․ It provides detailed installation, programming, and maintenance instructions, ensuring proper setup and operation․ By following the guide, users can optimize security, troubleshoot issues, and maintain system efficiency, making it a crucial resource for owners and installers to ensure long-term functionality and reliability of the access control system․

Installation and Setup

The Linear AK-11 keypad is designed for easy installation, with options to mount directly to a wall or pedestal․ Its rugged cast aluminum enclosure ensures durability, and the manual provides step-by-step guidance for a seamless setup process, ensuring proper functionality and integration into your access control system․

2․1 Hardware Installation Steps

The Linear AK-11 keypad is mounted directly to a wall or pedestal using its rugged cast aluminum enclosure․ Ensure proper alignment and secure fastening for durability․ Connect the necessary wiring to the keypad’s terminals, following the manual’s wiring diagram․ Power supply connections should be made carefully to avoid damage․ Test the keypad’s functionality after installation to ensure all keys and relays operate correctly․

2․2 Software Setup Instructions

Connect the Linear AK-11 keypad to a PC using the provided cable or wireless interface․ Enter programming mode by pressing the master code, then navigate through menus to set entry codes, relay outputs, and security features․ Use the keypad’s numeric interface to program up to 480 codes and customize settings like door sense and anti-passback․ Refer to the manual for detailed steps and default codes․

Programming the Linear AK-11 Keypad

The Linear AK-11 supports up to 480 programmable entry codes, ranging from 1 to 6 digits․ It offers features like relay outputs, door sense, and anti-passback for enhanced control․

3․1 Entry Code Programming

Program up to 480 entry codes with 1-6 digits for secure access control․ Codes can be easily added, deleted, or modified using the keypad or remote programming․ The system supports multiple programming options, including temporary codes and scheduled access, enhancing flexibility for different user needs; Advanced features like door sense and anti-passback ensure robust security and control over access points․

3․2 Advanced Programming Features

The Linear AK-11 offers advanced programming features such as door sense, inhibit, and anti-passback functionality․ These settings enhance security by monitoring door status and preventing unauthorized access․ Additionally, programmable relay outputs allow integration with external devices, while features like timed access and user-specific codes provide enhanced control and customization for access management․

Key Features of the Linear AK-11

The Linear AK-11 offers a reliable keyless entry system with up to 480 programmable codes, a durable cast aluminum enclosure, and advanced features like door sense and relay outputs․

4․1 Security Features

The Linear AK-11 keypad enhances security with programmable entry codes, offering 1 to 6-digit options for up to 480 codes․ It also features anti-passback and inhibit functions, ensuring controlled access․ The system supports door sense and relay outputs, providing additional layers of protection against unauthorized entry, making it a robust solution for secure access control applications․

4․2 Durability and Build Quality

The Linear AK-11 keypad is constructed with a rugged cast aluminum enclosure, ensuring durability in harsh environments․ Its die-cast keys feature bright, easy-to-read yellow graphics, designed for long-lasting performance․ The keypad is weather-resistant and built to withstand heavy use, making it a reliable choice for outdoor access control applications․ Its robust design ensures consistent functionality over time․

Troubleshooting Common Issues

Troubleshooting the Linear AK-11 involves diagnosing keypad responsiveness, code recognition, and connectivity issues․ Ensure proper power supply, check wiring, and reset codes if necessary for optimal functionality․

5․1 Diagnostic Techniques

Diagnosing issues with the Linear AK-11 involves checking LED indicators for error codes, verifying power supply, and inspecting wiring connections․ Test individual keys for functionality and ensure codes are programmed correctly․ Resetting the system or reprogramming codes may resolve operational faults․ Regularly cleaning the keypad and ensuring proper installation can prevent many common issues․

5․2 Solutions to Common Problems

Common issues with the Linear AK-11 can often be resolved by resetting the system or reprogramming entry codes․ Check power connections and ensure the keypad is clean․ For unresponsive keys, test individual buttons and verify wiring integrity․ Programming errors can be corrected by following the manual’s instructions or restoring factory defaults․ Regular maintenance helps prevent recurring issues․

Compatibility and Integration

The Linear AK-11 keypad integrates seamlessly with various access control systems, including gates and doors․ Its design ensures compatibility with existing infrastructure, offering secure and reliable operation․

6․1 Compatible Systems and Devices

The Linear AK-11 keypad is compatible with a wide range of systems, including gates, doors, and other access control devices․ It integrates seamlessly with existing infrastructure, offering programmable relay outputs for flexible connectivity․ The system supports RS-485 communication and works with various control panels, making it suitable for both commercial and residential applications․ Its versatility ensures reliable operation across diverse access control setups․

6․2 Integration with Existing Infrastructure

The Linear AK-11 keypad seamlessly integrates with existing access control systems, supporting standard communication protocols and wiring setups․ Its compatibility with RS-485 communication ensures effortless connection to control panels and other devices․ The keypad’s flexible design allows for easy incorporation into current infrastructure, making it a versatile solution for upgrading or expanding access control systems without disrupting operational workflows․

Security Best Practices

Regularly update access codes, monitor usage, and ensure physical security of the keypad․ Use anti-tamper features and keep firmware updated for optimal protection․

7․1 Securing Entry Codes

To ensure maximum security, use complex entry codes and avoid common sequences․ Regularly update codes, limit access to authorized personnel, and utilize the keypad’s anti-passback feature․ Enable door sense and inhibit functions to enhance protection against unauthorized entry․ Store backup codes securely and consider implementing multi-user profiles for advanced access control․ Monitor code usage and update firmware to maintain optimal security․

7․2 Physical Security Measures

Mount the Linear AK-11 keypad securely to a wall or pedestal using tamper-proof hardware․ Ensure visibility and accessibility while protecting it from environmental elements․ Regularly inspect the enclosure for damage and clean the keypad to maintain functionality․ Use security screws to prevent unauthorized removal and consider installing surveillance nearby for added monitoring․ Maintain the unit’s integrity to ensure reliable performance and longevity․

Maintenance and Care

Regularly clean the keypad with a soft cloth and inspect for wear․ Ensure all connections are secure and protected from environmental elements to maintain optimal performance and longevity․

8․1 Regular Maintenance Tasks

Perform routine cleaning with a soft, dry cloth to remove dirt and debris․ Inspect electrical connections for tightness and corrosion․ Check keypad buttons for wear and damage․ Ensure the enclosure remains sealed to protect against moisture․ Regularly test all functions to confirm proper operation․ Refer to the manual for detailed maintenance procedures to ensure longevity and reliability of the system․

8․2 Cleaning and Upkeep

Regularly clean the keypad surface with a mild detergent and water, avoiding harsh chemicals․ Use a soft cloth to prevent scratching․ Ensure the enclosure remains dry to prevent moisture damage․ Inspect buttons for wear and clean connections with compressed air․ Replace worn buttons promptly to maintain functionality․ Always consult the manual for specific cleaning instructions to ensure optimal performance and longevity․

User Guides and Manuals

The official Linear AK-11 manual provides detailed instructions for installation, programming, and maintenance․ It is available for download as a PDF from the manufacturer’s website․

9․1 Navigating the Official Manual

The official Linear AK-11 manual is a comprehensive 12-page PDF guide․ It includes detailed sections on installation, programming, and troubleshooting․ Users can download it from websites like manualsonline․com․ The manual provides step-by-step instructions and diagrams for optimal use․ It is essential for understanding the keypad’s features and resolving common issues efficiently․

9․2 Additional Resources

Beyond the official manual, additional resources like the Linear AK-11 Programming Instructions Manual and FAQs provide in-depth guidance․ These documents, available on websites like controlledproducts․com, cover troubleshooting, advanced features, and compatibility․ They complement the manual, offering practical insights and solutions for optimal keypad functionality․

Technical Specifications

The Linear AK-11 features a rugged cast aluminum enclosure, supports up to 480 programmable entry codes, and includes two relay outputs for secure access control applications․

10․1 Hardware Specifications

The Linear AK-11 keypad features a rugged cast aluminum enclosure, making it suitable for outdoor use․ It includes a durable keypad with die-cast keys and bright, easy-to-read yellow graphics․ The system supports up to 480 programmable entry codes and includes two relay outputs for controlling access․ It operates on 12V DC and is designed for compatibility with various access control systems, ensuring reliable performance in diverse environments․

10․2 Software and Firmware Details

The Linear AK-11 operates with firmware that controls entry code management, relay outputs, and system settings․ It supports programmable options like door sense, inhibit, and anti-passback, enhancing security․ The firmware enables up to 480 programmable codes and integrates with access control systems․ Regular updates may be available to improve functionality or address specific user needs, ensuring optimal performance and security․

Mounting and Configuration Options

The Linear AK-11 keypad can be mounted directly to a wall or pedestal for secure installation․ Configuration options include adjustable relay outputs for customized access control setups․

11․1 Mounting to a Wall or Pedestal

The Linear AK-11 keypad is designed for easy installation on a wall or pedestal․ Its durable cast aluminum enclosure ensures secure mounting․ Use the provided hardware to attach the keypad to a flat surface, ensuring stability and weather resistance․ Proper mounting ensures reliable functionality and long-term durability in various environmental conditions․

11․2 Configuring Relay Outputs

The Linear AK-11 keypad features two programmable relay outputs for controlling access points․ These outputs can be configured to activate gates, doors, or other devices․ Programmable options include door sense, inhibit, and anti-passback features․ Refer to the manual for step-by-step relay configuration instructions to ensure proper setup and functionality․ Correct configuration is essential for reliable operation and security․

FAQs and Common Questions

Frequently asked questions include programming entry codes, troubleshooting common issues, and configuring relay outputs․ Refer to the manual for detailed solutions and best practices․

12․1 Frequently Asked Questions

Common questions include how to program entry codes, troubleshoot keypad issues, and configure relay outputs․ Users often inquire about mounting options and maximizing system security․ Additional FAQs address resetting the system, understanding error codes, and ensuring optimal performance․ Refer to the manual for detailed answers and step-by-step solutions to these frequently asked questions․

12․2 Best Practices for Optimal Use

Regularly update firmware for enhanced security and functionality․ Ensure a stable power supply to prevent malfunctions․ Protect the keypad from harsh weather conditions․ Use strong, unique entry codes and limit code sharing․ Clean the keypad regularly to maintain responsiveness․ Refer to the manual for detailed best practices to ensure longevity and optimal performance of the Linear AK-11 Keypad․

frigidaire washer/dryer combo manual

Frigidaire Washer/Dryer Combo Manual Overview

The Frigidaire Washer/Dryer Combo manual provides essential guidance for operating, maintaining, and troubleshooting the unit. It covers key features like multiple wash cycles, energy efficiency, and safety tips to ensure optimal performance and longevity of the appliance.

1.1 Key Features and Benefits

The Frigidaire Washer/Dryer Combo offers dual functionality, saving space and time. It features multiple wash cycles, customizable settings, and an energy-saving design. With ENERGY STAR certification, it ensures efficient water and energy use. The combo also includes a delay start option and a user-friendly control panel for convenient operation.

1.2 Model Variations and Specifications

Frigidaire offers various Washer/Dryer Combo models, such as the FLCE7522AW and FLCG7522AW, designed for different needs. These models feature capacities like 3.9 Cu. Ft. washer and 5.5 Cu. Ft. dryer, ensuring ample space for laundry loads. Each model includes specifications tailored for energy efficiency, noise reduction, and advanced cleaning technologies to meet diverse user preferences and requirements effectively;

1.3 Importance of Reading the Manual

Reading the Frigidaire Washer/Dryer Combo manual is essential for understanding its features, troubleshooting common issues, and ensuring safe operation. It provides critical information on maintenance, error codes, and optimal usage, helping users avoid costly repairs and extend the appliance’s lifespan while ensuring efficient and effective laundry cleaning.

Installation and Setup Guide

Proper installation ensures optimal performance. Follow manual instructions for leveling, water supply connections, and electrical setup. Professional help may be needed for complex installations to avoid issues.

2.1 Pre-Installation Requirements

Ensure the installation location has a grounded electrical outlet and water supply. Check for proper ventilation and space clearance. Verify the drain system compatibility and ensure all necessary tools are available. Follow manual guidelines for a safe and efficient setup process.

2.2 Step-by-Step Installation Instructions

First, unbox and inspect the unit for damage. Position it on a level surface and connect water hoses to the appropriate inlets. Secure the drain hose to a standpipe. Plug the unit into a grounded outlet. Tighten all connections and test for leaks. Refer to the manual for specific alignment and leveling instructions to ensure stability and proper function.

2.3 Connecting Water and Electrical Supplies

Connect the water hoses to the unit’s inlet ports, ensuring they are securely attached to prevent leaks; Plug the appliance into a 120V, 60Hz electrical outlet. Check that the circuit is dedicated and meets the unit’s power requirements. Verify all connections are tight and leak-free before starting the machine to ensure safe and proper operation.

Operating Instructions

Start by selecting the desired wash or dry mode, then choose the appropriate cycle and options. Adjust settings like temperature and spin speed as needed. Monitor progress via the control panel to ensure smooth operation and optimal results for your laundry tasks.

3.1 Wash Cycles and Options

The Frigidaire Washer/Dryer Combo offers various wash cycles, including delicate, normal, heavy-duty, and quick wash options. Users can customize settings like water temperature, spin speed, and soil level. Special features such as delay start and fabric softener options enhance convenience, ensuring tailored care for different fabric types and laundry needs.

3.2 Dryer Settings and Customization

The Frigidaire Washer/Dryer Combo allows users to customize drying settings with options like moisture sensors, eco mode, and variable heat levels. Customizable drying cycles cater to different fabric types, ensuring optimal results. The unit also features a delay start function, enabling users to schedule drying cycles according to their convenience, enhancing efficiency and energy savings.

3.4 Delay Start and Other Convenience Features

The Frigidaire Washer/Dryer Combo offers a delay start feature, allowing users to schedule wash and dry cycles up to 24 hours in advance. Additional convenience features include customizable cycle options, automatic detergent dispensing, and silent operation modes. These features enhance flexibility and user experience, making laundry tasks more efficient and hassle-free.

Troubleshooting Common Issues

Address common problems like the washer not starting, dryer not heating, or excessive vibrations. Refer to the troubleshooting section for detailed solutions to restore functionality quickly.

4.1 Washer Not Starting or Agitating

If the washer won’t start or agitate, check the power supply and ensure the lid is closed properly. Verify that the drain pump filter is clean and the unit is properly balanced. If issues persist, consult the diagnostic error codes in the manual or contact a professional for assistance.

4.2 Dryer Not Heating or Stopping Abruptly

If the dryer isn’t heating or stops abruptly, check the power supply and ensure the vent is clear of blockages. Clean the lint filter and verify proper gas connections for gas models. Consult the manual’s diagnostic guide or contact a technician if the issue persists to avoid further damage or safety hazards.

4.3 Excessive Vibrations or Noise

Excessive vibrations or noise may occur due to an unbalanced load or improper installation. Ensure the unit is level and placed on a sturdy floor. Redistribute clothes evenly during washing to balance the load. Check for loose drum bearings or worn-out belts, and refer to the manual for alignment and maintenance tips to resolve the issue.

4.4 Water Hammer or Fill Cycle Issues

Water hammer or fill cycle issues often result from improper water supply line connections or high water pressure. Ensure hoses are securely attached and not kinked. Installing a water hammer arrestor can reduce noise and pressure spikes. Check for blockages in water valves and verify that inlet screens are clean to maintain smooth operation and prevent damage.

Maintenance and Care Tips

Regularly clean the drain pump filter and check for lint buildup in the dryer. Run cleaning cycles and ensure proper ventilation to prevent odors and maintain efficiency.

5.1 Cleaning the Drain Pump Filter

Regularly cleaning the drain pump filter prevents blockages and ensures smooth operation. Locate the filter at the bottom of the washer, remove any debris, and rinse thoroughly with warm water. Reassemble carefully to avoid leaks. This simple maintenance step helps maintain your appliance’s efficiency and prevents potential water damage issues over time.

5.2 Managing Lint Buildup in the Dryer

Consistently cleaning the lint filter after each use is crucial for efficient drying and fire safety. Remove and empty the lint trap, ensuring no debris remains. Check the venting system regularly to prevent blockages. Proper lint management enhances dryer performance, reduces energy consumption, and minimizes the risk of mechanical issues or safety hazards over time.

5.3 Preventing Odors and Scaling

Regularly clean the washer drum and gasket to prevent mold and mildew. Run a hot water cycle with vinegar to remove detergent residue and odors. For scaling, use a water softener if needed and avoid excess detergent. This maintenance ensures fresh, clean laundry and extends the appliance’s lifespan by preventing internal damage.

Safety Precautions and Warnings

Always follow safety guidelines to avoid accidents. Ensure proper installation, regular maintenance, and adherence to electrical precautions. Avoid overloading and keep children away from operating controls for safe usage.

6.1 Electrical Safety Guidelines

Ensure the washer/dryer combo is properly grounded and connected to a dedicated 240V electrical outlet. Avoid using extension cords or overloaded circuits. Regularly inspect power cords for damage and ensure all connections are secure to prevent electrical hazards and maintain safe operation of the appliance at all times.

6.2 Proper Venting for the Dryer

Ensure the dryer vent is installed with rigid metal ducts, avoiding kinks and excessive bends for optimal airflow. Regularly clean the vent system to remove lint buildup, which can cause inefficiency or fire hazards. Proper venting directs moisture and lint outdoors, maintaining efficiency and safety, as outlined in the Frigidaire manual.

6.3 Avoiding Overloading the Unit

Avoid overloading the Frigidaire washer/dryer combo to prevent reduced performance and potential damage. Check the weight limits in the manual and balance the load size with the unit’s capacity. Overloading can cause excessive vibrations, poor drying results, and increased wear on internal components. Proper loading ensures efficient operation and extends the appliance’s lifespan.

Energy Efficiency and Eco-Friendliness

Frigidaire washer/dryer combos are ENERGY STAR certified, offering eco-friendly performance. They use advanced water and energy-saving technologies to reduce utility bills and environmental impact while maintaining superior cleaning results.

7.1 ENERGY STAR Certification

Frigidaire washer/dryer combos are ENERGY STAR certified, meeting strict energy efficiency standards set by the U.S. EPA and DOE. This certification ensures reduced energy and water consumption, lowering utility bills and environmental impact while delivering high-performance cleaning and drying cycles for eco-conscious users seeking reliable and sustainable laundry solutions.

7.2 Water and Energy-Saving Features

Frigidaire washer/dryer combos incorporate advanced water and energy-saving technologies. Features include adaptive water levels based on load size, eco-friendly wash cycles, and smart sensors that optimize energy use. These innovations help conserve resources while maintaining performance, making the appliance both efficient and environmentally responsible for modern households seeking to reduce their ecological footprint.

Product Specifications and Dimensions

Frigidaire washer/dryer combos are designed to be compact and space-efficient, with models offering capacities like 3.9 Cu. Ft washer and 5.5 Cu. Ft dryer, fitting various laundry needs.

8.1 Capacity and Size Options

Frigidaire washer/dryer combos offer various capacities, such as 3.9 Cu. Ft for washers and 5.5 Cu. Ft for dryers, catering to different laundry needs. Compact designs ensure space efficiency without compromising performance, making them ideal for apartments or small households.

8.2 Compatibility with Different Laundry Needs

Frigidaire washer/dryer combos adapt to diverse laundry requirements, offering cycles for delicate fabrics, heavy-duty loads, and quick washes. Energy-efficient designs reduce water and electricity use, while stackable options enhance space utilization, making them versatile for various household needs and preferences.

Frequently Asked Questions (FAQs)

Common user queries address issues like error codes, lint buildup, and water hammer problems. Solutions often involve checking connections, cleaning filters, and ensuring proper installation for optimal performance.

9.1 Common User Queries

Users often ask about error codes, lint buildup in the dryer, and water hammer issues. They also inquire about reset modes, load capacity, and noise during operation. Some seek advice on washer not starting or dryer not heating, while others question the functionality of specific features like delay start and spin cycles.

9.2 Solutions to Frequently Reported Problems

Solutions include checking electrical connections for power issues and ensuring balanced loads to reduce vibrations. Cleaning the drain pump filter and dryer vent can resolve water hammer and lint buildup problems. For error codes, restarting the unit or consulting the manual often helps. Regular maintenance and proper installation are also emphasized to prevent common issues.

User Reviews and Feedback

Users praise the Frigidaire Washer/Dryer Combo for its space-saving design and efficiency. Many highlight convenient features like multiple cycles and quiet operation, though some note occasional vibration issues during spin cycles.

10.1 Pros and Cons from Customer Experiences

Customers praise the Frigidaire Washer/Dryer Combo for its space-saving design, energy efficiency, and quiet operation. However, some users report issues with excessive vibrations and occasional reliability problems over time, suggesting areas for improvement in long-term performance and maintenance.

10.2 Overall Satisfaction Ratings

Customers generally rate the Frigidaire Washer/Dryer Combo highly, with models like the FLCE7522AW averaging a 7.7/10 and the FLCG7522AW at 8.5/10. Many praise its efficiency, space-saving design, and multiple wash cycles. However, some users note occasional reliability issues, affecting overall satisfaction despite its strong performance and convenient features.

Replacement Parts and Accessories

Replacement parts for Frigidaire Washer/Dryer Combos are available, including drain pumps, bearings, and lint filters. Genuine components ensure optimal performance and can be purchased from authorized dealers or online retailers.

11.1 Compatible Parts for Repairs

Compatible parts for Frigidaire Washer/Dryer repairs include drain pump motors, rear bearings, and lint filters. These components are designed to fit specific models, ensuring proper functionality. OEM parts like 4681EA2001T are recommended for reliable performance and longevity, addressing common issues such as clogs, vibrations, and lint buildup effectively.

11.2 Where to Buy Genuine Components

Genuine Frigidaire parts can be purchased through authorized dealers, official websites, or trusted retailers like Amazon. These sources ensure authenticity and compatibility, offering components such as drain pumps and bearings. Buying from reputable sellers guarantees quality and warranty coverage, ensuring repairs are done safely and effectively with approved parts.

Error Codes and Diagnostic Help

Frigidaire Washer/Dryer Combo error codes like E41, E42, and E43 indicate issues like imbalanced loads, drain problems, or overheating. The manual provides diagnostic steps to identify and resolve these errors, ensuring efficient troubleshooting and maintaining optimal appliance performance.

12.1 Understanding Error Codes

Frigidaire Washer/Dryer Combo error codes are essential for diagnosing issues. Codes like E41 indicate imbalanced loads, while E42 signals drain blockages. The manual explains each code’s meaning, helping users quickly identify problems and take corrective actions. This section is crucial for efficient troubleshooting and maintaining the appliance’s performance and longevity effectively.

12.2 Diagnostic Tools and Solutions

The manual provides diagnostic tools to identify issues, such as error code charts and troubleshooting guides. Users can resolve common problems by following step-by-step solutions. Advanced diagnostic features help detect issues like faulty sensors or clogged filters, ensuring quick fixes and maintaining appliance reliability and efficiency over time.

Common Problems and Solutions

This section addresses frequent issues like uneven loads, clogged filters, and error codes. It offers practical solutions to restore functionality, ensuring your Frigidaire Washer/Dryer Combo operates smoothly and efficiently.

13.1 Washer-Dryer Combo Specific Issues

Users often face issues like water hammer during fill cycles, lint buildup in dryers, and unbalanced loads causing vibrations. These problems can disrupt operation. Regular maintenance, proper venting, and ensuring balanced loads help mitigate these issues and ensure smooth functionality of the Frigidaire Washer-Dryer Combo. Addressing these promptly prevents long-term damage and maintains efficiency.

13.2 Long-Term Maintenance for Optimal Performance

Regular cleaning of the drain pump filter and lint buildup prevention are crucial; Ensure proper ventilation to avoid poor airflow. Check and replace worn-out parts like belts or hoses. Balance loads to prevent vibrations. Use recommended detergent amounts to avoid scaling. Schedule professional servicing annually. Record maintenance dates for tracking. These steps ensure extended appliance lifespan and efficiency.