
Safety Instructions
Always read the manual before using your Euro-Pro sewing machine. Ensure the machine is placed on a stable, flat surface away from water and children. Keep loose clothing and long hair tied back while operating. Avoid touching hot metal parts and unplug the machine before cleaning or oiling. Never use the machine near flammable materials or in humid environments. Follow all electrical safety guidelines to prevent accidents and ensure safe operation.
- Unplug the machine when not in use or during maintenance.
- Keep children and pets away from the sewing area.
- Avoid sewing over pins to prevent damage or injury.
Regularly inspect the power cord and plug for damage. Never operate the machine if it malfunctions or emits unusual noises.Refer to the manual for specific safety precautions tailored to your model.
1.1 Key Safety Precautions
Always read the manual before using your Euro-Pro sewing machine. Keep children and pets away while operating. Avoid wearing loose clothing or jewelry that may get caught. Never touch hot metal parts or sew over pins. Ensure the machine is placed on a stable, flat surface away from water and flammable materials.
- Unplug the machine during maintenance or when not in use.
- Avoid sewing in humid environments or near open flames.
- Regularly inspect the power cord and plug for damage.
Refer to the manual for model-specific safety guidelines to ensure safe operation.
1.2 Electrical Safety Guidelines
Ensure your Euro-Pro sewing machine is used with a properly grounded power source. Avoid overloading circuits or using damaged cords. Keep the machine away from water to prevent electrical shocks. Never expose the device to moisture or extreme temperatures. Always unplug it during cleaning or maintenance to ensure safety.
- Use only the power cord provided with the machine.
- Check for frayed cords or plugs before use;
- Store the machine in a dry, cool place when not in use.
Follow all electrical safety precautions to prevent accidents and prolong the machine’s lifespan.
Understanding Your Sewing Machine
Familiarize yourself with the Euro-Pro sewing machine’s principal parts, including the needle, bobbin, and stitch selectors. Explore its accessories like presser feet and extension tables. Learn about stitch options and advanced features to maximize your sewing experience.
2.1 Principal Parts of the Machine
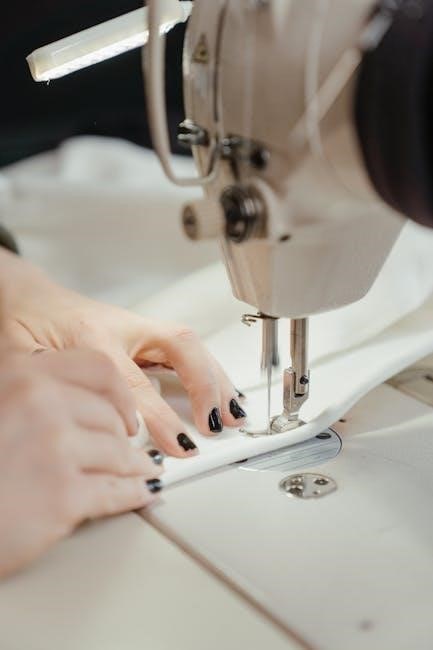
The Euro-Pro sewing machine features key components like the spool pins, take-up lever, and stitch length regulator. The tension dials control thread tightness, while the presser foot lifts for fabric placement. The bobbin area and needle bar are essential for stitching. Understanding these parts ensures proper operation and maintenance.
- Spool pins hold the thread spools.
- The take-up lever regulates thread tension.
- Stitch length and width regulators customize stitches.
- The presser foot secures fabric during sewing.
2.2 Accessories and Additional Features
Your Euro-Pro sewing machine comes with essential accessories like various presser feet for different fabrics and tasks. Additional features include a needle threader, bobbins, and a free-arm design for sewing cuffs and sleeves. Optional attachments like a quilting table and carrying case enhance functionality and portability, while an LED light provides better visibility for intricate stitches.
- Presser feet for zigzag, zipper, and buttonhole stitching.
- Built-in needle threader for easy threading.
- Free-arm design for hard-to-reach areas.
- Optional quilting table for larger projects.
Setting Up Your Sewing Machine
Place the Euro-Pro sewing machine on a flat, stable surface. Thread the machine correctly, wind the bobbin, and insert it as per instructions. Ensure thread tension is properly regulated for optimal stitching performance.
3.1 Threading the Machine
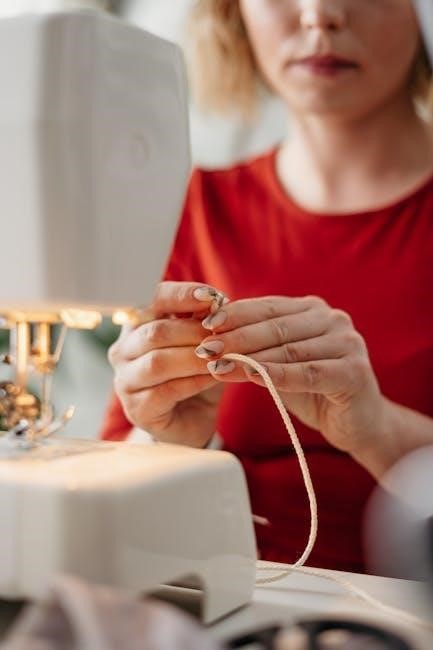
To thread your Euro-Pro sewing machine, lift the spool pin and place the thread on it. Follow the threading diagram on the machine, guiding the thread through the tension discs and take-up lever. Gently pull the thread to seat it properly in the tension spring. Finally, insert the thread through the needle eye from front to back. Ensure the thread is not twisted and lies flat for smooth operation.
- Always use the correct thread type for your fabric.
- Keep the thread taut but not overly tight during threading.
Refer to the manual for specific threading guidance tailored to your model.
3.2 Winding and Inserting the Bobbin
To wind the bobbin, place it on the winder and guide the thread through the bobbin tension spring. Wind slowly, keeping the thread taut, and stop when the bobbin is evenly filled. Trim the excess thread, then insert the bobbin into the bobbin case, ensuring it aligns with the machine’s mechanism.
- Use the correct bobbin type for your Euro-Pro model.
- Hold the thread taut while winding to avoid loose wraps.
Refer to your manual for specific bobbin insertion instructions tailored to your machine.
Basic Sewing Operations
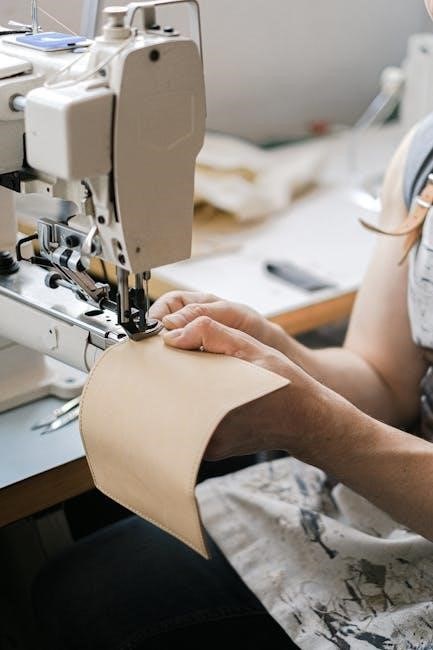
Start with a straight stitch for basic sewing. Place fabric under the needle, align edges, and gently guide material. Use the machine’s edge guide for straight seams. Backstitch at the beginning and end for secure seams. Keep the work area clear to avoid obstacles while sewing. Always maintain steady fabric movement for consistent stitch quality.
- Begin with a straight stitch for simple projects.
- Guide fabric smoothly to ensure even stitching.
4.1 Selecting the Right Stitch
Select the appropriate stitch based on fabric type and project needs. Use straight stitches for woven fabrics and zigzag for stretchy materials. Decorative stitches add embellishments. Choose the correct presser foot for optimal results. Adjust stitch length and width as needed. Ensure proper thread tension for consistent stitching quality. Always test stitches on scrap fabric first.
- Straight stitch: Ideal for woven fabrics and straight seams.
- Zigzag stitch: Perfect for stretchy fabrics and preventing fraying.
4.2 Regulating Thread Tension
Proper thread tension ensures even stitching and prevents fabric puckering. Adjust the tension discs on the machine to balance the upper and bobbin threads. Turn the dials to tighten or loosen the tension, then test on scrap fabric. Incorrect tension can cause loose stitches or fabric distortion.
- Always check the bobbin area for thread tangles before adjusting tension.
- Avoid over-tightening, as it may damage the machine or fabric.
For optimal results, ensure the thread flows smoothly and evenly through the machine. Regularly clean the tension discs to maintain consistent stitching quality. Test stitches on scrap fabric before starting your project to confirm the tension is correct.
4.3 Basic Sewing Techniques
Start with aligning fabric edges and using the machine’s edge guide for straight stitching. Place the fabric under the presser foot, ensuring it feeds smoothly. Use a steady pace and maintain consistent fabric tension. For seams, backstitch at the beginning and end for durability. Practice on scrap fabric to master control and alignment.
- Always pre-wash fabric to remove sizing and ensure accurate measurements.
- Use the correct presser foot for the type of stitch or fabric.
- Keep the work area well-lit to monitor stitching quality.
These techniques ensure professional-looking results and extend the life of your Euro-Pro sewing machine.
Advanced Features and Techniques
Explore advanced stitching options, including decorative patterns and automatic buttonholes. Utilize optional presser feet for specialized tasks like quilting or zippers. These features expand your creative possibilities.
5.1 Using Special Stitches and Patterns
Your Euro-Pro sewing machine offers a variety of special stitches and patterns for decorative sewing. Choose from embroidery, quilting, or heirloom stitches to enhance your projects. Refer to the stitch chart in your manual to explore options like floral patterns, zigzag, or stretch stitches. Adjust stitch length and width for custom results.
- Select the desired stitch using the control panel or dial.
- Use the stitch chart to identify patterns suitable for your fabric type.
- Experiment with decorative threads for unique effects.
Optional presser feet, like the zipper or quilting foot, can expand your creative possibilities. Always test stitches on scrap fabric before sewing your final project to ensure optimal results.
5.2 Sewing Buttonholes
Your Euro-Pro sewing machine simplifies buttonhole creation with its automatic feature. Position fabric, select the buttonhole stitch, and use the buttonhole foot for precise results. Measure and mark the desired length, then let the machine sew perfect buttonholes effortlessly. Use stabilizing material for smooth stitching and test on scrap fabric first.
- Mark the buttonhole length on fabric before sewing.
- Use the buttonhole foot for accurate stitching.
- Carefully cut open buttonholes with sharp scissors.
- Choose the right foot for your project to ensure professional results.
- Always unplug the machine before changing presser feet.
- Experiment with different feet to expand your sewing capabilities.
- Thread breakage: Check for tangles or incorrect threading.
- Bobbin issues: Ensure it’s properly seated and aligned.
- Tension problems: Adjust settings as per fabric type.
- Incorrect threading: Re-thread the machine following manual guidelines.
- Improper tension: Adjust upper and bobbin thread tension as needed.
- Lint buildup: Clean the machine’s interior regularly to prevent jams.
- Wrong needle: Use the appropriate needle size for your fabric type.
- Check bobbin alignment and seating.
- Wind thread evenly, avoiding overfilling.
- Clean the bobbin case frequently.
- Use the correct bobbin size for your machine.
- Lubricate moving parts periodically.
- Remove lint to prevent jams.
- Inspect the power cord regularly.
- Check the machine’s label for the exact model number.
- Use the search bar on manual download sites for quick results.
- Visit ManualsLib for a wide range of Euro-Pro manuals.
- Use the search function to filter by model number.
- Bookmark frequently used pages for easy access.
- Highlight important steps for future reference.
- What fabrics can I sew with my Euro-Pro machine?
- How do I replace the sewing needle?
- Does my machine require oiling?
- Cotton and polyester blends are ideal for everyday sewing.
- Denim and heavy fabrics require a heavy-duty needle.
- Silk and delicate fabrics need a sharp, thin needle.
- Turn off and unplug the machine for safety.
- Pull the old needle straight down to remove it.
- Insert the new needle, aligning the flat side correctly.
- Use only sewing machine oil for optimal performance.
- Apply oil to the bobbin case and hook mechanism.
- Refer to your manual for specific oiling intervals.
- Regularly clean and oil the machine to maintain smooth operation.
- Choose the appropriate stitch length and width for your fabric type.
- Keep the bobbin evenly wound to prevent thread bunching.
5.3 Using Optional Presser Feet
Enhance your sewing experience with optional presser feet designed for specific tasks. Use the zipper foot for precise zipper installation, the walking foot for heavy fabrics, and the blind hem foot for invisible hems. Attach the foot by snapping it onto the machine’s presser foot holder. Refer to your manual for model-specific compatibility and installation instructions.
Troubleshooting Common Issues
Identify and resolve common issues like thread breakage, bobbin jams, or uneven stitching. Check thread tension, ensure proper bobbin insertion, and clean lint regularly. Refer to the manual for specific solutions to maintain smooth operation and extend machine longevity.
6.1 Causes and Remedies for Thread Breakage
Thread breakage often occurs due to incorrect threading, improper tension, or using the wrong needle size. Ensure the thread is guided correctly through the machine’s tension discs and take-up lever. Check for lint buildup in the bobbin area and clean regularly. Adjust tension settings according to fabric type and thread weight. If issues persist, consult the manual for specific troubleshooting steps.
6.2 Solving Bobbin-Related Problems
Bobbin issues often arise from improper insertion or uneven winding. Ensure the bobbin is securely placed in the case and aligned correctly. Avoid overfilling the bobbin, as this can cause tangling. Regularly clean lint from the bobbin area to prevent jams. If the bobbin doesn’t rotate smoothly, refer to the manual for specific adjustment steps.
6.3 Machine Maintenance Tips
Regular maintenance ensures optimal performance and extends the machine’s lifespan. Oil moving parts as instructed in the manual to reduce friction. Clean lint and debris from the bobbin case and feed dogs frequently. Check the power cord for damage and replace if necessary. Perform routine inspections after each project to maintain functionality.
Downloading and Accessing Manuals
Visit ManualsLib to download over 60 Euro-Pro sewing machine manuals for free. Models like 372, 373, and 7500 are available in PDF format for easy access.
7.1 Finding the Right Manual for Your Model
To find the correct manual for your Euro-Pro sewing machine, visit ManualsLib and search by model number. Popular models include 372, 373, 374, and 7500. Ensure the manual matches your machine’s specific features for accurate instructions and troubleshooting. Always verify the model number before downloading to avoid mismatches.
7.2 Sources for Free PDF Downloads
Download free Euro-Pro sewing machine manuals from trusted sites like ManualsLib, ManualsOnline, or SewingPartsOnline. These platforms offer PDF manuals for various models, including 372, 373, and 7500. Ensure the manual matches your machine’s model number for accurate instructions. Always verify the source’s reliability to avoid downloading incorrect or incomplete files.
7.3 Tips for Navigating the Manual
Use the table of contents to quickly locate sections like safety instructions or troubleshooting. Search by model number for specific guidance. Pay attention to diagrams and symbols for clarity. Refer to the troubleshooting section for common issues and solutions. Regularly review maintenance tips to keep your machine functioning optimally.
Frequently Asked Questions
Common questions about Euro-Pro sewing machines include compatible fabrics, needle replacement, and oiling requirements. Refer to the manual for model-specific guidance and troubleshooting tips.
8.1 Compatible Fabrics and Materials
Euro-Pro sewing machines are versatile and suitable for a wide range of fabrics, including cotton, polyester, denim, silk, and multiple layers. They can handle heavier materials like canvas and upholstery with the right needle and settings. Always use the appropriate needle type and thread for the fabric to ensure optimal results.
For thick materials, consider using a walking foot or Teflon foot for smooth operation.
8.2 Changing the Needle
To change the needle on your Euro-Pro sewing machine, first turn off the power and unplug it. Pull the old needle downward gently. Insert a new needle, ensuring it clicks into place. Use a screwdriver to secure it if required. Always use a needle suitable for your fabric type.
Use universal or sharp needles for general sewing; heavy-duty for thick fabrics; Refer to your manual for model-specific instructions.
8.3 Oil Requirements for the Machine
Regular oiling is essential for smooth operation. Use high-quality sewing machine oil. Apply a few drops to the bobbin area and hook race. Avoid over-lubrication to prevent dust buildup. Oil after every 10 hours of use or as specified in your manual.
User Tips and Best Practices
Organize your sewing supplies and maintain a clean workspace. Regularly inspect and replace worn parts, store the machine in a dry area, and keep the manual accessible for easy reference.
and Resources
9.1 Optimizing Stitch Quality
Ensure proper thread tension by adjusting the dials as per the manual. Use the correct needle type for your fabric to prevent breakage. Maintain consistent fabric layers and align edges carefully. Test stitches on scrap fabric before sewing your final project to achieve even, professional-looking results.