Manuals

n54 manual transmission

N54 Manual Transmission: A Comprehensive Guide

Navigating the complexities of the N54 manual transmission requires understanding potential issues, from gear slip and ratio codes to controller relearning procedures.

The N54 manual transmission, found in BMW 335i and 135i models, is a robust but sometimes problematic unit. It’s known for its ability to handle increased power, making it popular for modifications. However, its age and the stresses of performance driving often lead to issues. Many owners face challenges with gear slip, particularly in 3rd and 4th gear, indicated by ratio codes like P0741 and P0715.

Understanding the transmission’s intricacies is crucial for both maintenance and repair. Swapping to an N55 transmission is a common consideration, though cost differences exist. Clutch compatibility is also a key factor when considering engine swaps or upgrades. Proper maintenance, including fluid changes and addressing cooling system issues, can significantly extend the transmission’s lifespan. The transmission controller often requires relearning after component changes, and sometimes even specific programming, to function optimally.

Common N54 Transmission Problems

N54 manual transmissions are prone to several recurring issues, often stemming from age and increased power demands. Gear slip, particularly in 3rd and 4th, is a frequently reported problem, manifesting as hesitation or a loss of power during acceleration. This often triggers diagnostic trouble codes related to gear ratio. Internal wear, specifically within the synchronizers, contributes to difficulty shifting and grinding noises.

Sleeves and solenoids are common failure points, impacting smooth gear changes. The mechatronics unit, responsible for controlling transmission functions, can also malfunction. Fluid contamination and insufficient fluid levels exacerbate these problems. Some owners experience issues even after addressing these components, highlighting the need for transmission controller relearning or reprogramming. Considering a manual swap becomes appealing when repair costs escalate, though clutch compatibility must be verified.

Identifying Transmission Issues: Symptoms

Recognizing the early signs of N54 transmission trouble is crucial for preventing further damage. Obvious symptoms include difficulty shifting into specific gears, accompanied by grinding or clunking noises. Gear slip, where the engine revs without a corresponding increase in speed, is a significant indicator. Hesitation during acceleration, particularly in higher gears, also points to potential problems.

More subtle signs include unusual vibrations or a whining sound emanating from the transmission. Diagnostic trouble codes (DTCs), such as P0741 or P0715, will illuminate the check engine light. A noticeable change in shift quality – becoming harsher or smoother than usual – warrants investigation. Fluid leaks around the transmission area should never be ignored. Ignoring these symptoms can lead to complete transmission failure and costly repairs.

Gear Slip and Ratio Codes (P0741, P0715 etc.)

Gear slip and associated ratio codes are common indicators of N54 transmission issues, often signaling internal mechanical or hydraulic problems. P0741 typically indicates a torque converter clutch circuit malfunction, while P0715 points to a pressure control solenoid ‘B’ performance issue. However, these codes can manifest differently in manual transmissions, often relating to solenoid function and pressure regulation.

Experiencing 3-4 gear slip, as reported by some N54 owners, suggests wear or failure within the transmission’s internal components. These codes frequently necessitate a thorough inspection of the transmission sleeves, solenoids, and mechatronic unit. A transmission controller relearn, or even reprogramming, may be required after component replacement. Addressing these codes promptly prevents escalating damage and potential complete transmission failure. Accurate diagnosis is key, as simply replacing parts without addressing the root cause often proves ineffective.

The Importance of Transmission Controller Relearning

After any significant N54 transmission work, particularly solenoid, sleeve, or mechatronic unit replacement, transmission controller relearning is absolutely crucial for optimal performance. The transmission control unit (TCU) adapts to the unique characteristics of each transmission and its components. Replacing parts alters these characteristics, requiring the TCU to recalibrate.

Without relearning, the transmission may exhibit harsh shifting, incorrect gear selection, or continued slip issues, even with new components installed. As one Reddit user noted, this “alone could be your current problem.” Relearning allows the TCU to establish new parameters for optimal pressure regulation and shift timing. In some cases, simple relearning isn’t enough, and specific TCU programming may be necessary. Ignoring this step can negate the benefits of repairs and lead to frustrating, unresolved transmission problems.

Manual Transmission Swap Considerations

For N54 owners facing repeated transmission failures, a manual transmission swap presents a viable, and often cost-effective, alternative. Compared to the N55 transmissions, N54 manual transmission units are significantly cheaper, making them an attractive option. However, several factors demand careful consideration.

Clutch compatibility is paramount; ensuring the clutch is appropriately rated for the N54’s power output and fits the bellhousing is essential. A mismatched clutch can lead to slippage or damage. Furthermore, the swap requires addressing potential differences in driveshaft lengths and shifter linkages. Some users have reported synchro issues requiring shimming for proper gear engagement. While potentially complex, a successful manual swap can transform the driving experience and offer a more reliable long-term solution, especially for tuned or modified N54 platforms.

Cost Comparison: N54 vs. N55 Transmissions

When considering a transmission replacement or swap, the cost difference between N54 and N55 units is substantial. The N55 transmissions consistently command a higher price on the used market, often significantly exceeding the cost of comparable N54 transmissions. This price disparity stems from the N55’s greater overall robustness and demand, particularly among those upgrading from an N54 platform.

A used N54 manual transmission can often be sourced for a fraction of the price of an N55 equivalent. This makes the N54 a more budget-friendly option for those seeking a manual conversion or a replacement for a failed N54 transmission. However, it’s crucial to factor in potential rebuild costs or the need for component upgrades to ensure long-term reliability, especially if the N54 unit has high mileage or a questionable history.

Clutch Compatibility for N54 Swaps

Successfully executing an N54 manual transmission swap hinges on selecting a compatible clutch system. The N54 engine’s torque output necessitates a clutch capable of handling the power, and simply fitting a clutch within the bellhousing isn’t sufficient. Ensuring proper clamping force and disc material are critical for longevity and performance.

Standard clutches designed for the 328i may prove inadequate for the N54’s increased power. Upgrading to a performance clutch specifically designed for the N54 or a similar high-torque application is highly recommended. Considerations include sprung vs. solid hub designs, disc diameter, and friction material. Proper clutch selection prevents slippage and premature wear, safeguarding the transmission and maximizing power transfer.

Careful research and consultation with experienced N54 swap builders are essential to determine the optimal clutch setup for your specific power goals and driving style.

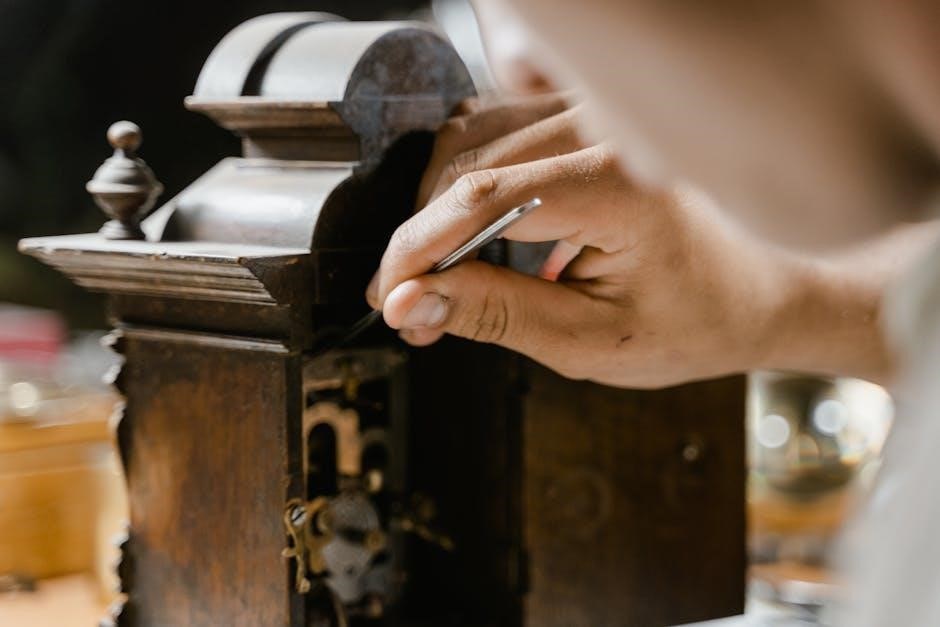
N54 Transmission Rebuild: Key Components

A comprehensive N54 transmission rebuild demands meticulous attention to several key components. Beyond the standard wear items, a thorough inspection and potential replacement of internal parts are crucial for restoring optimal functionality. Central to the rebuild process are the sleeves and solenoids, often requiring replacement to address common slipping issues, particularly in 3rd and 4th gear.

The mechatronics unit, responsible for electronic control of the transmission, is another critical area. Diagnosis and potential replacement are often necessary, alongside a fluid and filter change. Don’t overlook the synchros, which can exhibit issues requiring shimming for proper engagement.

Furthermore, the transmission pump’s functionality must be verified, ensuring adequate fluid flow throughout the system. A rear main seal replacement is highly advisable during the rebuild, preventing potential leaks post-installation.

Sleeves and Solenoids: Replacement and Function

The sleeves and solenoids within the N54 transmission are frequently implicated in common failure points, particularly manifesting as gear slip. These components play a vital role in directing hydraulic fluid to engage the appropriate gears, and wear or damage can disrupt this process. Replacement is often a proactive step during a transmission service, especially when experiencing ratio codes like P0741 or P0715.

Solenoids act as electronically controlled valves, regulating fluid flow based on signals from the transmission control unit. Sleeves, meanwhile, provide a sealing surface for the solenoids. Worn sleeves can lead to reduced pressure and imprecise shifting.

A complete fluid and filter change should always accompany sleeve and solenoid replacement, ensuring optimal lubrication and preventing contamination. It’s crucial to note that simply replacing these components may not fully resolve issues; transmission controller relearning or reprogramming might be necessary.

Mechatronics Unit: Diagnosis and Replacement

The mechatronics unit is the brain of the N54 transmission, integrating hydraulic control with electronic management. It’s a common point of failure, often linked to slipping gears and erratic shifting behavior. Diagnosis requires careful consideration, as symptoms can mimic other issues. Scanning for trouble codes is a crucial first step, but a thorough assessment of fluid condition and solenoid function is also necessary.

Replacement of the mechatronics unit often necessitates transmission controller relearning or even specific programming. The unit houses vital sensors and controls, and a simple swap may not guarantee proper operation without adaptation to the vehicle’s specific parameters.

Given the numerous revisions of the N54 mechatronics unit, ensuring compatibility is paramount. A faulty unit can cause a cascade of problems, making accurate diagnosis and a quality replacement essential for a reliable repair.

Transmission Fluid and Filter Changes

Regular transmission fluid and filter changes are vital for the longevity of the N54 manual transmission. Contaminated fluid can lead to premature wear of internal components and contribute to shifting problems. A fluid change should be performed as part of any transmission service, alongside solenoid and sleeve replacements.

Selecting the correct fluid is critical; consult your vehicle’s documentation or a trusted BMW specialist for recommended fluid types. Using the wrong fluid can cause compatibility issues and damage the transmission.

Fluid level checks are essential to ensure proper lubrication and operation. Maintaining the correct fluid level prevents overheating and ensures smooth shifting. Consistent maintenance, including fluid and filter changes, is a proactive step towards preventing costly repairs and maximizing the lifespan of your N54 transmission.

Recommended Fluid Types for N54 Manual Transmissions

Choosing the correct transmission fluid is paramount for the N54 manual transmission’s health and performance. BMW originally specified a specific fluid, but modern alternatives offer improved protection and compatibility. It’s crucial to avoid generic fluids not designed for BMW’s demanding specifications.

Many enthusiasts recommend using a high-quality synthetic GL-4 gear oil meeting BMW’s standards. Red Line MT-90 and Motul Gear 300 are frequently cited as excellent choices, offering superior shear stability and protection against wear. Always verify compatibility with your specific transmission model year.

Avoid GL-5 fluids as they can corrode the brass synchronizers within the N54 transmission. Prioritize fluids specifically formulated for BMW transmissions to ensure optimal performance and longevity. Regular fluid changes with the correct fluid type are a cornerstone of preventative maintenance.

Fluid Level Checks and Maintenance

Regularly monitoring the N54 manual transmission fluid level is vital for preventing damage and ensuring smooth operation. Unlike some automatic transmissions, checking the fluid level isn’t always straightforward, often requiring specific procedures and tools.

Typically, fluid level is checked with the transmission at operating temperature, following BMW’s specified fill plug location. The procedure often involves removing a fill plug and observing fluid expulsion while adding fluid until it begins to overflow. Always consult the BMW service manual for precise instructions specific to your model year.

Alongside level checks, routine fluid and filter changes are essential. A general guideline is to change the fluid every 30,000-60,000 miles, or more frequently under severe driving conditions. Maintaining proper fluid levels and adhering to a regular maintenance schedule will significantly extend the life of your N54 transmission.

Addressing Transmission Cooling System Issues

While often overlooked, the transmission cooling system plays a crucial role in the longevity of the N54 manual transmission. Overheating can lead to fluid breakdown, reduced lubrication, and ultimately, component failure. Identifying and addressing cooling system issues promptly is therefore essential.

Potential problems include clogged transmission cooler lines, a failing transmission cooler itself, or even issues with the radiator affecting overall cooling efficiency. If fluid isn’t moving within the system, suspect a blockage or pump issue. Inspect cooler lines for kinks or damage.

Regularly check for leaks around the transmission cooler and lines. Flushing the cooling system periodically can help remove debris and maintain optimal heat transfer. Monitoring transmission fluid temperature during spirited driving can provide early warning signs of cooling system inadequacy.

Rear Main Seal Replacement During Transmission Work

When undertaking any significant work on the N54 manual transmission, replacing the rear main seal is highly recommended. Accessibility is maximized with the transmission removed, making this a cost-effective preventative measure. Ignoring this can lead to oil leaks and potential engine damage down the line.

The rear main seal prevents oil from leaking where the engine and transmission meet. It’s a common failure point, especially on higher-mileage vehicles. Replacing it during transmission work saves considerable labor costs compared to addressing a leak later.

Ensure you use a high-quality seal and proper installation techniques; Lubricate the new seal before installation to prevent damage. Inspect the crankshaft surface for any scoring or damage that could compromise the seal’s effectiveness. This proactive step contributes significantly to long-term reliability.

Synchro Issues and Shimming

Synchro problems are a frequent concern with the N54 manual transmission, often manifesting as difficulty engaging specific gears or grinding noises. Worn synchronizers prevent smooth gear changes, impacting driving enjoyment and potentially causing transmission damage. Shimming plays a crucial role in addressing these issues.

Shimming involves adjusting the engagement point of the synchronizers. Incorrect shimming can lead to incomplete engagement or, conversely, excessive drag. Experienced technicians carefully measure and adjust shims to optimize synchronizer performance. A common scenario involves shimming out farther, but as noted, this can prevent gear engagement if taken too far.

Proper diagnosis is essential before attempting any shimming. Identifying the affected gear and understanding the specific symptoms guides the shimming process. Careful attention to detail and precise measurements are vital for successful results, restoring smooth and reliable gear changes.

High-Performance N54 Automatic Transmission Kits

While focusing on manual transmissions, it’s important to acknowledge the availability of high-performance automatic transmission kits for the N54 platform. These kits cater to enthusiasts seeking faster shift times and increased durability for demanding applications, like drag racing or track days.

These kits often include upgraded clutches, reinforced gears, and a modified torque converter. The goal is to minimize power loss during shifts and withstand higher horsepower levels. Some kits boast zero loss of boost pressure during gear changes, maximizing performance.

These kits are designed for builds aiming for substantial power gains, even exceeding 1200 whp. However, it’s crucial to remember that these are automatic transmission solutions; For those committed to a manual swap, the N54 transmission itself is relatively inexpensive compared to N55 units, offering a cost-effective alternative.

Transmission Pump Diagnosis

Diagnosing a failing transmission pump is critical when addressing N54 transmission issues, even within a manual swap context, as understanding fluid dynamics is key. A properly functioning pump ensures adequate fluid pressure for smooth shifting and overall transmission operation. Initial checks involve verifying fluid levels – a decreasing level with the engine running suggests pump activity, while a higher level when off indicates potential issues.

If fluid isn’t circulating, suspicion immediately falls on the pump or a blockage within the transmission cooling system. A thorough inspection should rule out any obstructions in the lines or cooler. Further diagnosis may require pressure testing at various points within the transmission to pinpoint a weak or failing pump.

Remember that a failing pump can cause significant damage to other transmission components, so prompt attention is essential. Addressing this issue is vital during a rebuild or swap to ensure long-term reliability.

Troubleshooting Fluid Flow Problems

Addressing fluid flow problems within the N54 transmission is paramount for optimal performance and longevity, even when considering a manual transmission swap. Restricted fluid flow can manifest as sluggish shifts, slipping gears, or complete transmission failure. Initial troubleshooting steps involve inspecting the transmission fluid cooler lines for kinks, blockages, or damage. A clogged cooler can significantly impede fluid circulation.

Next, examine the transmission filter for debris, as a dirty filter restricts flow. Internal blockages within the transmission itself, such as within the valve body or solenoids, can also cause issues. Pressure testing at various points within the system helps pinpoint the location of the restriction.

Remember to check for a failing transmission pump, as it’s a primary source of fluid flow. Proper diagnosis and repair of fluid flow problems are crucial for preventing further damage and ensuring smooth operation.

Resources for N54 Transmission Repair

Successfully tackling N54 transmission repairs demands access to reliable information and quality parts. Online BMW forums, such as BimmerFest, provide invaluable insights from experienced owners and mechanics, often detailing specific issues and solutions related to the N54 manual transmission. Reddit’s r/MechanicAdvice and r/E90 are also excellent platforms for seeking advice and sharing experiences.

JustAnswer connects you with qualified mechanics who can offer expert guidance on diagnosing and repairing transmission problems. JB4tech.com specializes in N54 performance upgrades and may offer resources related to transmission components.

For parts, reputable BMW parts suppliers are essential. Consider specialized transmission rebuild kits that include sleeves, solenoids, and seals. Access to wiring diagrams and technical service bulletins (TSBs) is also crucial for accurate repairs.

Preventative Maintenance for N54 Manual Transmissions

Proactive maintenance is key to extending the life of your N54 manual transmission and avoiding costly repairs. Regular transmission fluid and filter changes are paramount; adhering to BMW’s recommended service intervals, or even shortening them for aggressive driving, is advisable. Utilize recommended fluid types specifically designed for the N54 transmission to ensure optimal lubrication and performance.

Inspect the transmission cooling system for leaks or blockages, as overheating can significantly damage internal components. Pay close attention to synchro performance, addressing any grinding or difficulty shifting promptly.

When performing other maintenance, such as clutch replacement, always replace the rear main seal to prevent leaks. Consider a transmission controller relearn after any significant service to ensure smooth operation. Consistent monitoring and preventative measures will contribute to a reliable and enjoyable driving experience.

intex sand filter manual

Intex Sand Filter Manual: A Comprehensive Guide

Navigating pool maintenance can be complex, but this manual simplifies Intex sand filter operation. Troubleshooting issues like sand leaks or pressure fluctuations is covered,
along with setup and seasonal care. This guide ensures a sparkling clean pool all season long!

Understanding Your Intex Sand Filter

Your Intex sand filter is the heart of your pool’s cleaning system, efficiently removing debris and impurities to maintain crystal-clear water. Unlike cartridge filters, sand filters utilize a bed of specialized sand to trap particles as water passes through. This process provides excellent filtration and requires less frequent cleaning compared to other types.

However, understanding its components and operation is crucial for optimal performance. The filter consists of a tank, pump, valves, and pressure gauge. The pump circulates water, the valves control flow direction for filtration and backwashing, and the pressure gauge indicates filter condition.

A key aspect is recognizing that a properly functioning sand filter shouldn’t release sand into the pool. If you observe sand escaping, it signals a problem requiring immediate attention, potentially involving disassembly and inspection as suggested by online resources. Regular maintenance, including backwashing and eventual sand replacement, is vital for continued efficiency. Familiarizing yourself with these elements will empower you to keep your pool pristine.

What is a Sand Filter and Why Use One?

A sand filter is a water purification system that uses a bed of sand to remove impurities. Water is pumped through the sand, trapping particles like dirt, leaves, algae, and even small insects. This makes it a highly effective method for keeping pool water clean and healthy. Compared to cartridge filters, sand filters offer a larger capacity for holding debris, reducing the frequency of cleaning.

Why choose a sand filter? They are known for their efficiency and relatively low maintenance. While cartridge filters require regular cleaning or replacement, sand filters only need periodic backwashing – a process of reversing the water flow to flush out accumulated dirt. This makes them a convenient option for pool owners.

However, it’s important to note that a functioning sand filter should not release sand into the pool. Any sand escaping indicates a problem needing immediate attention. Understanding this fundamental aspect is key to maintaining a clean and safe swimming environment.

Intex Sand Filter Models: An Overview

Intex offers a range of sand filter models designed to accommodate various pool sizes and needs. Popular options include the Intex 28637EG Sand Filter, suitable for smaller above-ground pools, and larger capacity models like the 28643EG for more substantial setups. These filters typically feature a six-function control valve, allowing for filtering, backwashing, rinsing, waste, recirculate, and closed system options.

Key differences between models lie in their flow rates (gallons per minute — GPM) and the amount of sand they can hold. Higher GPM ratings are ideal for larger pools requiring faster water turnover. Sand capacity directly impacts how long the filter can operate efficiently before needing backwashing;

It’s crucial to select a model appropriate for your pool’s volume. Using an undersized filter will result in inefficient cleaning, while an oversized filter may be unnecessarily expensive. Checking Intex’s official specifications and comparing them to your pool’s requirements is highly recommended before purchasing.

Installation and Setup

Proper installation is vital for optimal performance. Carefully position the filter near the pump and pool, ensuring secure plumbing connections. Following the manual’s diagrams is essential for a trouble-free setup!

Correct Placement of the Filter

Strategic filter placement significantly impacts system efficiency and longevity. Choose a level, stable surface capable of supporting the filter’s weight when filled with water and sand – this is crucial to prevent instability and potential damage. Proximity to both the pool pump and the pool itself is paramount, minimizing plumbing runs and reducing potential friction loss, which can affect water flow.

Ideally, locate the filter in a well-ventilated area, shielded from direct sunlight and extreme weather conditions. Prolonged sun exposure can degrade plastic components over time, shortening the filter’s lifespan. Protection from freezing temperatures is also vital, as ice formation can cause cracks and leaks. Ensure easy access for maintenance tasks like backwashing, cleaning, and sand replacement.

Consider the proximity to a grounded electrical outlet for the pump, adhering to all local electrical codes. Avoid placing the filter in a location prone to flooding or standing water. A concrete pad or gravel base provides a stable and well-drained foundation. Finally, leave sufficient space around the filter for comfortable operation and inspection.

Plumbing Connections: Step-by-Step

Establishing secure plumbing connections is vital for a leak-free and efficient filtration system. Begin by applying Teflon tape to all threaded connections to ensure a watertight seal. Connect the pump’s outlet to the filter’s inlet, ensuring correct flow direction – typically indicated by arrows on the filter housing. Next, attach the filter’s outlet to the pool’s return line, again verifying proper flow.

Use appropriate sized hoses and clamps, tightening them securely but avoiding over-tightening, which can damage the fittings. Inspect all connections for leaks immediately after initial setup and after each maintenance procedure. If leaks are detected, tighten the clamps or reapply Teflon tape as needed.

Pay close attention to the orientation of the multiport valve, ensuring it’s aligned correctly for proper operation. Double-check that all valves are in the closed position before starting the pump. A vacuuming device attached to the system may diminish flow, so remove it to check pressure readings.

Sand Type and Quantity Requirements

Selecting the correct sand is crucial for optimal filter performance and longevity. Intex sand filters require a specific grade of silica sand – typically #20 silica sand – with a grain size between 0.45 and 0.85 millimeters. Avoid using play sand, construction sand, or sand with clay content, as these can clog the filter and reduce its efficiency.

The quantity of sand needed varies depending on the filter model. Refer to your filter’s specifications for the exact amount. Generally, Intex sand filters require between 75 and 100 pounds of sand. Ensure the sand is clean and dry before adding it to the filter tank.

Fill the tank to the designated level, usually indicated by a fill line inside the tank. Proper sand loading is essential for effective filtration and preventing damage to the filter system. Regularly inspect the sand for clumping or channeling, which can indicate the need for cleaning or replacement.

Operation and Maintenance

Consistent upkeep ensures peak performance. Regular backwashing removes debris, maintaining flow. Monitor pressure gauges and operate in timer or manual modes for optimal water clarity and longevity.

Initial Filter Startup Procedure

Before your first use, a careful startup is crucial for optimal performance and longevity of your Intex sand filter system. Begin by ensuring all plumbing connections are secure and leak-free, as detailed in the installation section. Next, slowly fill the filter tank with water, allowing it to saturate the sand bed completely. This prevents damage during initial operation.

Once the sand is fully saturated, prime the pump according to the pump’s manual – this typically involves filling the pump housing with water. Turn on the pump and observe for any leaks around the filter connections or the pump itself. Allow the system to run for at least 24 hours continuously. This initial run circulates the water, settles the sand, and helps establish proper filtration.

During this 24-hour period, monitor the pressure gauge. It will likely fluctuate as the sand settles. After the initial run, perform a backwash cycle (refer to the ‘Backwashing’ section) to remove any fine particles dislodged during the process. Following the backwash, resume normal operation and continue to monitor the pressure gauge for stable readings within the recommended operating range. Regularly check the system for any unusual noises or vibrations, indicating potential issues.

Normal Operating Pressure Ranges

Maintaining the correct pressure is vital for efficient filtration and preventing damage to your Intex sand filter system. A typical, healthy operating pressure for most Intex sand filters falls within the range of 8-12 PSI (pounds per square inch) when the pump is running normally. This range indicates that water is flowing freely through the sand bed without excessive restriction.

However, pressure can fluctuate based on several factors, including the cleanliness of the sand, the flow rate, and the presence of debris. A slight increase in pressure is normal as the sand traps dirt and particles. If the pressure rises above 18-20 PSI, it signals that the filter is becoming clogged and requires backwashing. Conversely, a pressure reading consistently below 8 PSI may indicate a leak in the system or insufficient pump power.

Regularly monitoring the pressure gauge allows you to proactively identify potential problems. Remember to always turn off the pump before opening the filter housing for inspection or maintenance. Consistent pressure within the recommended range ensures optimal water clarity and extends the life of your filter media.

Backwashing: When and How To

Backwashing is a crucial maintenance procedure for Intex sand filters, reversing the water flow to flush out accumulated dirt and debris. You should backwash when the filter pressure gauge reads between 18-20 PSI, indicating a clogged sand bed; This process restores optimal filtration performance and prevents damage to the system.

To backwash, first turn off the pump. Set the multiport valve to the “Backwash” position. Then, turn the pump back on and allow it to run for 2-3 minutes, or until the water in the sight glass runs clear. Next, turn off the pump again, set the valve to “Rinse” and run for approximately 30-60 seconds to resettle the sand bed. Finally, return the valve to the “Filter” position and restart the pump.

Important: Always ensure the waste line is properly directed away from electrical components and landscaping. Backwashing too frequently can reduce the lifespan of the sand, so only perform it when necessary.

Filter Cleaning and Sand Replacement

Maintaining a clean filter and healthy sand bed is vital for efficient pool filtration. While backwashing removes debris, periodic deep cleaning is also necessary. Annually, disassemble the filter tank and inspect the internal components for wear or damage. Clean the laterals and manifold thoroughly, removing any accumulated buildup.

Sand replacement is recommended every 3-5 years, depending on usage and water quality. Old sand loses its filtering efficiency and can become compacted. When replacing, use the correct grade and quantity of sand specified in your Intex filter manual. Ensure the sand is thoroughly rinsed before adding it to the filter tank.

Proper sand maintenance extends the life of your filter and ensures consistently clean pool water. Neglecting these steps can lead to reduced performance, increased chemical usage, and potential system failure.

Troubleshooting Common Issues

Addressing problems promptly keeps your pool pristine. Common issues include low flow, high pressure, and sand leaks. Identifying the root cause—like a clogged filter or vacuum device—is key to resolution.

Low Water Flow: Causes and Solutions

Reduced water flow through your Intex sand filter can stem from several sources, impacting your pool’s cleanliness. A primary culprit is often a clogged filter itself, as debris accumulates within the sand bed, restricting water passage. Regularly scheduled backwashing is crucial to alleviate this. However, if backwashing doesn’t resolve the issue, a more thorough filter cleaning or even sand replacement might be necessary.

Another frequent cause is a restriction in the plumbing lines. Inspect hoses for kinks, bends, or obstructions. Ensure skimmer baskets and pump strainers are clear of leaves and debris, as these can significantly impede water intake. Furthermore, attached devices like automatic pool cleaners can diminish flow and elevate pressure; disconnecting these during normal operation can help diagnose the problem.

If the flow remains low, examine the pump itself. A failing pump or impeller can’t generate sufficient suction. Check for air leaks in the system, as air entering the lines reduces water flow. Finally, verify that the multi-port valve is correctly positioned for filtration. Addressing these potential issues systematically will restore optimal water flow and maintain a healthy pool environment.

High Pressure Readings: Identifying the Problem

Elevated pressure readings on your Intex sand filter gauge signal a restriction within the system, demanding immediate attention. The most common cause is a dirty filter – accumulated debris within the sand bed hinders water flow, increasing pressure. Backwashing is the first line of defense, reversing the water flow to dislodge trapped particles. However, consistently high pressure even after backwashing indicates a deeper issue.

Inspect the system for obstructions in the plumbing lines. Kinks in hoses, closed valves, or debris lodged within pipes can all contribute to increased pressure. As noted, vacuuming devices attached to the system can also cause pressure to rise; removing them is a simple diagnostic step. A clogged skimmer basket or pump strainer restricts water intake, forcing the pump to work harder and raising pressure.

Less frequently, the problem lies within the filter itself. Caked sand, or sand that has become too fine, can impede water flow. In such cases, a thorough filter cleaning or sand replacement may be necessary. Ignoring high-pressure readings can damage the filter and pump, so prompt investigation is vital.

Sand Leaking from the Filter: Diagnosis and Repair

Discovering sand leaking from your Intex sand filter is concerning, indicating a breach in the filtration system. The primary culprit is often a compromised lateral – the internal pipes distributing water through the sand bed. These can crack or become disconnected, allowing sand to escape with the backwash water. A visual inspection, requiring disassembly of the filter, is usually necessary to pinpoint the damaged lateral(s).

Another potential source of leaks is a faulty multiport valve. This valve controls the direction of water flow, and worn seals or cracks can allow sand to bypass the filtration process. Examine the valve carefully for any visible damage or signs of leakage. The tank itself can also develop cracks, though this is less common.

Repair typically involves replacing the damaged component. Laterals are relatively inexpensive and easy to replace, while a multiport valve replacement is more involved. If the tank is cracked, replacement of the entire filter unit is usually the most practical solution. Always ensure the system is depressurized before attempting any repairs.

Pump Not Priming with Sand Filter

A pump failing to prime after installing or backwashing an Intex sand filter is a common frustration. This usually indicates air trapped within the pump housing or suction lines, preventing it from drawing water. First, verify the water level in the pool is adequate – the pump needs sufficient water to operate effectively.

Next, check for air leaks in the suction plumbing between the skimmer or main drain and the pump. Loose connections or damaged pipes can introduce air into the system. Tighten all fittings and inspect for cracks. Ensure the pump basket is clean and free of debris, as obstructions can restrict water flow.

Priming the pump manually is often necessary. Open the pump lid, fill the pump housing with water using a hose, and replace the lid tightly. Then, turn on the pump and allow it to run until it draws water and establishes a steady flow. If the pump still fails to prime, a vacuuming device attached to the system may be diminishing flow.

Advanced Topics

For optimal pool care, explore timer versus manual operation modes. Proper winterization safeguards your Intex filter from damage. Understanding parts replacement extends its lifespan, ensuring consistently clear water.

Using a Vacuuming Device with the Filter

Integrating an automatic pool cleaner, such as an Intex auto pool cleaner, with your sand filter system offers convenience, but requires careful attention to avoid operational issues. A common symptom of using a vacuuming device while the filter is running is a noticeable reduction in water flow and a corresponding increase in pressure, potentially pushing the pressure gauge into the yellow zone.

This occurs because the vacuuming device adds extra load to the filtration system, restricting water movement. If you observe diminished flow and elevated pressure, the first step is to immediately disconnect the vacuuming device from the system. Observe the pressure gauge after disconnection; a significant drop from the yellow zone back into the green zone confirms the vacuuming device was the culprit.

It’s crucial to remember that sand filters have a limited capacity. Overloading them with additional demands, like a vacuum cleaner, can compromise their efficiency and potentially lead to damage. Always monitor the pressure gauge when using a vacuuming device and be prepared to temporarily halt vacuuming if the pressure rises excessively. Consider vacuuming during periods of lower filter demand or adjusting the vacuuming schedule to prevent overloading the system. Regular filter maintenance, including backwashing, is even more important when utilizing a vacuuming device.

Operating Modes: Timer vs. Manual

Intex sand filters offer flexibility in operation through two primary modes: Timer and Manual. Understanding the benefits of each allows you to optimize filtration based on your pool’s needs and usage patterns.

Manual mode provides complete control, enabling you to start and stop the filter as desired. This is ideal for short periods of heavy pool use, like after a party, or when addressing a sudden influx of debris. However, it requires consistent monitoring and active operation.

Timer mode automates the filtration process, allowing you to set specific run times. This is the preferred method for consistent, everyday filtration. Program the timer to run the filter for an adequate duration each day – typically 8-12 hours – to maintain water clarity and hygiene. The timer ensures continuous filtration without requiring constant attention.

Consider your pool’s usage when selecting a mode. For consistent cleanliness, timer mode is recommended. For targeted cleaning or infrequent use, manual mode offers greater control. Experiment to find the optimal settings for your specific pool and lifestyle, always monitoring filter pressure and water clarity.

Winterizing Your Intex Sand Filter

Proper winterization is crucial to protect your Intex sand filter from freezing temperatures and potential damage. Failing to do so can lead to costly repairs in the spring.

First, thoroughly backwash the filter to remove any accumulated debris. Then, disconnect all plumbing connections and drain any remaining water from the filter tank, pipes, and pump. Leaving water inside can cause cracking due to ice expansion.

Remove the drain plug from the filter tank and ensure it’s completely empty. Consider using an air compressor to blow out any residual water in the lines. Store the drain plug in a safe place for reinstallation in the spring.

Finally, cover the filter and pump with a protective tarp or store them indoors in a dry location. This shields them from the elements. Remember to also winterize your pool itself following separate guidelines to ensure a smooth spring reopening.

Intex Filter Parts and Replacement

Maintaining your Intex sand filter often requires replacing worn or damaged parts. Common components needing attention include the sand, filter media, multiport valve, and pump components.

Sand replacement is typically needed every 3-5 years, depending on usage. Use the correct grade and quantity of sand as specified in your filter’s manual. The multiport valve may require occasional rebuild kits or complete replacement if it develops leaks or malfunctions.

Pump impellers, seals, and motors can also wear out over time. Regular inspection can identify potential issues before they lead to complete failure. Intex offers a wide range of replacement parts, readily available online and at pool supply stores.

When ordering parts, always verify compatibility with your specific filter model number. Utilizing genuine Intex parts ensures optimal performance and longevity. Don’t hesitate to consult the manual or contact Intex customer support for assistance with part identification and installation.

jandy e pump manual

Jandy ePump Manual: A Comprehensive Guide

Welcome! This detailed manual provides essential guidance for installing, operating, and maintaining your Jandy ePump, ensuring peak performance and longevity for years to come․

Jandy ePump represents a significant advancement in pool and spa circulation technology․ Unlike traditional single-speed pumps, the ePump utilizes a variable-speed motor, offering unparalleled control and efficiency․ This innovative design allows the pump to operate at different speeds, precisely matching the flow requirements of your pool or spa’s features․

At its core, the ePump employs a permanent magnet motor, known for its exceptional reliability and energy savings․ This technology dramatically reduces electrical consumption compared to older pump models․ The ePump isn’t just about saving energy; it’s about optimizing your entire pool system․ By running at lower speeds for filtration and higher speeds for features like waterfalls or spa jets, the ePump delivers consistent performance while minimizing noise and wear and tear․

This manual will guide you through understanding and harnessing the full potential of your Jandy ePump, ensuring a quieter, more efficient, and enjoyable pool experience․

Understanding Variable Speed Pump Benefits

Variable speed pumps, like the Jandy ePump, offer a multitude of advantages over conventional single-speed pumps․ The primary benefit is significantly reduced energy consumption․ By operating at lower speeds for the majority of the time – typically for filtration – the pump uses considerably less electricity, translating into substantial cost savings on your utility bills․

Beyond energy efficiency, variable speed technology provides superior filtration․ Slower water flow allows the filter to capture more debris, resulting in cleaner, clearer pool water․ Furthermore, the ePump’s ability to adjust speed optimizes water flow for various features, such as waterfalls, fountains, and spa jets, enhancing their performance․

These pumps also contribute to a quieter pool environment․ Lower speeds equate to less noise, creating a more relaxing atmosphere․ Finally, reduced stress on the pump components extends the lifespan of the equipment, minimizing the need for repairs or replacements․

Energy Savings & Cost Reduction

The Jandy ePump is engineered to dramatically reduce your pool’s energy consumption and lower operating costs․ Traditional single-speed pumps run at 100% power, even when full power isn’t needed․ The ePump, however, utilizes a variable frequency drive (VFD) to precisely match pump speed to demand․

This means that for most of the day, during filtration or low-demand periods, the pump operates at a fraction of its maximum speed, consuming significantly less electricity․ Studies show that ePump owners can save up to 90% on pump-related energy costs compared to older, single-speed models․

These savings accumulate over time, quickly offsetting the initial investment in the pump․ Many utility companies also offer rebates for installing energy-efficient pool pumps, further reducing your upfront costs․ By optimizing energy usage, the Jandy ePump is both environmentally friendly and economically advantageous․

Quieter Operation

One of the most immediately noticeable benefits of the Jandy ePump is its remarkably quiet operation․ Unlike traditional single-speed pumps that often produce a loud, disruptive hum, the ePump operates at significantly lower decibel levels, especially at reduced speeds․

The variable speed technology allows the pump to run at lower RPMs for the majority of the time, minimizing noise pollution․ This creates a more peaceful and enjoyable backyard environment for you, your family, and your neighbors․ You’ll barely notice it’s running!

This quieter performance is particularly advantageous for pools located close to living areas or neighboring properties․ No more intrusive pump noise interrupting conversations or relaxation․ The Jandy ePump delivers powerful performance without the disruptive sound, enhancing your overall pool experience․

Extended Equipment Life

The Jandy ePump’s variable speed technology doesn’t just benefit your energy bill and noise levels; it also significantly extends the lifespan of your entire pool equipment system․ Traditional pumps constantly operate at full speed, creating stress and wear on components like filters, heaters, and chlorinators․

By running at lower, more consistent speeds, the ePump reduces hydraulic stress throughout the system․ This gentler operation minimizes wear and tear on all connected equipment, delaying the need for costly repairs or replacements․ Less stress equals longer life!

Furthermore, the reduced flow rates can help prevent cavitation and erosion within the pump itself, preserving its internal components․ Investing in a Jandy ePump is an investment in the longevity and reliability of your entire pool system, saving you money and headaches in the long run․

ePump Model Overview & Identification

Jandy offers a diverse range of ePump models designed to accommodate various pool sizes and operational needs․ Understanding the different series is crucial for proper installation, programming, and maintenance․ The primary series include the ePump Premier, known for its advanced features and integrated flow sensor, and the ePump Pro, offering robust performance and reliability․

Each model is characterized by its horsepower (HP) rating, which dictates its pumping capacity․ Common HP ratings range from 0․8 HP to 2․0 HP․ Identifying your specific model is the first step in accessing the correct documentation and support resources․

Locate the model and serial number label affixed to the pump housing․ This label contains vital information for warranty claims, parts ordering, and accessing model-specific instructions․ Keep this information readily available for future reference․ Accurate model identification ensures you receive the correct guidance․

Identifying Your Specific ePump Model

Precisely identifying your Jandy ePump model is paramount for accessing tailored support, replacement parts, and accurate troubleshooting information․ The model number is typically found on a sticker located on the pump’s housing – often on the side or rear panel․ This sticker also contains the serial number, which is equally important for warranty verification․

Begin by visually inspecting the pump for this label․ If the label is damaged or missing, consult your original purchase records or the installer․ The model number follows a specific Jandy format, often starting with “ePump” followed by a series identifier (e․g․, Premier, Pro) and a numerical value indicating horsepower and features․

Once located, carefully record the complete model and serial number․ Refer to the Jandy website or contact Jandy customer support with this information to confirm your model and access its specific manual and resources․ Accurate identification streamlines the support process․

Key Components & Their Functions

The Jandy ePump comprises several crucial components working in harmony․ The motor, a high-efficiency permanent magnet motor, drives the pump․ The pump housing contains the impeller and volute, responsible for water circulation․ The impeller, a rotating component, imparts kinetic energy to the water․

The volute directs water flow and converts velocity into pressure․ A diffuser further optimizes flow․ The control panel allows for programming speed, schedules, and monitoring pump performance․ A strainer basket prevents debris from entering and damaging the pump․ The union connections facilitate easy installation and removal․

Finally, the thermal overload protector safeguards the motor from overheating․ Understanding each component’s role is vital for maintenance and troubleshooting․ Regular inspection of these parts ensures optimal operation and extends the pump’s lifespan․ Refer to diagrams for visual identification․

Installation Procedures – A Step-by-Step Guide

Step 1: Verify all components are present and undamaged․ Step 2: Position the ePump on a level, stable surface near the filtration system․ Step 3: Carefully connect the suction and discharge plumbing, utilizing appropriate PVC primer and cement; Ensure proper alignment to prevent stress on connections․

Step 4: Install the strainer basket into the suction side․ Step 5: Connect the electrical wiring according to local codes and the wiring diagram․ Step 6: Ground the pump properly for safety․ Step 7: Before powering on, prime the pump by filling the pump housing and suction line with water․

Step 8: Slowly turn on the power and check for leaks․ Step 9: Program the control panel with desired settings․ Step 10: Monitor pump operation for the first few minutes․ Always consult a qualified electrician if unsure about electrical connections․

Pre-Installation Checklist

Before beginning the installation of your Jandy ePump, ensure you have completed the following crucial steps․ First, verify local electrical codes and obtain any necessary permits․ Second, confirm the pump’s voltage matches your electrical supply․ Third, gather all required tools: PVC cutter, primer, cement, screwdrivers, wire strippers, and a level․

Fourth, inspect the plumbing lines for any damage or obstructions․ Fifth, ensure adequate space around the pump for maintenance and access․ Sixth, have a qualified electrician available for electrical connections if you are not comfortable performing them yourself․ Seventh, review the wiring diagram thoroughly․

Eighth, confirm the filtration system is compatible with a variable speed pump․ Ninth, check the pump’s flow rate requirements against your pool’s needs․ Finally, read this entire manual before proceeding to understand all safety precautions and procedures;

Plumbing Connections & Requirements

Proper plumbing is critical for optimal ePump performance․ Utilize Schedule 40 or 80 PVC piping, adhering to local codes․ Ensure all connections are clean, dry, and properly primed and cemented․ Avoid using metal pipes directly connected to the pump to prevent corrosion․ The suction side piping should be as short and direct as possible, minimizing bends․

A minimum of 10 pipe diameters of straight pipe before the pump inlet is recommended․ The discharge side piping should also be smooth and free of restrictions․ Use a check valve on the discharge side to prevent backflow․ Consider installing isolation valves on both the suction and discharge sides for easy maintenance․

Always support the piping adequately to prevent stress on the pump․ Verify all unions are accessible for future disassembly․ Double-check for leaks after initial installation and before energizing the pump․ Proper pipe sizing is essential for efficient operation․

Electrical Connections & Safety Precautions

WARNING: Electrical work must be performed by a qualified electrician and comply with all local and national codes․ Before beginning any electrical connections, ALWAYS disconnect power to the circuit breaker․ Verify the voltage matches the pump’s specifications – incorrect voltage will cause damage․ Use appropriately sized wiring and conduit for the amperage draw of the ePump․

Ensure a dedicated circuit is used for the pump, avoiding shared circuits with other high-demand appliances․ Proper grounding is essential for safety; connect the ground wire securely to the grounding terminal․ Install a Ground Fault Circuit Interrupter (GFCI) breaker for added protection․ Double-check all connections for tightness and insulation․

Never operate the pump with a damaged power cord․ Keep electrical components dry and protected from the elements․ Follow all manufacturer’s wiring diagrams precisely․ Regularly inspect electrical connections for corrosion or damage․

Programming & Control Panel Operation

The Jandy ePump’s control panel offers intuitive programming for customized operation․ Access the main menu by pressing the ‘Menu’ button․ Utilize the up and down arrow keys to navigate through options like speed control, scheduling, and diagnostics․ Speed can be adjusted in percentage increments, optimizing flow for various applications․

To create a schedule, select ‘Schedule’ from the menu and define start/stop times and speeds for different days of the week․ The ‘Prime’ function assists in initial startup and air removal․ Monitor pump performance through real-time data displays, including flow rate and wattage․ Error codes will appear on the screen, indicating potential issues․

Familiarize yourself with the ‘Settings’ menu to adjust parameters like temperature units and display brightness․ Save all changes before exiting the menu․ Refer to the troubleshooting section for assistance with specific error codes or programming challenges․

Navigating the ePump Control Panel

The Jandy ePump features a user-friendly control panel with a clear LCD screen and intuitive button layout․ The ‘Power’ button initiates or terminates pump operation․ ‘Menu’ provides access to programming functions, schedules, and settings․ Up and Down arrow keys allow for scrolling through menu options and adjusting values․

‘Select’ confirms your choices and enters submenus․ ‘Back’ returns to the previous screen․ The display shows current pump speed (in RPM or percentage), flow rate, wattage consumption, and any active error codes․ Pay attention to indicator lights; a solid green light signifies normal operation, while flashing lights indicate a potential issue․

Pressing and holding the ‘Menu’ button may reveal advanced diagnostic information․ Explore each menu option to understand its function․ Consult the programming section for detailed instructions on utilizing the control panel’s features effectively․

Setting Up Schedules & Timers

The Jandy ePump allows for customized scheduling to optimize energy usage and automate pool operations․ Access the ‘Schedule’ menu via the control panel․ You can create multiple schedules, each with unique start times, durations, and pump speeds․ Utilize the ‘Timer’ function for single, one-time events, like backwashing․

To create a schedule, select a day or group of days, then input the desired start time and run duration․ Choose an appropriate pump speed – lower speeds are ideal for filtration, while higher speeds are needed for features like spa jets․ Review your schedule carefully before saving․

The ePump remembers up to eight independent schedules․ Experiment with different settings to find the optimal balance between performance and energy savings․ Remember to save any changes made to existing schedules․ Proper scheduling significantly reduces energy costs and extends pump life․

Troubleshooting Common Issues

Encountering problems with your Jandy ePump? This section addresses frequent issues and provides solutions․ First, check the power supply and ensure the circuit breaker hasn’t tripped․ If the pump fails to start, verify the control panel is properly displaying information․ Low flow often indicates a clogged strainer basket or plumbing restriction – inspect and clean accordingly․

For unusual noises, check for air in the system and bleed the lines․ If the pump is running but not circulating water effectively, examine the impeller for debris․ Error codes displayed on the control panel provide valuable diagnostic information; consult the full error code list in the appendix․

Remember to always disconnect power before performing any maintenance․ If you’re unable to resolve the issue, contact a qualified pool service professional․ Ignoring problems can lead to further damage and costly repairs․ Safety is paramount!

Pump Not Starting – Possible Causes & Solutions

If your Jandy ePump isn’t starting, begin with the simplest checks․ Verify the power supply – is the breaker tripped? Check the voltage to ensure it meets the pump’s requirements․ Inspect the pump’s power cord for any damage or loose connections; Next, examine the control panel; is it illuminated and displaying information?

A common cause is a blocked impeller․ Disconnect power and carefully remove the strainer basket, checking for obstructions․ Also, confirm the pump isn’t in a locked rotor condition, which may require professional assistance․ Low voltage or a faulty capacitor can also prevent startup․

If the problem persists, consult the error code list in the manual․ Remember, attempting repairs without proper knowledge can be dangerous․ Contact a qualified technician if you’re uncomfortable or unable to diagnose the issue․

Low Flow or Pressure – Diagnosis & Repair

Experiencing reduced flow or pressure from your Jandy ePump? Start by inspecting the strainer basket for debris – leaves, hair, and other obstructions are frequent culprits․ Check the skimmer and pump lid o-rings for proper sealing; leaks reduce suction․ Examine the plumbing lines for kinks or collapsed sections, restricting water flow․

A partially blocked impeller is another common cause․ Carefully disconnect power and inspect the impeller housing for obstructions․ Consider the filter; a dirty filter significantly reduces flow․ Ensure all valves are fully open and functioning correctly․

If the issue continues, a prime leak in the suction line could be present․ For more complex problems, like a failing pump or motor, consult a qualified pool technician․ Never operate the pump dry for extended periods․

Winterization & Long-Term Storage

Preparing your Jandy ePump for winter or extended periods of non-use is crucial to prevent damage․ First, disconnect the power supply at the breaker․ Drain all water from the pump housing, strainer basket, and plumbing lines to avoid freezing․ Remove any drain plugs and store them safely․

Introduce pool antifreeze specifically designed for plumbing into the pump and lines, following the manufacturer’s instructions․ Clean the strainer basket and impeller housing thoroughly․ Lubricate the pump shaft with a silicone-based lubricant․ Store the pump in a dry, protected location, away from direct sunlight and extreme temperatures․

Before restarting the pump in the spring, inspect all connections and ensure proper sealing․ Re-prime the pump and check for leaks․ Always consult local climate guidelines for appropriate winterization procedures․

goldline controls manual

Welcome to the Goldline Controls Manual‚ your comprehensive guide to understanding and operating Goldline pool automation systems. This manual covers installation‚ operation‚ and troubleshooting for models like Aqua Logic‚ Aqua Rite‚ and Pro Logic‚ ensuring smooth pool management. Refer to the official online sources for the latest updates and detailed instructions to optimize your pool experience.

1.1 Overview of Goldline Controls

Goldline Controls offers advanced pool automation systems designed to enhance efficiency and convenience. Their product line includes models like Aqua Logic‚ Aqua Rite‚ and Pro Logic‚ each providing unique features for pool management. These systems automate functions such as chlorination‚ lighting‚ and temperature control‚ ensuring optimal pool conditions. With user-friendly interfaces and remote control capabilities‚ Goldline Controls cater to both residential and commercial needs‚ promoting energy savings and seamless integration with solar panels and other pool equipment. Manuals for these systems are available online for detailed guidance.

1.2 Importance of the Manual

The Goldline Controls Manual is essential for understanding and operating your pool automation system effectively. It provides detailed instructions for installation‚ programming‚ and troubleshooting‚ ensuring optimal performance. The manual also offers insights into maintaining your system‚ replacing parts‚ and updating software. By following the guidelines‚ users can troubleshoot common issues‚ such as salt level imbalances or water flow problems‚ and ensure safe operation. Accessing the manual online guarantees you have the latest updates and comprehensive support for your Goldline Controls system.

Models and Features

Goldline Controls offers a range of models‚ including Aqua Logic‚ Aqua Rite‚ GL-235‚ Aqua Pod‚ and Pro Logic‚ each designed for specific pool automation needs.

2.1 Hayward Goldline Aqua Logic AQL-P-4

The Hayward Goldline Aqua Logic AQL-P-4 is a cutting-edge pool automation system designed for seamless control of lighting‚ chlorination‚ and other pool functions. It integrates with devices like the Aqua Rite chlorinator and GL-235 solar controller‚ offering advanced automation capabilities. The system supports remote control via the Aqua Pod and is compatible with home automation systems for enhanced convenience. Its user-friendly interface and robust features make it a versatile solution for modern pool management‚ ensuring efficient and precise control over pool operations.

2.2 Goldline Aqua Rite-CUL

The Goldline Aqua Rite-CUL is an advanced electrolytic chlorine generator designed for efficient pool sanitization. It integrates seamlessly with Goldline automation systems‚ including the Pro Logic and Aqua Logic‚ offering precise control over chlorine levels. This system is ideal for saltwater pools‚ providing a cost-effective and eco-friendly alternative to traditional chlorine methods. Compatible with remote control via the Aqua Pod‚ the Aqua Rite-CUL ensures convenient operation and is also designed to work with other pool automation systems like Pentair and Polaris.

2.3 Goldline GL-235 Solar Pool Controller

The Goldline GL-235 Solar Pool Controller is a cutting-edge system designed to optimize solar pool heating. It features digital temperature controls‚ automatic operation‚ and compatibility with Goldline automation systems. This controller ensures efficient energy use by monitoring and adjusting solar heat capture. Ideal for above-ground pools‚ the GL-235 integrates seamlessly with other Goldline products‚ offering a user-friendly interface and reliable performance for consistent pool temperatures.

2.4 Goldline Aqua Pod Remote Control

The Goldline Aqua Pod Remote Control offers convenient wireless control for Aqua Logic automation systems. Designed as a handheld device‚ it allows users to adjust settings‚ monitor pool and spa functions‚ and activate chlorination systems remotely. Compatible with Goldline Pro Logic and Aqua Rite‚ the Aqua Pod enhances user experience with real-time feedback and intuitive navigation‚ ensuring seamless control over pool operations from anywhere in the vicinity.

2.5 Goldline Pro Logic Automation System

The Goldline Pro Logic Automation System is a cutting-edge solution for pool and spa control‚ offering advanced automation and integration capabilities. Designed to work seamlessly with Goldline Aqua Rite and Aqua Logic systems‚ it provides intuitive control over pool lighting‚ heating‚ and sanitation. With features like scheduling‚ remote access‚ and multi-functional control‚ Pro Logic enhances efficiency and convenience. Its user-friendly interface and compatibility with various pool systems make it a versatile choice for modern pool automation needs.

Installation and Setup

Follow detailed guidelines for installing and setting up Goldline controls‚ ensuring proper connections and configurations. Refer to specific model manuals for step-by-step instructions and safety precautions.

3.1 General Installation Guidelines

Ensure proper installation by following these steps:
– Verify power requirements and wiring compatibility.
– Mount control units in a dry‚ shaded area.
– Connect sensors and actuators securely.
– Test all connections before powering up.
– Refer to the specific model manual for detailed instructions.
– Ensure compliance with local electrical codes.
– Avoid exposing components to direct sunlight or water.
– Double-check all configurations before initial operation.
– Consult a professional if unsure about any step.

3.2 Aqua Logic AQL-P-4 Setup

Mount the Aqua Logic AQL-P-4 control unit in a shaded‚ dry area. Connect the valve actuators to the control panel‚ ensuring proper wiring. Power up the system and configure settings via the keypad. Test all functions‚ including automation and chlorination. Ensure correct orientation and avoid direct sunlight. Refer to the manual for specific configuration details. Verify all connections before operation. If issues arise‚ consult the troubleshooting section or contact support.

3.3 Aqua Rite-CUL Installation Steps

Mount the Aqua Rite-CUL near the pool equipment‚ ensuring proper ventilation. Connect the plumbing according to the manual‚ avoiding leaks. Wire the electrical connections securely‚ following local codes. Test the system by running a cycle. Ensure the salt level is correct before operation. Refer to the manual for specific configuration details. If issues arise‚ consult the troubleshooting guide or contact Hayward support. Proper installation ensures optimal performance and safety.

3.4 GL-235 Solar Controller Setup

Mount the GL-235 controller near the solar panels for optimal performance. Connect the sensors to monitor temperature and flow. Wire the controller according to the manual‚ ensuring polarity is correct. Configure the settings for your pool’s specific needs. Test the system to ensure proper operation. Refer to the manual for troubleshooting common issues. Regularly check sensor accuracy and clean connections for reliable performance. Proper setup ensures efficient solar heating and energy savings.

3.5 Aqua Pod Remote Control Configuration

Configure the Aqua Pod remote by syncing it with your Aqua Logic system. Ensure the remote is within range and follow the manual’s pairing instructions. Program the remote to control chlorination levels‚ pool lighting‚ and automation functions. Test all buttons to confirm proper operation. Troubleshoot common issues like signal interference or battery depletion. Regularly update the remote’s software for optimal performance. The Aqua Pod enhances convenience‚ allowing seamless control of your pool systems from anywhere.

Operation and Programming

This section guides you through operating and programming your Goldline controls‚ ensuring efficient pool management through automated functions and customizable settings for optimal performance.

4.1 Navigating the Control Panel

Navigating the Goldline control panel is straightforward‚ with intuitive buttons for accessing settings and functions. The LIGHTS button controls pool lighting‚ while Aux buttons manage additional features. Use the menu to adjust timers‚ salt levels‚ and automation settings. The display provides real-time feedback‚ ensuring easy monitoring. Refer to the manual for detailed button functions and programming options to customize your pool system efficiently.

4.2 Programming Automated Functions

Programming automated functions on Goldline controls allows for customized pool management. Set timers for filtration‚ heating‚ and lighting through the control panel. Adjust salt levels and chlorine production for optimal water quality. Use the menu to schedule maintenance reminders and automate energy-saving modes. The system stores settings for consistent operation. Refer to the manual for step-by-step guidance on programming and optimizing automated features for your specific model.

4.3 Manual Operation Procedures

For manual operation‚ access the control panel to adjust settings directly. Override automated functions by selecting manual mode. Adjust chlorine levels‚ pool temperature‚ and valve positions as needed. Use the diagnostic menu to test individual components. Refer to the manual for step-by-step instructions on performing manual overrides and troubleshooting common issues. Ensure all settings are saved after manual adjustments to maintain consistency in pool operations.

4.4 Scheduling and Timers

The Goldline Controls Manual details how to set schedules and timers for automated pool operations. Use the control panel to program specific times for chlorine generation‚ heating‚ and valve actuations. Set daily or weekly schedules to optimize energy use and maintain consistent pool conditions. Timers can be adjusted manually or via remote control. Refer to the manual for step-by-step instructions on configuring schedules and timers to suit your pool maintenance needs.

4;5 Remote Control Functionality

The Goldline Controls Manual explains how to use the Aqua Pod remote for convenient pool system management. This handheld device allows you to control chlorination levels‚ pool lighting‚ and valve operations from a distance. Compatible with Aqua Logic systems‚ it enhances ease of use and efficiency. Refer to the manual for pairing instructions and troubleshooting remote connectivity issues to ensure seamless control over your pool automation features.

Maintenance and Upkeep

Regular maintenance ensures optimal performance of Goldline controls. Clean control units‚ replace worn parts‚ and update software. Schedule tasks to prevent malfunctions and extend system longevity.

5.1 Regular Maintenance Tasks

Regular maintenance is crucial for optimal performance of Goldline controls. Inspect and clean control units‚ check salt levels‚ and ensure proper water flow. Replace worn parts like the circuit board or cell if necessary. Schedule routine checks to prevent malfunctions and extend system longevity. Refer to the manual for specific guidance on maintenance procedures tailored to your model. Consistent upkeep ensures reliable operation and prevents unexpected issues‚ keeping your pool system running smoothly year-round.

5.2 Cleaning the Control Units

Regular cleaning of Goldline control units ensures optimal performance. Use a soft‚ dry cloth to wipe surfaces‚ avoiding harsh chemicals. Gently remove debris from buttons and ports. For internal components‚ use compressed air carefully to prevent damage. Regular cleaning prevents dust buildup and ensures proper function. Always refer to the manual for model-specific instructions to maintain your system effectively.

5.3 Replacing Parts and Upgrades

Regular inspection of Goldline control units helps identify worn-out parts needing replacement. Replace components like circuit boards or cells promptly to maintain functionality. Always use genuine Goldline parts for compatibility and reliability. Upgrades‚ such as software updates or hardware enhancements‚ can improve performance and efficiency. Refer to the manual for specific instructions and ensure all replacements and upgrades align with manufacturer guidelines to preserve warranty and system integrity.

5.4 Software Updates

Regular software updates are crucial for maintaining optimal performance and security of your Goldline control systems. Check the official Goldline website or authorized sources for the latest updates. Download and install updates following the manual’s instructions to ensure compatibility and avoid system disruptions. Always back up your settings before updating. The manual provides detailed steps for a smooth update process‚ ensuring your system remains efficient and secure. Refer to the troubleshooting section if issues arise during the update.

Troubleshooting Common Issues

Identify and resolve common issues like salt level imbalances‚ water flow problems‚ or system errors. Check the manual for detailed solutions and maintenance tips to ensure optimal performance.

6.1 Common Errors and Solutions

Common issues with Goldline controls include low salt levels‚ improper water flow‚ and cell malfunctions. Check salt levels and ensure proper water circulation. Clean the cell regularly and replace worn parts like the circuit board or cell if necessary. Refer to the manual for troubleshooting tips and step-by-step solutions to maintain optimal system performance and resolve errors effectively.

6.2 Diagnosing Control Malfunctions

Diagnosing control malfunctions involves checking error messages‚ salt levels‚ and water flow. Inspect sensors and connections for damage or corrosion. Clean the cell and ensure proper circulation. Reset the system if necessary. For persistent issues‚ refer to the troubleshooting section or contact technical support. Regular maintenance and software updates can prevent many malfunctions‚ ensuring smooth operation of your Goldline control system.

6.3 Resetting the System

Resetting the Goldline control system can resolve many operational issues. Power off the system‚ wait 30 seconds‚ and restart it. This process clears temporary glitches without affecting programmed settings. For a factory reset‚ refer to the manual or contact support. Regular resets can prevent malfunctions and ensure optimal performance. Always follow safety guidelines during the reset process to avoid any potential risks or data loss.

6.4 Salt Level and Water Flow Issues

Low salt levels or poor water flow can disrupt system performance. Check the salt level and ensure it matches the recommended range. Inspect the cell for debris and clean it regularly. Verify proper water circulation and pressure. If issues persist‚ consult the manual or contact support. Regular maintenance helps prevent these problems and ensures efficient operation of your Goldline control system.

Integration with Other Systems

Goldline controls seamlessly integrate with pool automation‚ solar panels‚ and home systems‚ enhancing functionality and control. Compatibility ensures efficient operation across various devices and platforms.

7.1 Compatibility with Pool Automation

Goldline controls are designed to integrate seamlessly with pool automation systems‚ including Hayward/Goldline‚ Pentair‚ and Polaris. This compatibility ensures enhanced control and efficiency‚ allowing synchronized operation of pool equipment. The Aqua Rite‚ for instance‚ works with all pool automation controls‚ providing streamlined functionality. Users can manage multiple systems from a single interface‚ optimizing pool maintenance and operation. This integration simplifies tasks‚ reduces manual intervention‚ and ensures a cohesive pool management experience.

7.2 Integration with Solar Panels

Goldline controls seamlessly integrate with solar panels‚ enhancing energy efficiency and reducing operational costs. The GL-235 Solar Pool Controller is specifically designed to optimize solar heating systems‚ ensuring maximum energy utilization. This integration allows for automated control of solar heating‚ adapting to sunlight conditions for consistent pool temperatures. The system minimizes manual adjustments‚ providing a cost-effective and eco-friendly solution. Refer to the manual for detailed setup and optimization guidelines to maximize the benefits of solar energy with Goldline controls.

7.3 Connecting to Home Automation Systems

Goldline controls can be integrated with home automation systems‚ offering enhanced control and convenience. Compatible with systems like Pro Logic and third-party hubs‚ this integration allows seamless operation of pool equipment alongside other smart devices. Users can control pool settings‚ lighting‚ and automation through a single interface‚ enabling voice commands and remote access. This feature simplifies pool management and enhances overall home automation efficiency. Refer to the manual for specific compatibility and setup instructions to integrate Goldline controls with your home automation system effectively.

Safety Precautions

This section outlines essential safety precautions for Goldline controls‚ including electrical safety‚ chemical handling‚ and operation in adverse weather. Always follow guidelines to ensure safe system operation.

8.1 Electrical Safety Guidelines

  • Ensure proper installation by a licensed electrician to avoid hazards.
  • Keep control units dry; exposure to water can cause electrical shock.
  • Use Ground Fault Circuit Interrupter (GFCI) outlets for pool equipment.
  • Disconnect power before performing maintenance or repairs.
  • Adhere to local electrical codes and manufacturer instructions.
  • Inspect cables and connections regularly for damage or wear.
  • Consult a professional if unsure about any electrical procedure.

8.2 Chemical Handling Precautions

  • Always wear protective gloves and goggles when handling pool chemicals.
  • Follow the manufacturer’s instructions for proper chemical dosages.
  • Keep chemicals away from children and pets to prevent accidents.
  • Ensure good ventilation when handling chlorine or salt-based products.
  • Avoid mixing different chemicals‚ as reactions may occur.
  • Store chemicals in their original containers with tight-fitting lids.
  • Dispose of chemical waste according to local regulations.
  • Rinse any chemical splashes on skin immediately with water.
  • Seek medical attention if chemical exposure occurs.

8.3 Operating in Adverse Weather

  • Disconnect power during lightning storms to prevent damage.
  • Avoid exposing control units to direct rain or flooding.
  • Ensure proper ventilation to prevent moisture buildup.
  • Inspect and clean sensors after extreme weather conditions.
  • Monitor salt levels and water flow post-storm.
  • Check for debris in valves and pipes after high winds.
  • Protect outdoor units from freezing temperatures.
  • Restart systems gradually after power outages.

Warranty and Support

Your Goldline Controls system is backed by a comprehensive warranty. Contact Hayward/Goldline Technical Support at 888-921-POOL (7665) for assistance. Authorized service centers are available for repairs and maintenance‚ ensuring optimal performance and longevity of your pool automation investment.

9.1 Warranty Terms and Conditions

The Goldline Controls warranty ensures protection for your investment. Most products are covered for a minimum of one year‚ with extended options available. The warranty covers manufacturing defects and malfunctions under normal use. Registration is required for validation. Exclusions include damage from improper installation‚ chemical imbalances‚ or extreme weather conditions. For detailed terms‚ refer to the official manual or contact Hayward/Goldline Technical Support. Proper maintenance and adherence to guidelines are essential to uphold warranty validity.

9.2 Contacting Technical Support

For assistance with Goldline Controls‚ contact Hayward/Goldline Technical Support at 888-921-POOL (7665). Representatives are available Monday through Friday‚ 8 AM to 5 PM EST; Visit the official website or email for inquiries. Ensure to have your product model number and serial number ready for efficient support. Local authorized dealers can also provide guidance. Refer to the manual or website for contact details and troubleshooting resources to resolve issues promptly and effectively.

9.4 Authorized Service Centers

Authorized Goldline Service Centers provide expert repairs‚ upgrades‚ and maintenance for your pool control systems. These centers use genuine parts and follow manufacturer guidelines to ensure reliability. Contact them through the official website or by phone for assistance. Trained technicians handle complex issues‚ ensuring compliance with warranty terms. Visit the nearest center for professional support and genuine Goldline products‚ maintaining your system’s optimal performance and extending its lifespan.

Accessing the Manual Online

Download the Goldline Controls Manual from official sources like Hayward’s website or manual lib. Visit www.goldlinecontrols.com for the latest versions and navigate the PDF for easy reference.

10.1 Official Sources for Download

The Goldline Controls Manual is available for download from official sources like Hayward’s website and manual libraries. Visit www.goldlinecontrols.com or trusted platforms like manuallib.com to access the latest versions. Ensure you download from authorized sites to avoid outdated or incorrect information. The PDF manual includes detailed guides for models like Aqua Logic‚ Aqua Rite‚ and Pro Logic‚ providing comprehensive instructions for installation‚ operation‚ and troubleshooting. Always verify the source for authenticity and reliability.

10.2 Navigating the PDF Manual

The Goldline Controls Manual is structured for easy navigation‚ with clear sections and bookmarks. Use the table of contents or search function to quickly locate specific topics. Key sections include Settings Menu‚ Aux Output Configuration‚ and Troubleshooting Tips. Model-specific guides‚ like the Aqua Logic or Aqua Rite‚ are detailed in dedicated chapters. For optimal use‚ familiarize yourself with the index and use Adobe Acrobat tools to navigate seamlessly through the document.

verdant thermostat manual

Welcome to the Verdant Thermostat Manual. This guide provides comprehensive instructions for installing, configuring, and operating your Verdant VX Series thermostat. Explore its features, troubleshooting, and maintenance tips for optimal energy management and comfort control.

1.1 Overview of the Verdant Thermostat System

The Verdant Thermostat System is a cutting-edge, energy-efficient solution designed to optimize heating, cooling, and ventilation in various environments. It features a wireless control card and an occupancy sensor for smart, automated operation. The system is ideal for spaces like apartments, hotels, and commercial buildings, offering precise temperature control and energy-saving presets. Its intuitive interface allows users to customize settings, ensuring comfort and efficiency. The thermostat integrates seamlessly with external devices, such as lighting and air dampers, making it a comprehensive energy management tool.

1.2 Importance of Reading the Manual

Reading the Verdant Thermostat Manual is essential for understanding the system’s features, operation, and maintenance. It provides detailed guidance on installation, configuration, and troubleshooting, ensuring optimal performance. By following the manual, users can personalize settings, troubleshoot common issues, and maximize energy efficiency. The manual also covers critical topics like occupancy sensor calibration and energy-saving presets, helping users achieve comfort while reducing energy consumption. Proper understanding of the manual prevents errors and ensures the thermostat operates as intended, delivering reliable and efficient climate control.

1.3 Key Features of the Verdant Thermostat

The Verdant Thermostat offers advanced features designed for comfort and efficiency. It includes an occupancy sensor that adjusts settings based on room activity, smart energy management to optimize consumption, and compatibility with smart home systems for seamless integration. The thermostat also features a user-friendly interface with a backlit display, allowing easy navigation and adjustments. Additional highlights include customizable schedules, temperature limits, and remote access via mobile devices. These features ensure precise control, energy savings, and enhanced convenience for users.

Installation and Setup

This section guides you through the Verdant Thermostat installation process, including pre-installation checks, wiring requirements, and initial setup steps for a smooth and efficient setup experience.

2.1 Pre-Installation Checks

Before installing the Verdant Thermostat, ensure your system is compatible with the thermostat’s requirements. Verify that the heating, cooling, and ventilation systems are compatible with the thermostat’s voltage and wiring configuration. Check for any existing smart home integrations to ensure seamless connectivity. Ensure the power is turned off at the circuit breaker before starting the installation. Gather all necessary tools and materials, such as screwdrivers and wire strippers. Review the wiring diagram provided in the manual to understand the connections. Finally, ensure the area is clear and safe for installation.

2.2 Installing the Wireless Control Card

To install the wireless control card, first ensure the thermostat is powered off. Locate the wireless control card slot on the back or side of the thermostat. Remove the cover gently using a screwdriver if necessary. Insert the card into the slot, ensuring it clicks securely into place. Replace the cover and screw it back if required. Power on the thermostat and check for wireless connectivity. Test communication with the system to confirm proper installation. Refer to the manual for specific card orientation and alignment details.

2.3 Wiring Connections and Requirements

Ensure the power is off before connecting any wires. Use 18-24 AWG wires for all connections. Connect the R (red) wire to the power terminal and W (white) to heat. Y (yellow) is for cooling, and G (green) controls the fan. C (common) wire is essential for proper operation. Verify all connections are secure and match the terminal designations on the thermostat. If unsure, consult a licensed electrician. Double-check wiring before restoring power to avoid damage or safety hazards. Follow the manual’s wiring diagram for accurate connections. Test the system after wiring to ensure functionality. Always prioritize safety during installation. Use a voltage tester to confirm power is off before starting work. Proper wiring ensures reliable performance and prevents potential malfunctions. If your system requires additional wiring, refer to the manual’s specific guidelines for compatibility and requirements. Avoid using damaged or frayed wires, as they can lead to system issues. Ensure all wires are securely fastened to prevent loose connections. If you encounter any wiring issues, consult the troubleshooting section or contact a professional. Always follow local electrical codes and safety standards when handling wiring. This ensures compliance and prevents hazards. Use the provided wire nuts or connectors for secure connections. Do not overload terminals with multiple wires unless specified. Keep wires organized to avoid tangles or damage. If your system uses zone control, ensure the wiring matches the zone configuration. Test each wire connection individually to confirm proper functionality. Use a multimeter to verify continuity and voltage levels. Proper wiring is critical for optimal thermostat performance and energy efficiency. If you are unsure about any step, consider hiring a professional to ensure correct installation. Always turn off the power at the circuit breaker before handling any wiring. Use the correct tools to strip and connect wires safely. Avoid touching live wires or terminals to prevent electrical shock; If you notice any damage to the wires or terminals, replace them immediately. Proper wiring ensures seamless communication between components, enhancing system reliability. Follow the manufacturer’s guidelines for wire lengths and routing to maintain performance. Use the provided wiring diagram as a reference for accurate connections. Secure all wires neatly to prevent interference or damage. If you are installing in a new location, plan the wiring route carefully to avoid obstacles. Use wire clips or ties to keep wires organized and secure. Ensure all connections are tight and free from corrosion. Apply a small amount of dielectric grease to terminals if recommended. If you are upgrading from an older system, verify compatibility with existing wiring. Update wiring if necessary to meet current standards. Always follow the manufacturer’s instructions for wiring configurations specific to your system. Use the correct gauge wire to prevent overheating or voltage drop. If you are installing in a high-voltage area, take extra precautions to ensure safety. Use insulated tools and wear protective gear when handling live wires. Double-check all connections before restoring power to ensure they are correct. If you encounter any issues during testing, refer to the troubleshooting guide or contact support. Proper wiring is essential for optimal performance, safety, and energy efficiency. Always prioritize caution when working with electrical systems. If you are unsure about any aspect of the wiring process, seek professional assistance to avoid potential risks. Use the provided wiring accessories to ensure compatibility and reliability. Keep all wiring connections clean and dry to prevent short circuits. If you are installing in a humid environment, use moisture-resistant wires and connectors. Ensure all wires are securely fastened to prevent vibration damage. If you are installing in a commercial setting, ensure compliance with local electrical codes and regulations. Use the correct wiring colors to match the system’s requirements. Test each connection individually to confirm proper installation. Use a wiring checklist to ensure all steps are completed correctly. If you are installing multiple thermostats, ensure each system’s wiring is isolated to prevent interference. Use the correct wire connectors to prevent corrosion and ensure longevity. If you are installing in a high-traffic area, secure wires to prevent accidental damage. Use the provided wiring templates to ensure accurate connections. Double-check all wiring before finalizing the installation. If you are upgrading from an older system, ensure all wiring meets current safety standards. Use the correct tools to avoid damaging the wires or terminals. If you are installing in a sensitive environment, take extra precautions to prevent static discharge. Use anti-static wrist straps or mats when handling sensitive components. Ensure all wires are properly labeled for future reference. Use the provided wire labels or create your own for clarity. If you are installing in a large space, plan the wiring route carefully to avoid signal loss. Use the correct wire type for long-distance connections to prevent signal degradation. If you are installing multiple components, ensure all wiring is compatible and properly connected. Use the correct gauge wire for the distance to prevent voltage drop. If you are installing in a noisy environment, use shielded wires to prevent interference. Use the correct connectors to ensure secure and reliable connections. If you are installing in a corrosive environment, use wires and connectors resistant to corrosion. Ensure all wiring connections are tight and free from oxidation. Use the correct torque when tightening terminals to avoid damage. If you are installing in a high-temperature area, use heat-resistant wires and connectors. Ensure all wiring is rated for the operating temperature of the environment. Use the correct insulation type for the wires to prevent melting or degradation. If you are installing in a high-humidity area, use wires and connectors with moisture-resistant ratings. Ensure all wiring is securely sealed to prevent water ingress. Use the correct wire ties to keep wires organized and secure. If you are installing in a vibration-prone area, use wires and connectors with vibration-resistant ratings. Ensure all wiring is securely fastened to prevent loosening over time. Use the correct tools to ensure all connections are secure and reliable. If you are installing in a sensitive electronic environment, use wires with proper shielding to prevent EMI. Ensure all wiring is routed away from sources of interference. Use the correct wire clips to keep wires organized and prevent damage. If you are installing in a confined space, plan the wiring route carefully to avoid overcrowding. Use the correct wire management tools to keep wires neat and secure. If you are installing multiple systems, ensure all wiring is properly isolated to prevent cross-talk. Use the correct wire separators to keep wires organized and prevent tangling. If you are installing in a high-security area, use wires with proper shielding to prevent signal interception. Ensure all wiring is securely fastened to prevent tampering. Use the correct wire locks to prevent unauthorized access. If you are installing in a remote location, ensure all wiring is properly insulated to withstand environmental conditions. Use the correct wire type for outdoor installations to prevent damage from weather. Ensure all wiring connections are sealed to prevent water ingress. Use the correct wire connectors with weather-resistant ratings. If you are installing in a subzero environment, use wires and connectors rated for low temperatures. Ensure all wiring is properly insulated to prevent freezing. Use the correct wire type for extreme temperatures to maintain performance. If you are installing in a high-altitude area, ensure all wiring is rated for the operating conditions. Use the correct wire type to prevent damage from low air pressure. Ensure all wiring connections are secure to prevent loosening due to altitude changes. If you are installing in a marine environment, use wires and connectors resistant to saltwater corrosion. Ensure all wiring is properly sealed to prevent moisture ingress. Use the correct wire type for marine environments to maintain reliability. If you are installing in a dusty environment, use wires and connectors with dust-resistant ratings. Ensure all wiring is properly sealed to prevent contamination. Use the correct wire type for dusty environments to maintain performance. If you are installing in a chemical plant, use wires and connectors resistant to chemical corrosion. Ensure all wiring is properly sealed to prevent chemical ingress. Use the correct wire type for chemical environments to maintain safety and reliability. If you are installing in a nuclear facility, use wires and connectors resistant to radiation. Ensure all wiring is properly shielded to prevent radiation interference. Use the correct wire type for nuclear environments to maintain safety and performance. If you are installing in a medical facility, use wires and connectors with proper shielding to prevent EMI. Ensure all wiring is properly insulated to prevent patient risk. Use the correct wire type for medical environments to maintain safety and reliability. If you are installing in a data center, use wires and connectors with proper shielding to prevent data loss. Ensure all wiring is properly routed to avoid interference. Use the correct wire type for data centers to maintain performance and reliability. If you are installing in a laboratory, use wires and connectors resistant to chemical and

2.4 Mounting the Thermostat

Mount the thermostat on a flat, dry wall surface, ideally 52-60 inches above the floor. Choose a location with consistent room temperature. Use the provided mounting bracket and screws to secure the thermostat. Ensure the wall can support the weight of the device. Drill pilot holes if necessary and use wall anchors for stability. Align the thermostat level to ensure accurate temperature readings. Tighten all screws firmly but avoid overtightening. If installing on a plaster or drywall, use appropriate anchors. Refer to the manual for specific mounting hardware recommendations. Ensure the thermostat is accessible for easy operation and adjustments. Avoid mounting near drafts or direct sunlight to maintain accurate temperature sensing. If additional stability is needed, use the optional mounting plate. Always follow safety precautions when drilling or handling tools. Ensure the thermostat is securely fastened to prevent movement or vibration. If installing in a humid environment, ensure the mounting area is dry to prevent moisture damage. Use a level tool to confirm proper alignment before finalizing the installation. If unsure about the mounting process, consult a professional for assistance. Proper mounting ensures optimal performance and longevity of the thermostat. Keep the area around the thermostat clear to allow proper air circulation. If installing multiple thermostats, ensure they are spaced appropriately to avoid interference. Use the provided mounting template to mark the wall accurately. Double-check all screws and connections before finalizing the installation. If you encounter any issues during mounting, refer to the troubleshooting section or contact support. Always follow the manufacturer’s guidelines for mounting the thermostat to ensure warranty validity. Use the correct tools to avoid damaging the device or the wall. If you are mounting in a commercial setting, ensure compliance with local building codes and regulations. Use the correct mounting hardware for the type of wall material. If you are unsure about the wall type, consult a professional to avoid damage. Proper mounting ensures the thermostat functions accurately and reliably; Always test the thermostat’s operation after mounting to ensure it is working correctly. If you notice any issues, adjust the mounting or consult the manual for troubleshooting steps. Ensure the thermostat is securely mounted to prevent accidental dislodgement. Use the provided screws and brackets to avoid compatibility issues. If you are installing in a high-traffic area, ensure the thermostat is mounted at a safe height to prevent tampering or damage. Use the correct torque when tightening screws to avoid stripping the threads. If you are installing in a sensitive environment, take extra precautions to prevent damage to the wall or the device. Use a stud finder to locate the best spot for mounting if necessary. Ensure the thermostat is mounted in a location that allows for easy access and visibility. If you are installing in a rented property, consider using removable wall anchors to avoid permanent damage. Use the correct type of screws for the wall material to ensure a secure hold. If you are installing in a historical building, consult with a professional to ensure compliance with preservation standards. Use the correct mounting technique to avoid damaging the wall or surrounding area. If you are installing in a mobile home, ensure the wall can support the weight and use appropriate anchors. Use the correct mounting hardware to prevent loosening over time. If you are installing in a recreational vehicle, ensure the thermostat is securely mounted to withstand movement. Use the correct screws and brackets to maintain stability during travel. If you are installing in a boat, use marine-grade mounting hardware to resist corrosion. Ensure the thermostat is mounted in a dry, well-ventilated area to prevent moisture damage. Use the correct mounting technique to secure the thermostat firmly. If you are installing in an aircraft, use aviation-grade mounting hardware to ensure safety and reliability. Ensure the thermostat is mounted in a location that meets aviation standards and regulations. Use the correct tools and materials to prevent any risk of malfunction. If you are installing in a train or bus, use heavy-duty mounting hardware to withstand constant movement. Ensure the thermostat is securely fastened to prevent vibration damage. Use the correct screws and brackets to maintain stability during operation. If you are installing in a industrial setting, use industrial-grade mounting hardware to ensure durability. Ensure the thermostat is mounted in a location that allows for easy maintenance and access. Use the correct mounting technique to prevent damage from harsh environmental conditions. If you are installing in a laboratory, use mounting hardware that can withstand exposure to chemicals and cleaning agents. Ensure the thermostat is mounted in a location that allows for proper airflow and temperature sensing. Use the correct screws and brackets to maintain a secure hold in a dynamic environment. If you are installing in a medical facility, use mounting hardware that meets medical safety standards. Ensure the thermostat is mounted in a location that allows for easy cleaning and sanitization. Use the correct screws and brackets to prevent contamination or damage. If you are installing in a food processing plant, use mounting hardware that can withstand exposure to moisture and cleaning agents. Ensure the thermostat is mounted in a location that allows for proper airflow and temperature control. Use the correct screws and brackets to maintain a secure hold in a high-moisture environment. If you are installing in a greenhouse, use mounting hardware that can withstand exposure to humidity and temperature fluctuations. Ensure the thermostat is mounted in a location that allows for proper airflow and temperature sensing. Use the correct screws and brackets to maintain stability in a dynamic environment. If you are installing in a server room, use mounting hardware that can withstand exposure to constant heat and airflow. Ensure the thermostat is mounted in a location that allows for proper temperature sensing and control. Use the correct screws and brackets to maintain a secure hold in a high-tech environment. If you are installing in a cleanroom, use mounting hardware that meets cleanroom standards. Ensure the thermostat is mounted in a location that allows for proper airflow and temperature control. Use the correct screws and brackets to prevent contamination or damage. If you are installing in a pharmaceutical facility, use mounting hardware that meets pharmaceutical safety standards. Ensure the thermostat is mounted in a location that allows for proper airflow and temperature sensing. Use the correct screws and brackets to maintain a secure hold in a regulated environment. If you are installing in a museum, use mounting hardware that can withstand exposure to controlled environmental conditions. Ensure the thermostat is mounted in a location that allows for proper airflow and temperature control. Use the correct screws and brackets to maintain stability in a sensitive environment. If you are installing in a library, use mounting hardware that can withstand exposure to quiet and controlled conditions. Ensure the thermostat is mounted in a location that allows for proper airflow and temperature sensing. Use the correct screws and brackets to maintain a secure hold in a low-traffic area. If you are installing in a residential garage, use mounting hardware that can withstand exposure to temperature fluctuations and humidity. Ensure the thermostat is mounted in a location that allows for proper airflow and temperature control. Use the correct screws and brackets to maintain stability in a dynamic environment. If you are installing in a basement, use mounting hardware that can withstand exposure to moisture and humidity. Ensure the thermostat is mounted in a location that allows for proper airflow and temperature sensing. Use the correct screws and brackets to maintain a secure hold in a damp environment. If you are installing in an attic, use mounting hardware that can withstand exposure to high temperatures and humidity. Ensure the thermostat is mounted in a location that allows for proper airflow and temperature control. Use the correct screws and brackets to maintain stability in a high-temperature environment. If you are installing in a crawl space, use mounting hardware that can withstand exposure to moisture and humidity. Ensure the thermostat is mounted in a location that allows for proper airflow and temperature sensing. Use the correct screws and brackets to maintain a secure hold in a confined space. If you are installing in a barn, use mounting hardware that can withstand exposure to temperature fluctuations and humidity. Ensure the thermostat is mounted in a location that allows for proper airflow and temperature control. Use the correct screws and brackets to maintain stability in a rural environment. If you are installing in a shed, use mounting hardware that can withstand exposure to temperature fluctuations and humidity. Ensure the thermostat is mounted in a location that allows for proper airflow and temperature sensing. Use the correct screws and brackets to maintain a secure hold in a small, enclosed space. If you are installing in a greenhouse, use mounting hardware that can withstand exposure to high humidity and temperature fluctuations. Ensure the thermostat is mounted in a location that allows for proper airflow and temperature control. Use the correct screws and brackets to maintain stability in a dynamic environment. If you are installing in a solarium, use mounting hardware that can withstand exposure to high temperatures and humidity. Ensure the thermostat is mounted in a location that allows for proper airflow and temperature sensing. Use the correct screws and brackets to maintain a secure hold in a

2.5 Initial Power-Up and Configuration

After mounting, power up the thermostat by connecting it to the HVAC system and turning on the power supply. The display will light up and begin a self-test. Follow the on-screen prompts to set the date, time, and preferred temperature units. Select your HVAC system type from the menu. The thermostat will then perform a system test to ensure all components are functioning properly. Once the test is complete, you can proceed to set your preferred temperature range and schedule. Save your settings to complete the initial configuration.

Configuration and Settings

Access the menu to customize temperature, scheduling, and energy-saving preferences. Adjust settings to optimize comfort and energy efficiency based on your lifestyle and HVAC system requirements.

3.1 Navigating the Thermostat Menu

Navigate the Verdant Thermostat menu by using the touchscreen or buttons. Press the menu button to access settings, then scroll through options using arrows or swipe gestures. The main menu includes sections like temperature settings, scheduling, and energy management. Submenus appear when selecting specific options, allowing detailed adjustments. Use the back button or exit option to return to the previous screen. The interface is designed for ease of use, with clear labels and visual indicators for selected options. Ensure to save changes before exiting to apply new settings.

3.2 Setting Up the Clock and Room Number

To set up the clock and room number on your Verdant Thermostat, navigate to the menu and select “Clock Settings.” Use the touchscreen or buttons to set the current time, date, and time zone. Ensure accuracy for proper scheduling and energy management. Next, assign a unique room number or name to identify the thermostat’s location, especially in multi-zone systems. This helps differentiate settings and controls. Save your changes to apply them. Accurate clock settings are crucial for automated features, while room numbers simplify system organization and operation.

3.3 Configuring Equipment Settings

Configuring equipment settings on the Verdant Thermostat allows you to tailor its operation to your specific HVAC system. Navigate to the “Equipment Settings” menu and select your system type, such as forced air, radiant, or heat pump. Set the heating and cooling cycles per hour to optimize performance. Adjust the stage configuration if you have a multi-stage system. Ensure compatibility with your equipment by selecting the correct fan and fuel types. Accurate configuration ensures efficient operation and avoids potential system conflicts. Save your settings to apply them.

3.4 Energy Savings and Preset Options

The Verdant Thermostat offers advanced energy-saving features to reduce consumption. Use preset schedules to automatically adjust temperatures during peak hours or when the house is unoccupied. Enable energy-saving mode to limit extreme heating or cooling. Customize energy usage based on your lifestyle by selecting from predefined programs or creating your own. The thermostat also learns your preferences over time to optimize efficiency. These options ensure you save energy without compromising comfort, making it easier to manage your home’s climate responsibly.

3.5 Occupancy Sensor Configuration

Configure the occupancy sensor to optimize energy use based on room activity. Adjust sensitivity levels to detect motion accurately, ensuring the thermostat responds to presence or absence. Set timeout periods to determine how long the system waits before switching to energy-saving mode. Enable or disable the sensor manually if needed. Customizable settings allow you to tailor the sensor’s behavior to your space and habits, enhancing both energy efficiency and comfort. Proper configuration ensures seamless operation and maximizes the thermostat’s smart features.

Operation and Usage

This section guides users through the daily operation of the Verdant Thermostat, covering essential functions like temperature adjustment, mode selection, and energy-efficient feature utilization.

4.1 Understanding the Thermostat Interface

The Verdant Thermostat features an intuitive interface designed for ease of use. The high-resolution touchscreen display provides clear visuals of current temperature, system mode, and active settings. Navigate using the menu button to access options like temperature adjustment, fan control, and energy-saving modes. The interface includes a status bar showing system operation, such as heating, cooling, or idle. Indicator lights on the side signal active functions, while the occupancy sensor LED confirms motion detection. This user-friendly design ensures seamless control over your home’s climate system.

4.2 Setting Temperature Preferences

To set temperature preferences on the Verdant Thermostat, tap the touchscreen to access the main menu. Use the up or down arrows to adjust the desired temperature. For precise control, enter the temperature manually using the number pad. Save your changes by selecting “Done.” You can also schedule temperature adjustments using the Smart Schedule feature, ensuring optimal comfort and energy efficiency throughout the day; The thermostat will confirm your settings with a brief message before returning to the home screen.

4.3 Manual Override and Temporary Adjustments

To manually override the Verdant Thermostat, tap the current temperature on the home screen. Use the up or down arrows to set your desired temperature. Temporary adjustments will override the current schedule but will revert after the next programmed setting or after 24 hours, whichever comes first. To cancel the override, select the cancel option in the menu. This feature is ideal for making quick changes without altering your long-term schedule, ensuring flexibility and convenience.

and Future Directions

4.4 Using the Occupancy Sensor

The occupancy sensor detects movement to automatically adjust the thermostat. It helps optimize energy use by switching to energy-saving modes when no one is present. The sensor is usually located on the front or side of the thermostat. To use it, ensure it is enabled in the menu. Adjust the sensor sensitivity in settings if needed, based on room size or pet activity. The sensor will automatically resume normal operation when movement is detected again, making it a convenient energy-saving feature;

jeep wrangler instruction manual

Welcome to the Jeep Wrangler Instruction Manual, your comprehensive guide to understanding and utilizing your vehicle’s features, safety, and maintenance. This manual covers everything from basic operations to advanced troubleshooting, ensuring you get the most out of your Jeep Wrangler experience. Whether you’re a new owner or a seasoned driver, this manual provides essential information to help you navigate everyday driving, off-road adventures, and routine maintenance. Explore the sections to discover how to maximize your vehicle’s performance, safety, and longevity.

Welcome to the Jeep Wrangler Instruction Manual

Welcome to your Jeep Wrangler Instruction Manual! This guide is designed to help you understand and make the most of your vehicle’s features, capabilities, and maintenance requirements. Whether you’re a new owner or a seasoned enthusiast, this manual provides detailed insights into operating, customizing, and caring for your Jeep Wrangler. From basic controls to advanced off-road techniques, we’ve covered it all to ensure your driving experience is safe, enjoyable, and tailored to your needs. Explore the sections to discover how to maximize your vehicle’s performance and longevity while staying connected to the Jeep community.

Purpose and Scope of the Manual

This manual is your essential guide to understanding and optimizing your Jeep Wrangler experience. It provides detailed information on operating, maintaining, and customizing your vehicle, ensuring you maximize its performance and longevity. Whether you’re navigating everyday driving or venturing into off-road adventures, this manual covers it all. From safety features and multimedia systems to troubleshooting and maintenance schedules, it serves as your go-to resource for all aspects of Jeep Wrangler ownership. Designed for both new and experienced owners, this comprehensive guide helps you make the most of your vehicle while staying informed about its capabilities and care requirements.

Getting to Know Your Jeep Wrangler

Familiarize yourself with your Jeep Wrangler’s design, features, and capabilities. This section introduces you to the exterior and interior components, controls, and advanced systems, helping you explore its full potential for adventure and daily driving.

Exterior Features and Components

Explore the rugged and iconic design of your Jeep Wrangler. The exterior features include a durable grille, removable doors, and a foldable windshield for off-road adventures. The Wrangler boasts a lightweight yet robust frame, high ground clearance, and skid plates for enhanced protection. The bumpers are designed for functionality, with optional winch mounts and tow hooks. The fender flares and wheel arches accommodate large tires, while the roof options range from soft tops to hardtops. The exterior components are built to withstand harsh environments, ensuring reliability and performance on both paved roads and challenging terrains.

Interior Features and Controls

The interior of your Jeep Wrangler combines functionality with comfort. The cabin features durable, weather-resistant materials, perfect for adventurous use; Controls are intuitively placed, with easy access to the Uconnect infotainment system, climate settings, and four-wheel-drive controls. The instrument panel includes a clear display of essential gauges and warning lights. Optional features like heated seats and a leather-wrapped steering wheel enhance your driving experience. Storage compartments are strategically located throughout, offering space for personal items. Whether you’re on a daily commute or an off-road excursion, the Wrangler’s interior is designed to keep you connected and comfortable, blending practicality with modern technology.

Instrument Panel Overview

The instrument panel features essential gauges for speed, RPM, fuel level, and temperature. Warning lights indicate seatbelt status, oil levels, and system alerts, ensuring driver awareness at a glance.

Dashboard Layout and Gauges

The Jeep Wrangler’s dashboard is designed for clarity and convenience, featuring a modern layout that prioritizes easy access to essential information. The dashboard includes a speedometer, tachometer, fuel gauge, and temperature gauge, all neatly arranged for quick reference. The Uconnect infotainment system is centrally located, providing controls for navigation, Bluetooth, and audio settings. Additional buttons for climate control and driver assistance features are intuitively placed within reach. The dashboard also houses warning lights that alert the driver to critical system statuses, ensuring safety and awareness. This thoughtful design enhances both on-road and off-road driving experiences.

Warning Lights and Indicators

The Jeep Wrangler’s dashboard features a variety of warning lights and indicators designed to alert you to specific vehicle conditions. These lights include the check engine light, oil pressure warning, battery alert, and temperature gauge. Each light corresponds to a particular system, ensuring timely notifications for maintenance or potential issues. If a light illuminates, consult the manual for its meaning and recommended actions. Some indicators may flash to signal urgency, while others remain steady for less critical alerts. Regular monitoring of these lights helps maintain your vehicle’s health and ensures safe operation under all driving conditions.

Starting and Operating Your Jeep Wrangler

Learn how to properly start, drive, and operate your Jeep Wrangler, including key ignition procedures, transmission options, and essential driving modes for optimal performance and control.

Ignition and Starting the Engine

To start your Jeep Wrangler, insert the key into the ignition switch and turn it to the “ON” position. Press the engine start/stop button firmly while ensuring the transmission is in “PARK” or “NEUTRAL” gear. For models with a keyless start system, simply press the button with your foot on the brake. If the engine doesn’t start, check the battery connections or consult a professional. Always ensure the parking brake is engaged before starting the engine to avoid unintended movement. Follow proper starting procedures to ensure safety and optimal performance.

Driving Modes and Transmission Options

Your Jeep Wrangler offers versatile driving modes and transmission options to suit various conditions. For optimal performance, select from modes like Sport, Snow, Sand/Mud, or Rock Crawl. Automatic transmissions provide smooth shifting, while manual transmissions offer precise control. Engage four-wheel drive using the transfer case selector, ensuring proper mode selection for on-road or off-road driving. Always match your driving mode to the terrain for enhanced traction and stability. Refer to your Uconnect system for real-time monitoring and adjustments. Proper use of these features ensures a safe and enjoyable driving experience, whether navigating city streets or challenging off-road trails.

Multimedia and Infotainment Systems

Your Jeep Wrangler features advanced multimedia and infotainment systems, including the Uconnect Radio and Navigation System. Enjoy seamless Bluetooth connectivity, voice commands, and customizable settings for an enhanced driving experience. Access real-time analytics and entertainment options through the intuitive interface, ensuring convenience and connectivity on the go.

Uconnect Radio and Navigation System

The Uconnect Radio and Navigation System in your Jeep Wrangler offers a user-friendly interface for entertainment, navigation, and connectivity. With voice command functionality, you can effortlessly control music, maps, and calls. The system supports Bluetooth connectivity, allowing seamless pairing with your smartphone for hands-free communication and audio streaming; Navigate confidently with turn-by-turn directions and real-time traffic updates. Customizable settings enable you to personalize your experience, ensuring every drive is enjoyable and stress-free. Refer to your Uconnect manual for detailed instructions on maximizing these features.

Bluetooth Connectivity and Voice Commands

The Jeep Wrangler’s Uconnect system offers seamless Bluetooth connectivity, enabling hands-free phone calls and audio streaming from your smartphone. Voice commands allow you to control navigation, music, and calls without distractions. Pairing your device is straightforward: ensure Bluetooth is enabled on your phone, select the Uconnect system, and follow prompts. Once connected, use voice commands to access features like dialing contacts or searching for destinations. This system enhances safety and convenience, keeping your focus on the road. For detailed pairing instructions, refer to your Uconnect Radio and Navigation System manual.

Safety Features and Emergency Procedures

Your Jeep Wrangler is equipped with advanced airbags, seatbelts, and passive safety systems for maximum protection. Emergency procedures include SOS buttons and roadside assistance for added security.

Airbags, Seatbelts, and Passive Safety Systems

Your Jeep Wrangler is equipped with advanced safety features, including dual-stage front airbags, side airbags, and seatbelts with pretensioners to ensure optimal protection in collisions. The vehicle also features passive safety systems, such as crumple zones and a high-strength steel frame, designed to absorb and distribute impact forces. Seatbelt reminders and automatic locking retractors enhance occupant safety. These systems work together to provide a secure environment, reducing the risk of injury. Always wear seatbelts and ensure proper usage to maximize safety benefits.

Emergency Procedures and Roadside Assistance

In case of an emergency, your Jeep Wrangler is equipped with features to help ensure safety. For accidents, activate hazard lights and use the steering wheel-mounted controls to call for help. Familiarize yourself with the location of emergency equipment like the spare tire and jack. If stranded, contact Jeep’s 24/7 roadside assistance for towing or repairs. Always keep the emergency contact information handy. Regularly check the condition of your spare tire and ensure all safety systems are functioning properly. For more details, refer to the dedicated roadside assistance section in your manual.

Maintenance and Servicing

Regular maintenance is crucial for your Jeep Wrangler’s longevity and performance. Follow the recommended service intervals to ensure optimal functioning of engine, transmission, and suspension. Check fluid levels and tire pressure regularly. Address any warning lights promptly to prevent issues. Keep records of all services for warranty purposes. Refer to the manual for detailed schedules and guidelines. Proper maintenance enhances safety, efficiency, and overall driving experience.

Scheduled Maintenance and Service Intervals

Adhering to the recommended service schedule ensures optimal performance and longevity of your Jeep Wrangler. Regular maintenance intervals include oil changes every 5,000 to 7,500 miles, depending on driving conditions. Brake pads, rotors, and suspension components should be inspected every 15,000 miles. Tire rotations are recommended every 8,000 miles to ensure even wear. The annual inspection covers belts, hoses, and fluid levels. Use the maintenance minder system to track due services. Keep a service log for warranty purposes. Refer to the manual for detailed schedules and guidelines to maintain your vehicle in top condition. Proper servicing enhances reliability and safety.

Fluid Levels and Tire Pressure Monitoring

Regular monitoring of fluid levels and tire pressure is crucial for optimal performance and safety; Check engine oil, coolant, transmission, and brake fluid levels during routine maintenance. Ensure windshield washer fluid is topped up for visibility. Tire pressure should match the recommended levels, found in the owner’s manual or on the tire information placard. Proper inflation improves handling, fuel efficiency, and tire longevity. Use a pressure gauge for accuracy and inspect tires for wear or damage. The Tire Pressure Monitoring System (TPMS) alerts you to low pressure, ensuring timely adjustments. Always maintain correct fluid levels and tire pressure for a smooth and safe driving experience.

Technical Specifications

This section outlines the Jeep Wrangler’s technical specifications, including engine options, transmission types, suspension details, dimensions, capacities, weight limits, and axle ratios for on-road and off-road performance.

Engine, Transmission, and Suspension Details

The Jeep Wrangler offers various engine options, including a 2.4L inline-four cylinder and a 4.0L V6, delivering robust power for both on-road and off-road driving. The transmission choices include a six-speed manual and a four-speed automatic, providing smooth gear shifting. The suspension system features a proven five-link coil setup, ensuring exceptional stability and articulation. This combination allows the Wrangler to excel in challenging terrains while maintaining comfortable ride quality. These specifications ensure the vehicle’s versatility, making it suitable for diverse driving conditions and preferences. Proper understanding of these components is essential for optimal performance and maintenance.

Dimensions, Capacities, and Weight Limits

The Jeep Wrangler features a robust design with specific dimensions to enhance off-road capability. Its overall length, wheelbase, and height are optimized for maneuverability and clearance. The vehicle’s curb weight varies by model, with a maximum payload capacity designed for hauling gear. The fuel tank capacity ensures extended range for both on-road and off-road adventures. Weight limits, including Gross Vehicle Weight Rating (GVWR), are crucial for safe towing and loading. These specifications ensure the Wrangler’s versatility, balancing performance and practicality. Understanding these measurements and limits is essential for maintaining optimal vehicle performance and safety under various driving conditions.

Off-Road Driving Tips

Mastering off-road driving requires preparation, skill, and knowledge of your Jeep Wrangler’s capabilities. Always assess terrain, use low gear for steep inclines, and maintain steady momentum. Avoid sudden movements and ensure proper tire pressure for traction. Carry recovery tools and practice safe driving practices to minimize environmental impact and ensure a safe adventure. Familiarize yourself with four-wheel-drive modes and suspension settings to optimize performance on various surfaces.

Preparing for Off-Road Adventures

Before heading off-road, ensure your Jeep Wrangler is ready for the challenge. Check fluid levels, tire pressure, and suspension settings. Pack essentials like a recovery kit, spare tires, and tools. Plan your route, considering terrain difficulty and weather conditions. Familiarize yourself with four-wheel-drive modes and locking differentials. Secure loose items inside the vehicle to prevent damage; Bring navigation aids, emergency supplies, and communication devices. Assess your skill level and vehicle capabilities to choose appropriate trails. Always inform someone about your itinerary and expected return time; Proper preparation ensures safety, reduces risks, and enhances your off-road experience.

Best Practices for Safe Off-Road Driving

Safe off-road driving requires skill, awareness, and caution. Always engage four-wheel drive when necessary and reduce speed on uneven terrain. Avoid sudden acceleration or sharp turns to maintain control. Use hill descent control on steep inclines to manage speed. Keep a safe distance from obstacles and be mindful of your vehicle’s clearance. Stay alert for changing conditions like mud, sand, or water. Use recovery gear responsibly and never drive alone without proper communication devices. Respect the environment by staying on designated trails. Practice defensive driving and never exceed your vehicle’s capabilities or your driving experience. Safety should always be your top priority.

Troubleshooting Common Issues

Identify and resolve common issues with your Jeep Wrangler using diagnostic tools and error codes. Consult the manual for guidance on addressing electrical, mechanical, or software faults. If unresolved, contact a certified technician for professional assistance.

Diagnosing Warning Lights and Error Codes

When a warning light illuminates on your Jeep Wrangler’s dashboard, refer to the Uconnect system or owner’s manual to identify the issue. Error codes provide specific details about system malfunctions. Use the diagnostic tools built into the Uconnect system or a compatible OBD-II scanner to retrieve codes. Common issues include engine faults, transmission problems, or sensor malfunctions. Once identified, consult the manual or contact a certified technician for guidance. Addressing these issues promptly ensures optimal performance and prevents further damage to your vehicle. Always prioritize safety and professional assistance for complex repairs.

Common Problems and DIY Fixes

Common issues with the Jeep Wrangler include faulty oxygen sensors, worn-out brake pads, and electrical malfunctions. For minor problems, such as replacing air filters or topping off fluids, DIY fixes are straightforward. Consult the manual for step-by-step guidance. Loose connections or corroded terminals can often be resolved with basic tools. For more complex issues like error codes or sensor failures, use a diagnostic tool or OBD-II scanner to identify the problem. Always refer to the manual for specific instructions and safety precautions. If unsure, seek professional assistance to avoid further damage. Regular maintenance can prevent many of these issues from arising.

Accessories and Customization

Customize your Jeep Wrangler with approved accessories like roof racks, lift kits, and custom wheels. Personalize interiors with tailored seats and trim options for enhanced comfort and style.

Approved Accessories for Jeep Wrangler

Enhance your Jeep Wrangler with factory-approved accessories designed to maintain performance and style. Choose from a range of options, including roof racks, lift kits, and protective floor mats. Official MOPAR accessories ensure compatibility and durability, while custom wheels and bumpers can personalize your vehicle’s look. For off-road enthusiasts, winches, skid plates, and suspension upgrades are recommended. Interior accessories like premium seat covers and storage solutions can improve comfort and functionality. Always consult authorized dealers or the manual for compatibility and installation guidelines to ensure your modifications meet safety and warranty standards.

Customization Options and Aftermarket Parts

Customize your Jeep Wrangler with a wide range of aftermarket parts to suit your style and needs. Popular modifications include lift kits, suspension upgrades, and performance-enhancing engine components. Owners can also add unique exterior features like LED light bars, custom bumpers, and specialized wheel designs. Interior upgrades, such as premium seating and advanced infotainment systems, enhance comfort and functionality. When choosing aftermarket parts, ensure they meet safety and compatibility standards to maintain your vehicle’s performance and warranty. Always consult reputable suppliers and professionals for installation to avoid potential issues. Personalize your Jeep to reflect your lifestyle and driving preferences while maintaining its legendary capability;

Warranty and Support

Your Jeep Wrangler is backed by a comprehensive warranty program, offering coverage for parts and labor under specified conditions. For detailed information, refer to your warranty booklet or contact Jeep customer support. Additionally, authorized service centers provide expert assistance, ensuring your vehicle receives the care it deserves. Stay informed about warranty terms, extensions, and maintenance requirements to protect your investment and maintain optimal performance. Jeep’s dedicated support team is here to address any questions or concerns, ensuring a smooth ownership experience.

Understanding Your Vehicle Warranty

Your Jeep Wrangler warranty provides coverage for defective parts and labor under normal use, with specific terms and conditions outlined in your warranty booklet. The warranty period typically starts from the date of purchase and varies by component, with coverage for parts like the powertrain, emissions, and corrosion protection. Regular maintenance is required to maintain warranty validity, as outlined in the manual. Additionally, warranties may be transferable to subsequent owners under certain conditions. For detailed information, refer to your warranty booklet or contact Jeep customer support. Understanding your warranty ensures optimal protection and peace of mind for your vehicle.

Customer Support and Service Centers

Jeep offers comprehensive customer support to ensure your ownership experience is seamless. Visit the official Jeep website or mobile app for resources, including downloadable manuals, video tutorials, and warranty details. For assistance, contact Jeep customer support via phone, email, or live chat. Authorized service centers are equipped to handle maintenance, repairs, and upgrades, ensuring your Wrangler is serviced by certified professionals. Additionally, the Uconnect system provides in-vehicle support, and the Jeep app offers remote access to vehicle diagnostics and service scheduling. Stay connected with the Jeep community through forums and events for shared knowledge and enthusiasts’ support.

Environmental Considerations

Adopt eco-friendly driving practices to minimize your Jeep Wrangler’s environmental impact. Properly dispose of vehicle fluids and parts to protect the environment. Refer to your manual for guidance.

Eco-Friendly Driving Practices

To minimize your Jeep Wrangler’s environmental impact, adopt eco-conscious habits. Maintain proper tire pressure and avoid aggressive driving to improve fuel efficiency. Regular tune-ups ensure optimal engine performance, reducing emissions. Use cruise control on highways to maintain consistent speeds and conserve fuel. Recycle or dispose of vehicle fluids and parts responsibly to prevent environmental contamination. Follow guidelines in your manual for proper disposal methods. By practicing these habits, you contribute to a cleaner environment while enhancing your vehicle’s performance and longevity. Eco-friendly driving not only benefits the planet but also helps you get the most out of your Jeep Wrangler.

Proper Disposal of Vehicle Fluids and Parts

Proper disposal of vehicle fluids and parts is crucial for environmental protection. Dispose of oil, coolant, and other hazardous materials at certified recycling centers. Batteries, tires, and brake fluids must be handled separately due to their toxic properties. Check local regulations for specific guidelines. Do not drain fluids onto the ground or discard parts in regular trash. Use leak-proof containers for transporting fluids and ensure parts are recycled responsibly. Consult your Jeep Wrangler manual for recommended disposal methods and facilities. Proper disposal helps protect ecosystems and ensures compliance with environmental laws, promoting sustainability and responsible vehicle ownership.

Thank you for exploring the Jeep Wrangler Instruction Manual. By following these guidelines, you’ll ensure safe, enjoyable, and environmentally responsible driving experiences. Happy trails ahead!

Final Tips for Enjoying Your Jeep Wrangler

Maximize your Jeep Wrangler experience by familiarizing yourself with its features and capabilities. Regular maintenance ensures optimal performance and longevity. Explore off-road adventures with confidence, using proper preparation and safety precautions. Utilize the Uconnect system for navigation and entertainment, and stay connected with Bluetooth functionality. Always prioritize safety, following guidelines for airbags, seatbelts, and emergency procedures. For troubleshooting, refer to the diagnostic tools and common fixes outlined in the manual. Join the Jeep community to share experiences and gain insights. Embrace the freedom and versatility of your Wrangler, whether on-road or off-road, and enjoy the journey!

Staying Connected with the Jeep Community

Engage with the vibrant Jeep community to enhance your ownership experience. Join online forums, social media groups, and local clubs to share tips, modifications, and adventures. Access downloadable manuals and guides to stay informed about maintenance, troubleshooting, and customization. Participate in events and meetups to connect with fellow enthusiasts and gain insights. The community offers valuable advice, support, and inspiration to maximize your Jeep Wrangler’s potential. Stay updated on the latest trends, accessories, and aftermarket parts. By staying connected, you become part of a passionate network dedicated to the Jeep lifestyle, ensuring you get the most out of your vehicle.

gravely manuals

Gravely manuals are essential guides for operating, maintaining, and troubleshooting Gravely equipment, ensuring safety, efficiency, and longevity. They provide detailed instructions, diagrams, and expert advice for users.

1.1. Overview of Gravely Manuals

Gravely manuals are comprehensive guides designed to help users understand and utilize Gravely equipment effectively. These manuals cover a wide range of topics, from basic operation and maintenance to advanced troubleshooting techniques. They are tailored for both novice and experienced users, providing clear instructions, diagrams, and safety tips. The manuals are structured to ensure easy navigation, with sections dedicated to specific models and their unique features. They serve as invaluable resources for optimizing performance, ensuring safety, and extending the lifespan of Gravely machinery.

1.2. Importance of Gravely Manuals

Gravely manuals are crucial for the safe and efficient operation of equipment. They provide clear instructions and safety tips to prevent accidents and ensure optimal performance. By following these manuals, users can maintain their machinery effectively, reducing repair costs and extending longevity. Adherence to the guidelines ensures compliance with manufacturer standards, which is vital for warranty validity and operational safety.

Understanding Gravely Manuals

Gravely manuals provide comprehensive guides for equipment operation, maintenance, and troubleshooting. They feature clear instructions, diagrams, and expert tips, ensuring users can understand and apply the information effectively.

2.1. Structure and Format

Gravely manuals are structured to ensure clarity and ease of use. They typically begin with an introduction, followed by detailed sections on maintenance, troubleshooting, and safety. The format includes numbered steps, diagrams, and visual aids to guide users through complex procedures. Clear headings and subheadings help navigate the content, while bullet points and tables highlight key information. This organized approach ensures users can quickly find and understand the information they need, making the manuals both practical and user-friendly.

2.2. Key Components of Gravely Manuals

Gravely manuals include essential components such as detailed instructions, high-quality diagrams, and comprehensive parts lists. These elements ensure users can understand and perform complex procedures with accuracy. Safety guidelines are prominently featured to prevent accidents, while troubleshooting sections help diagnose and resolve common issues. Additional resources, like appendices with technical specifications and maintenance schedules, further enhance the manual’s utility. These components work together to make the manual a complete and indispensable resource for operators and technicians.

Maintenance and Repair Guides

Gravely manuals offer detailed maintenance schedules and repair procedures to ensure equipment longevity. They provide step-by-step instructions for routine checks, part replacements, and troubleshooting common issues effectively.

3.1. Routine Maintenance Procedures

Routine maintenance is crucial for ensuring Gravely equipment operates efficiently. Gravely manuals provide schedules for lubricating moving parts, checking fluid levels, and inspecting belts and tires. Regularly sharpening mower blades and cleaning the mower deck are also emphasized. These procedures help prevent wear and tear, ensuring optimal performance and longevity. By following these guidelines, users can maintain their equipment effectively and avoid costly repairs. Proper maintenance also enhances safety and overall productivity.

3.2. Troubleshooting Common Issues

Gravely manuals offer detailed troubleshooting guides to address common issues, such as engine problems, mowing inefficiencies, or hydraulic malfunctions. They provide step-by-step solutions, including checking error codes, inspecting connections, and replacing worn parts. Manuals also highlight diagnostic tools and methods to identify root causes quickly. By following these guidelines, users can resolve issues efficiently, minimizing downtime and ensuring equipment runs smoothly. Troubleshooting sections are designed to empower users with practical solutions for everyday challenges.

Safety Precautions

Gravely manuals emphasize essential safety measures, including proper protective gear, operation guidelines, and hazard awareness. They ensure safe equipment handling and compliance with safety regulations.

4.1. General Safety Guidelines

Gravely manuals outline critical safety practices to ensure user protection. Always wear personal protective equipment like gloves and goggles. Conduct thorough pre-operation checks and avoid hazardous conditions. Familiarize yourself with equipment controls and adhere to weight limits. Keep loose clothing tied back and avoid distractions while operating. Ensure the work area is clear of obstacles and bystanders. Follow proper shutdown procedures to prevent accidents. These guidelines are designed to safeguard both the operator and the equipment, promoting a safer working environment.

4.2. Hazardous Situations and Solutions

Gravely manuals address potential hazards and provide solutions to ensure safe operation. Common risks include equipment malfunctions, chemical exposure, and operational errors. Solutions involve immediate shutdown, using personal protective gear, and following emergency procedures. For spills, containment and cleanup protocols are outlined. Electrical issues require disconnecting power and professional intervention. Always refer to the manual for specific instructions tailored to the situation, ensuring quick and effective resolution to maintain safety and equipment integrity.

Best Practices for Using Gravely Manuals

Always read the manual thoroughly, follow instructions step-by-step, and refer to diagrams. Regularly update your knowledge on new features and best practices for optimal equipment performance and safety.

5.1. How to Read and Interpret Instructions

To effectively use Gravely manuals, start by skimming headings to identify key sections. Read instructions step-by-step, paying attention to warnings and safety notes. Highlight or underline important details for quick reference. Understand technical terms and refer to diagrams for visual clarity. Align the instructions with your equipment model and operational needs. Practice active reading by asking questions and seeking additional resources if unclear. This approach ensures comprehension and proper application of the manual’s guidance, enhancing safety and efficiency.

5.2. Tools and Equipment Required

Using Gravely manuals effectively requires having the right tools and equipment. Essential items include wrenches, screwdrivers, pliers, and socket sets for mechanical tasks. Safety gear like gloves and goggles is crucial for protection. Specialized tools, such as multimeters or hydraulic pressure testers, may be needed for advanced diagnostics. Ensure all tools are compatible with your equipment to avoid damage. Keep a well-organized toolbox and refer to the manual for specific recommendations to streamline maintenance and repairs.

DIY Projects with Gravely Manuals

Gravely manuals empower users to explore various DIY projects, enabling modifications, upgrades, and customizations with clear guidance, fostering creativity and efficiency in equipment maintenance and improvement.

6.1. Simple Modifications and Upgrades

Gravely manuals provide detailed guidance for simple modifications and upgrades, helping users enhance their equipment’s performance. From adjusting settings to installing attachments, these manuals offer step-by-step instructions. Whether it’s improving efficiency or customizing features, the manuals ensure modifications are done safely and effectively. Users can explore basic upgrades like blade replacements or adding accessories, all while maintaining warranty compliance. These DIY projects not only boost functionality but also empower users to tailor their equipment to specific tasks or preferences, fostering creativity and resourcefulness.

6.2. Advanced Customization Techniques

Gravely manuals also delve into advanced customization techniques, allowing users to tailor their equipment for specialized tasks. These techniques may include complex mechanical upgrades, software adjustments, or integrating additional features. The manuals provide detailed schematics and step-by-step guides for advanced modifications, ensuring safety and compatibility. Users with technical expertise can explore performance tuning, custom fabrication, or system enhancements. By following these advanced methods, users can unlock their equipment’s full potential, achieving precise results and boosting productivity for unique operational needs.

Troubleshooting and Error Codes

Gravely manuals provide comprehensive troubleshooting guides, detailing common error codes, solutions, and diagnostic tools. They help users identify and resolve issues efficiently, ensuring optimal equipment performance.

7.1. Common Error Codes and Solutions

Gravely manuals detail common error codes and their solutions, ensuring quick troubleshooting. For example, E01 often indicates a sensor malfunction, while E02 may signal a connectivity issue. Solutions typically involve resetting systems, cleaning sensors, or updating software. The manual provides step-by-step guidance for each code, helping users resolve problems efficiently. By referencing these codes, operators can diagnose and fix issues without extensive technical knowledge, minimizing downtime and ensuring smooth equipment operation. Regular updates to the manual keep solutions current and relevant.

  • Identify the error code displayed.
  • Refer to the manual for specific solutions.
  • Perform recommended troubleshooting steps.

7.2. Diagnostic Tools and Methods

Gravely manuals provide detailed diagnostic tools and methods to identify and resolve equipment issues. Operators can use built-in diagnostic systems, software, and external tools like multimeters. The manual outlines step-by-step procedures for system checks, error code analysis, and sensor calibration. Advanced methods include data logging and real-time monitoring to pinpoint malfunctions. By leveraging these tools, users can efficiently diagnose problems, reducing downtime and ensuring optimal performance. Regular updates in the manual reflect the latest diagnostic advancements and techniques.

  • Utilize built-in diagnostic systems for real-time feedback.
  • Employ external tools for precise measurements and analysis.
  • Follow manual guidelines for accurate troubleshooting.

Warranty and Support Information

Gravely manuals provide detailed warranty information and support resources, ensuring equipment longevity. They outline coverage, contact details, and troubleshooting guides for user convenience and satisfaction.

8.1. Understanding Warranty Coverage

Gravely manuals provide comprehensive details on warranty coverage, ensuring users understand the terms, duration, and scope of their equipment’s protection. They outline covered components, limitations, and conditions, helping users avoid voiding the warranty. Proper registration and maintenance are emphasized to maximize benefits. The manuals also guide users on how to file claims and contact support for assistance. Understanding warranty coverage is crucial for protecting investments and ensuring equipment longevity. Detailed information helps users navigate warranty processes seamlessly.

8.2. Contacting Customer Support

Gravely manuals provide clear instructions for contacting customer support, ensuring users can easily access assistance. They list contact methods such as phone numbers, email addresses, and online support portals. The manuals emphasize the availability of support teams to address technical inquiries, troubleshooting, and warranty-related questions. Users are encouraged to have model numbers and serial numbers ready for faster resolution. This section ensures users know how to reach support efficiently, resolving issues promptly and effectively.

Environmental and Storage Guidelines

Gravely manuals provide key guidelines for environmentally responsible storage and disposal, ensuring equipment longevity. Proper conditions prevent damage and contamination, while organized storage enhances safe accessibility and maintenance efficiency.

9.1. Proper Storage Conditions

Gravely manuals emphasize storing equipment in dry, clean environments to prevent rust and damage. Keep machinery away from direct sunlight and moisture. Use protective covers and ensure the area is well-ventilated. Store batteries separately, fully charged, and in a cool place. Regularly inspect stored equipment for signs of wear or pests. Follow manufacturer guidelines for optimal storage conditions to maintain performance and longevity. Proper storage ensures safety, reduces maintenance needs, and extends the lifespan of your Gravely equipment.

9.2. Disposal and Recycling Tips

Gravely manuals recommend eco-friendly disposal and recycling practices for outdated or damaged equipment. Recycle metal and plastic parts whenever possible. Properly drain fluids and dispose of hazardous materials like batteries and oils according to local regulations. Check with recycling centers or authorized dealers for guidance. Follow environmental guidelines to minimize waste and promote sustainability. Ensure all components are safely handled to prevent harm to the environment. Responsible disposal helps conserve resources and reduces ecological impact.

Future Trends in Gravely Manuals

Gravely manuals will likely integrate AI, interactive guides, and real-time updates, enhancing user experience and accessibility through digital platforms. Technology will make manuals more dynamic and user-friendly.

10.1. Digital Manuals and New Technologies

Digital Gravely manuals are becoming increasingly popular, offering interactive guides, searchable content, and real-time updates. New technologies like AI-powered search and video tutorials enhance usability. Web-based platforms allow instant access from any device, while QR codes link directly to specific sections. These innovations ensure manuals are more accessible, reducing errors and improving efficiency. The integration of augmented reality (AR) could further revolutionize how users interact with Gravely equipment, providing immersive, step-by-step instructions. This shift toward digital solutions is making manuals more dynamic and user-friendly.

10.2. Evolving User Expectations

Users increasingly expect Gravely manuals to be more interactive, personalized, and easily accessible. With the rise of digital platforms, there is a growing demand for manuals that offer tailored guidance, video tutorials, and real-time updates. Users also seek intuitive search functions and mobile-friendly formats. These evolving expectations push manufacturers to innovate, ensuring manuals are not just informative but also engaging and adaptable to individual needs. This shift reflects a broader trend toward user-centric design in technical documentation.

Gravely manuals are indispensable for users, ensuring efficient operation and safety. By following guidelines, users maximize performance and equipment lifespan. Always refer to the manual for comprehensive guidance and support.

11.1. Final Thoughts on Gravely Manuals

Gravely manuals serve as vital resources for users, providing clear guidance on safety, maintenance, and operation. They empower users to optimize performance, troubleshoot issues, and extend equipment lifespan. By adhering to the manual’s instructions, users can ensure efficient and safe operation. These manuals are not just technical documents but tools for building expertise and confidence. Whether for routine tasks or complex repairs, Gravely manuals remain indispensable for anyone seeking to maximize their equipment’s potential and longevity.

11.2. Encouragement for Further Exploration

Exploring Gravely manuals beyond the basics can unlock new insights and skills, enhancing your ability to maintain and customize your equipment. Dive into advanced troubleshooting, DIY projects, and customization techniques to optimize performance. Engage with community forums and additional resources for shared knowledge and support. Embrace continuous learning to master your Gravely equipment and explore innovative ways to improve its functionality. Remember, every page offers valuable information to help you achieve your goals and maximize your investment.

Additional Resources

Explore recommended websites, community forums, and support groups for further guidance and shared experiences with Gravely manuals and equipment maintenance.

12.1. Recommended Reading and Websites

For in-depth knowledge, visit Gravely’s official website and explore their comprehensive guides. Check out community forums like Reddit’s DIY and gardening sections for shared experiences. YouTube channels specializing in lawn equipment offer valuable tutorials. Additionally, e-books and instructional guides on platforms like Amazon and eBay provide detailed insights. Cross-reference with manufacturer-authorized service centers for accurate information. Engage with user communities to troubleshoot and discover tips from seasoned professionals. These resources collectively enhance your understanding and practical skills with Gravely manuals.

12.2. Community Forums and Support Groups

Engaging with community forums and support groups is a valuable resource for Gravely manual users. Platforms like Reddit, Facebook groups, and specialized forums offer spaces to share experiences, ask questions, and gain insights from seasoned professionals. These communities often provide real-world tips, troubleshooting advice, and modifications. Active participation can enhance your problem-solving skills and foster collaboration among enthusiasts. Leveraging these groups ensures you stay updated with the latest trends and solutions, making your use of Gravely manuals more effective and efficient.

whirlpool dishwasher parts manual

The Whirlpool Dishwasher Parts Manual is a comprehensive guide providing detailed information on components, troubleshooting, and maintenance․ It helps users identify and replace parts efficiently, ensuring optimal performance and longevity of their appliance․

Overview of the Manual and Its Importance

The Whirlpool Dishwasher Parts Manual is a comprehensive guide designed to help users understand and maintain their appliance effectively․ It provides detailed diagrams, part lists, and troubleshooting tips, ensuring easy identification and replacement of components․ The manual also includes safety guidelines and warranty information, making it an essential resource for extending the lifespan of your dishwasher and optimizing its performance․

How to Find the Right Parts for Your Whirlpool Dishwasher

Use the model and serial number to identify parts, then access online databases or official Whirlpool resources for accurate diagrams and replacement options․

Locating the Model Number and Serial Number

The model and serial numbers are typically found on a sticker located near the dishwasher door, often on the right or left side of the interior․ These numbers are essential for identifying the correct parts and accessing diagrams or manuals․ Ensure the numbers are visible and legible, as they are required for online lookups or contacting customer support․ Always have them handy when searching for specific components or troubleshooting․

Using Online Lookup Systems for Parts Identification

Online lookup systems simplify identifying Whirlpool dishwasher parts by allowing users to input their model number․ Websites like Sears Parts Direct and Repair Clinic provide detailed diagrams and part lists․ These platforms often feature exploded views, making it easier to locate specific components․ Additionally, many sites offer tutorials or customer support to assist with accurate part identification, reducing errors and ensuring the right fit for your appliance․

Installation and Repair Guides

Installation and repair guides provide step-by-step instructions for fixing common issues, ensuring safety and efficiency․ They include diagrams and tools needed for successful dishwasher repairs and maintenance․

Step-by-Step Instructions for Common Repairs

The manual offers detailed, step-by-step guides for repairing common issues like faulty spray arms, clogged filters, and malfunctioning drain pumps․ Users are advised to identify the problem using diagnostic tools, then follow specific instructions for disassembly, part replacement, and reassembly․ Safety precautions, such as disconnecting power, are emphasized․ Instructions are accompanied by diagrams to ensure clarity and accuracy, helping users restore their dishwasher’s functionality efficiently․

Safety Precautions and Tools Needed

Before starting any repair, ensure the dishwasher is unplugged from the power source to avoid electrical hazards․ Wear protective gloves and eyewear․ Essential tools include screwdrivers, pliers, and wrenches․ Refer to the manual for specific part locations and instructions․ Always check the warranty before initiating repairs․ Ensure all water supply lines are turned off to prevent leaks․ Keep replacement parts and materials ready for a smooth process․

Troubleshooting Common Issues

Identify common problems like poor cleaning, noise, or leaks using diagnostic guides․ Refer to error codes in the manual for precise issue identification and solutions․

Diagnosing Problems Using the Manual

The manual provides a detailed guide for diagnosing issues, starting with error codes and model number identification․ Users can identify common problems like poor cleaning, noise, or leaks by referencing symptoms and troubleshooting charts․ It also includes step-by-step repair guidance, ensuring accurate diagnosis and effective solutions for components like filters, drain pumps, and spray arms․

Common Faults and Their Solutions

Common issues include faulty drain pumps, clogged filters, and malfunctioning spray arms․ The manual offers solutions like cleaning filters, replacing worn seals, and installing new parts․ It also addresses error codes, providing clear instructions for resolving issues efficiently; Regular maintenance, such as checking and replacing worn components, is emphasized to prevent future problems․

Maintenance Tips for Optimal Performance

Regular maintenance ensures optimal performance․ Clean filters, check for wear and tear, and ensure proper water flow․ These steps prevent issues and maintain efficiency․

Cleaning and Replacing Filters

Regularly cleaning and replacing filters is essential for maintaining your Whirlpool dishwasher’s performance․ Locate the filter, usually found under the lower rack or at the tub’s bottom corner․ Remove and rinse it with warm soapy water, using a soft brush to clear debris․ Replace the filter as recommended in the manual, typically every 1-2 months, to prevent clogs and ensure efficient operation․

Regular Checks for Wear and Tear

Regular inspections of your Whirlpool dishwasher can prevent major issues․ Check racks for damage, door seals for cracks, and spray arms for blockages․ Clean or replace these parts as needed to maintain performance․ Lubricate door hinges periodically to ensure smooth operation․ Inspect the drain filter and clean it regularly to avoid clogs․ Addressing wear and tear promptly helps extend the lifespan of your appliance and keeps it running efficiently․

Understanding Diagrams and Schematics

Diagrams and schematics in the Whirlpool manual illustrate dishwasher components, aiding in identification and repair․ They detail part locations, connections, and relationships, ensuring accurate replacements and fixes․

Reading Part Diagrams for Repair

Reading part diagrams in the Whirlpool manual helps identify components accurately․ Locate the model number to match diagrams, understand symbols, and find part numbers․ Use the diagrams to pinpoint worn or faulty parts, ensuring precise repairs․ Cross-reference with the parts list for clarity and ease of understanding, making DIY fixes more straightforward and efficient for optimal dishwasher performance․

Using Schematics to Identify Components

Using schematics in the Whirlpool manual helps visually identify dishwasher components and their connections․ Locate your model number to access specific diagrams, then cross-reference with the parts list for accurate identification․ Understand symbols and flowcharts to pinpoint issues like faulty pumps or motors․ This method ensures precise repairs by mapping out the appliance’s inner workings, saving time and reducing errors in part replacements and troubleshooting․

Commonly Replaced Parts

Commonly replaced parts include spray arms, drain pumps, and filters․ These components often wear out and can be sourced from genuine Whirlpool suppliers like Parts Town or Sears Parts Direct․

Key Components Like Spray Arms and Drain Pumps

The spray arm distributes water during cycles, while the drain pump ensures efficient water removal․ These components are crucial for optimal performance․ Regular maintenance, such as cleaning the spray arm and checking the drain pump, prevents clogs and ensures proper function․

Where to Buy Genuine Whirlpool Parts

Genuine Whirlpool parts are available through authorized distributors like Parts Town, Sears Parts Direct, and Repair Clinic․ These sources ensure authenticity and compatibility․ For convenience, Whirlpool’s official website also offers a model-specific lookup tool to find and purchase original parts․ Always verify the model number to ensure the correct fit and maintain warranty validity․

Model-Specific Information

Model-specific information ensures accurate repairs and maintenance by detailing unique parts and technical specs for each Whirlpool dishwasher model, aiding in precise component identification and compatibility․

Differences in Parts Across Various Models

Whirlpool dishwashers vary in parts across models, with differences in components like rack track stops, heating elements, and pump assemblies․ Specific models, such as WDF310PAAB2 or WDF310PAAW2, may have unique parts designed for their configuration․ Always refer to the model-specific manual to ensure compatibility when replacing parts like spray arms or diverter motors, as designs differ to suit each model’s features and performance requirements․

Technical Specifications for Popular Models

Popular Whirlpool dishwasher models like WDF530PSYW2 and ADP 5966 WHM include detailed technical specs in their manuals․ These specs outline dimensions, weight, and specific features like silent operation or advanced drying systems․ Models may also list exact part numbers, such as the WPW10605057 Pump and Motor Assembly, ensuring precise repairs․ These specifications help users and technicians identify compatible parts and perform accurate upgrades or maintenance, enhancing appliance performance and longevity․

Additional Resources and Support

Whirlpool offers extensive online resources, including official manuals, customer service at 1-800-253-1301, and genuine parts from trusted retailers like Parts Town and Repair Clinic, ensuring comprehensive support for dishwasher maintenance and repairs․

Accessing Official Whirlpool Manuals Online

Accessing official Whirlpool dishwasher manuals is straightforward․ Visit the Whirlpool website at www․whirlpool․com and use the model lookup system to find your appliance’s manual․ Enter your model number, and download the PDF guide for free․ These manuals include detailed diagrams, troubleshooting guides, and part lists․ For Canadian users, visit www․whirlpool․ca or call 1-800-807-6777 for assistance․ This ensures you have all the necessary information for repairs and maintenance at your fingertips․

Customer Service and Warranty Information

Whirlpool offers comprehensive customer support and warranty services․ For assistance, call 1-800-253-1301 in the U․S․ or 1-800-807-6777 in Canada․ Visit www․whirlpool․com or www․whirlpool․ca for warranty details, repair guides, and troubleshooting tips․ Genuine Whirlpool parts are covered under warranty, ensuring reliable performance and protection for your dishwasher․ This support ensures your appliance runs smoothly and any issues are resolved promptly and efficiently․

sharp carousel microwave manual

The Sharp Carousel Microwave offers advanced cooking features like convection and combination modes, along with sensor technology for precise cooking. Designed for versatility and efficiency, it caters to both novice and experienced users, providing a comprehensive guide for setup, operation, and maintenance. This manual, along with the companion cookbook, ensures optimal use of its capabilities, making it a valuable resource for enhancing your culinary skills.

1.1 Overview of the Sharp Carousel Microwave

The Sharp Carousel Microwave is a versatile and advanced appliance offering convection, combination cooking, and sensor technology. Available in models like R-1874 and R-350F, it features programmable settings for precise cooking. Designed for efficiency, it includes an Information Display System and a companion cookbook for enhanced culinary experiences, catering to both novice and experienced users.

1.2 Importance of the User Manual

The user manual is essential for understanding the Sharp Carousel Microwave’s features, safety guidelines, and operation. It provides step-by-step instructions for setup, troubleshooting, and maintenance, ensuring safe and efficient use. The manual also includes warranty details and serves as a quick start guide to master the appliance’s advanced capabilities and customization options.

Installation and Setup

Proper installation ensures safe and efficient operation. Place the microwave on a level surface, ensure adequate ventilation, and follow setup instructions carefully for optimal performance and alignment.

2.1 Physical Installation Requirements

Ensure the microwave is installed on a level, flat surface to prevent vibration. Maintain clearance around vents for proper airflow. Secure the unit to avoid movement during operation. Follow the manual’s guidelines for specific measurements and mounting instructions to ensure stability and safety. Proper installation is crucial for optimal performance and longevity;

2.2 Initial Setup and Configuration

Plug in the microwave and ensure the power cord is securely connected. Set the clock and adjust display settings as needed. Familiarize yourself with control panels and buttons. Refer to the manual for step-by-step instructions on configuring special features like convection settings or sensor cooking. Test basic functions to ensure proper operation before first use.

2.3 Ventilation Requirements for Proper Operation

Ensure proper ventilation by installing the microwave on a level, flat surface with unobstructed air vents. Do not block vents, as this can cause overheating. Maintain at least 3 inches of clearance around the oven for optimal airflow. Regularly clean vents to prevent dust buildup and ensure efficient operation.

Operating the Microwave

Learn to navigate basic controls, utilize sensor cooking, and explore advanced features like convection and combination modes. The intuitive interface guides you through settings, ensuring precise cooking results with minimal effort, while the display offers step-by-step instructions for seamless operation.

3.1 Basic Controls and Functions

The Sharp Carousel Microwave features intuitive controls, including a dial and buttons for easy navigation. Users can set power levels, cooking times, and monitor progress via the digital display. The start button initiates cooking, while sensors adjust settings for optimal results. Ensure all controls are understood before operation for safe and effective use.

3.2 Special Features (Convection, Combination Cooking)

The Sharp Carousel Microwave excels with its advanced convection and combination cooking modes. Convection cooking allows for precise temperature control between 40°C and 230°C, ideal for baking and roasting. Combination mode seamlessly blends microwave and convection cooking for faster, evenly cooked results. These features, guided by the included cookbook, enhance culinary versatility and efficiency.

3.3 Sensor Cooking and Automatic Settings

The Sharp Carousel Microwave features advanced sensor cooking technology, automatically adjusting cooking time and power levels for optimal results. Sensors detect moisture and food density, ensuring perfectly cooked dishes. Automatic settings streamline tasks like defrosting and reheating, while the Information Display System provides step-by-step guidance for effortless cooking experiences tailored to your needs.

Safety Precautions and Warnings

Adhere to safety guidelines to avoid exposure to excessive microwave energy. Ensure proper ventilation, avoid overheating, and keep children away from the appliance while in operation.

4.1 General Safety Guidelines

Always follow safety guidelines to prevent accidents. Keep the microwave area clear of flammable materials. Avoid overheating food or liquids, as they may cause burns. Never leave cooking unattended. Ensure proper ventilation and avoid blocking air vents. Do not use metal utensils or containers, as they can cause sparks. Follow all instructions carefully to ensure safe operation.

4.2 Specific Warnings for Carousel Microwave

Never use the oven without the turntable, as it may cause uneven heating or damage. Avoid blocking air vents to prevent overheating. Do not use metal utensils or containers, as they can spark. Keep the interior clean to avoid food residue igniting. Always follow cooking times and power levels recommended in the manual to ensure safe operation.

4.3 Child Safety Features

The Sharp Carousel Microwave includes a child safety lock to prevent accidental operation. This feature ensures the oven cannot be turned on by children. The manual provides detailed instructions on how to activate and use this lock. Additionally, the door latch design adds an extra layer of protection to keep children safe from hot containers or sharp utensils.

Cooking Modes and Techniques

The Sharp Carousel Microwave offers multiple cooking modes, including microwave-only, convection, and combination cooking. It features sensor technology for automatic settings and customizable power levels, ensuring precise cooking results for various dishes.

5;1 Microwave-Only Cooking

Microwave-only cooking offers quick and efficient meal preparation with adjustable power levels. The Sharp Carousel Microwave features sensor technology to automatically adjust cooking time and power, ensuring evenly cooked dishes. The quick start guide provides step-by-step instructions for basic microwave cooking, making it easy to achieve perfect results for various foods.

5.2 Convection and Combination Cooking

The Sharp Carousel Microwave offers advanced convection cooking with adjustable temperatures (40-230°C) for precise baking and roasting. Combination cooking combines microwave and convection modes for faster, evenly cooked meals. The manual provides detailed guides for setting up convection cooking and troubleshooting common issues, ensuring optimal results for a variety of dishes;

5.3 Defrosting and Reheating Guidelines

The Sharp Carousel Microwave features sensor cooking for precise defrosting and reheating. Use lower power levels to avoid overheating. Follow guidelines for specific food types, ensuring even thawing and reheating. Always cover food to retain moisture and promote even cooking. Consult the manual for detailed time and power recommendations for optimal results.

Cleaning and Maintenance

Regularly clean the interior with mild detergent and water to prevent food residue buildup. Wipe the exterior with a soft cloth and avoid abrasive cleaners. Ensure the turntable and accessories are washed thoroughly after each use to maintain hygiene and efficiency.

6.1 Exterior and Interior Cleaning Tips

For the exterior, use a soft cloth and mild detergent to wipe down surfaces, avoiding abrasive cleaners. Interior cleaning involves using a damp cloth to remove food splatters and stains. Regularly clean the turntable and accessories with warm soapy water. Dry all parts thoroughly to prevent water spots and maintain optimal performance.

6.2 Turntable and Accessory Maintenance

Regularly inspect the turntable for cracks or damage; replace if necessary. Clean accessories with warm soapy water, avoiding abrasive cleaners. Ensure the turntable is properly aligned and seated to maintain smooth rotation. Dry all parts thoroughly after cleaning to prevent water spots and maintain optimal performance and safety.

6.3 Removing Odors and Stains

To eliminate odors, mix equal parts water and vinegar in a microwave-safe bowl. Heat for 2-3 minutes, then let stand for 5 minutes. Wipe interior with a damp cloth. For stains, apply a baking soda paste or lemon juice directly; let sit before cleaning. Regularly cleaning prevents odor buildup and maintains hygiene.

Accessories and Additional Resources

Explore Sharp’s range of compatible accessories and resources, including the Carousel Microwave Cookbook, for enhanced cooking experiences. Visit Sharp’s website or contact 1-800-BE-SHARP for support.

7.1 Compatible Accessories for Carousel Microwave

Enhance your cooking experience with Sharp’s compatible accessories, including the Carousel Microwave Cookbook, turntable replacements, and specialized cooking racks. These tools optimize performance and versatility, ensuring you get the most out of your microwave. Visit Sharp’s official website or contact customer support for a full list of available accessories.

7.2 Sharp Carousel Microwave Cookbook

The Sharp Carousel Microwave Cookbook offers a variety of recipes and cooking tips tailored to your microwave’s unique features. It provides detailed guidance for convection, combination, and sensor cooking, helping you maximize your appliance’s potential. Available online or through Sharp’s customer support, it’s a must-have for exploring advanced cooking techniques and healthy meal options.

7.3 Online Support and Manuals

Sharp offers comprehensive online support, including downloadable manuals, troubleshooting guides, and FAQs. Visit their official website to access resources tailored for your Carousel Microwave. Customer support is also available at 1-800-BE-SHARP for personalized assistance, ensuring you can resolve issues and optimize your appliance’s performance with ease.

Troubleshooting Common Issues

This section covers common issues, error codes, and solutions. Refer to the manual for detailed troubleshooting or contact Sharp support for assistance.

8.1 Common Problems and Solutions

Addressing common issues with your Sharp Carousel Microwave, such as error codes or uneven cooking, starts with checking the manual. Ensure proper ventilation, level placement, and clean filters. For persistent problems, refer to the troubleshooting guide or contact Sharp customer support for professional assistance.

8.2 Error Codes and Their Meanings

Sharp Carousel Microwave error codes like “E-01” or “E-02” indicate specific issues, such as sensor malfunctions or power errors. Consult the manual for code definitions and solutions. If unresolved, contact Sharp customer support for further assistance to ensure proper functionality and safety of your appliance.

8.3 When to Contact Customer Support

Contact Sharp customer support if error codes persist, troubleshooting steps fail, or repairs are needed. For model-specific issues, serial number, and error details ready, call 1-800-BE-SHARP or visit their online support portal for assistance. This ensures timely resolution and maintains your microwave’s optimal performance and warranty coverage.

Warranty and Customer Support

The Sharp Carousel Microwave is covered by a 12-month warranty for parts and labor. For assistance, contact Sharp’s customer service at 1-800-BE-SHARP or visit their official website for support and service options.

9.1 Warranty Details and Coverage

The Sharp Carousel Microwave warranty covers defects in materials and workmanship for one year from purchase. This includes parts and labor, ensuring repairs are free during this period. For details, refer to the manual or contact Sharp’s customer service at 1-800-BE-SHARP for assistance and support options.

9.2 Contacting Sharp Customer Service

For assistance, contact Sharp Customer Service at 1-800-BE-SHARP (1-800-237-4277) or visit their website at www.sharpusa.com. Their customer support team is available to address inquiries, troubleshooting, and warranty-related issues. You can also mail inquiries to Sharp Electronics Corporation, 1300 Naperville Drive, Romeoville, IL 60446-1091, for prompt assistance.

9.3 Authorized Service Centers

Sharp recommends using authorized service centers for repairs to ensure quality and warranty compliance. Visit the Sharp website or call 1-800-BE-SHARP to locate the nearest authorized service center. Have your model and serial number ready for efficient assistance, ensuring your microwave is serviced by trained professionals.

Advanced Features and Customization

Customize your cooking experience with programmable settings, adjustable convection temperatures, and multi-stage cooking. Tailor power levels, timers, and sensor settings for personalized results, enhancing your culinary creativity.

10.1 Programming Custom Cooking Settings

Program custom cooking settings to suit your preferences. Set specific power levels, cooking times, and multi-stage sequences. Utilize the control panel to input up to ten different convection temperatures, ensuring precise control for various dishes. This feature allows you to save frequently used settings for quick access, streamlining your cooking process and enhancing efficiency.

10.2 Adjusting Convection Cooking Temperatures

Adjust convection cooking temperatures precisely between 40°C and 230°C in 10-degree increments. Use the control panel to set your desired temperature and cooking time. This feature ensures even heating and optimal results for baking, roasting, or combination cooking. Custom temperature settings save time and ensure consistent cooking outcomes for various recipes.

10.3 Customizing Power Levels and Timers

Customize power levels from 1 to 10 for precise control over cooking intensity. Set timers up to 99 minutes for accurate cooking durations. Use the control panel to adjust these settings, ensuring optimal results for defrosting, reheating, or cooking specific dishes. Save preferred settings for quick access in future cooking sessions.

Specialized Cooking Guides

Explore advanced techniques for baking, roasting, and combination cooking. The manual provides detailed guides for healthy recipes and specialized methods, enhancing your culinary creativity with precise instructions.

11.1 Baking and Roasting in the Carousel Microwave

Master baking and roasting with precise temperature control and convection features. The Carousel Microwave allows even cooking for cakes, cookies, and roasted meats. Use the companion cookbook for recipes and tips to achieve perfect results every time, ensuring delicious outcomes with minimal effort and time.

11.2 Healthy Cooking Options and Recipes

Utilize the Sharp Carousel Microwave for healthier meals with its convection and combination cooking modes. Steam vegetables, grill lean proteins, and bake whole grains effortlessly. The companion cookbook offers tailored recipes and tips, helping you create nutritious, flavorful dishes while reducing oil and preserving nutrients.

11.3 Advanced Combination Cooking Techniques

Elevate your cooking with the Sharp Carousel Microwave’s combination modes, blending microwave and convection cooking for optimal results. Use custom settings to layer cooking methods, ensuring crispy textures and even heating. Explore advanced techniques like sequential cooking and precise temperature control, supported by the cookbook’s detailed recipes and step-by-step guidance for versatile meal preparation.

User Reviews and Feedback

Users praise the Sharp Carousel Microwave for its versatile cooking modes and user-friendly interface. Many highlight its durability and efficient performance, making it a top choice for home kitchens.

12.1 Popular Opinions on the Carousel Microwave

Users widely praise the Sharp Carousel Microwave for its versatility, highlighting features like convection cooking and sensor technology. Many appreciate its even cooking performance and intuitive controls, making it a favorite for both simple and complex recipes. The carousel design also receives compliments for consistent heating and effortless food rotation during cooking.

12.2 Common Praises and Criticisms

The Sharp Carousel Microwave is often praised for its advanced features like convection cooking and sensor technology, which enhance cooking efficiency. Users appreciate its even heating and spacious interior. However, some critics mention the complexity of controls and the need for frequent cleaning to maintain performance, balancing its overall positive reception.

12.3 Tips from Experienced Users

Experienced users recommend regular cleaning of the turntable and interior for optimal performance. They suggest referencing the Sharp Carousel Cookbook for innovative recipes and troubleshooting common issues. Programming custom settings and using the Information Display System effectively can enhance your cooking experience, ensuring efficient and delicious results every time.

quality manual template

A quality manual template provides a structured framework for documenting processes, ensuring compliance with ISO standards, and establishing a clear Quality Management System (QMS) within an organization.

1;1 Definition and Purpose of a Quality Manual Template

A quality manual template is a pre-designed document that outlines the structure and content for creating a Quality Management System (QMS) manual. Its purpose is to provide a framework for organizations to define their quality policies, procedures, and objectives while ensuring compliance with ISO standards. The template serves as a starting point, allowing businesses to customize the content according to their specific needs and industry requirements, ensuring clarity and consistency in their quality management processes.

1.2 Importance of a Quality Manual in Quality Management Systems (QMS)

A quality manual is essential for establishing a structured and compliant QMS, ensuring alignment with ISO standards. It provides a central reference for policies, procedures, and responsibilities, promoting consistency and clarity across the organization. By documenting processes and objectives, the manual enhances operational efficiency, supports continuous improvement, and facilitates audits. It also serves as a foundation for training and communication, ensuring everyone understands their roles in maintaining quality standards. Ultimately, it helps organizations achieve certification and build trust with customers and stakeholders.

Key Sections of a Quality Manual Template

A quality manual template comprises essential sections such as scope, quality policy, objectives, process interactions, and system structure to establish a robust QMS framework effectively.

2.1 Scope of the Quality Management System

The scope of the Quality Management System (QMS) defines the extent of the system’s application within an organization, outlining which processes, products, and departments are included. It provides clarity on the boundaries of the QMS, ensuring alignment with business objectives and compliance with ISO standards. A well-defined scope helps organizations identify responsibilities, allocate resources effectively, and establish a clear framework for achieving quality goals. This section is crucial for ensuring that the QMS is both comprehensive and tailored to the organization’s specific needs.

2.2 Quality Policy and Objectives

The quality policy and objectives are foundational elements of a Quality Management System (QMS), guiding an organization’s commitment to quality and continuous improvement. They outline the company’s vision, values, and measurable goals, ensuring alignment with business strategies and stakeholder expectations. The quality policy provides a clear direction, while objectives are specific, achievable targets that drive performance. Together, they foster a culture of excellence, accountability, and customer satisfaction, ensuring the QMS is effective and sustainable over time. Regular reviews ensure these elements remain relevant and impactful.

2.3 Process Interaction and System Structure

Process interaction and system structure define how various processes within an organization work together to achieve quality objectives. The quality manual template outlines these interactions, ensuring a clear understanding of roles, responsibilities, and workflows. It provides a visual representation of the system, such as flowcharts or diagrams, to illustrate how processes align with organizational goals. This section ensures that the Quality Management System (QMS) is integrated, efficient, and aligned with ISO standards, fostering a cohesive and structured approach to quality management.

Benefits of Using a Quality Manual Template

A quality manual template streamlines QMS implementation, ensures ISO compliance, enhances operational efficiency, and reduces costs by providing a structured, user-friendly framework for quality management.

3.1 Streamlining QMS Implementation

A quality manual template simplifies the implementation of a Quality Management System (QMS) by providing a pre-structured framework with predefined sections and processes. This reduces the time and effort required to develop a QMS from scratch, allowing organizations to focus on customization rather than creation. The template includes gap analysis tools, process maps, and sample procedures, ensuring a smooth transition to a fully operational QMS. This user-friendly approach enables businesses to efficiently document their system, align with ISO standards, and achieve compliance without unnecessary delays.

3.2 Ensuring Compliance with ISO Standards

A quality manual template is designed to ensure compliance with ISO standards by providing a framework that aligns with specific requirements. It includes gap analysis checklists, process flowcharts, and sample procedures to meet ISO 9001:2015 guidelines. The template ensures that all necessary documentation is in place, making it easier to demonstrate compliance during audits; By following the template, organizations can avoid non-compliance issues and maintain a system that consistently meets ISO standards, ensuring certification and operational integrity.

3.4 Enhancing Operational Efficiency

A quality manual template enhances operational efficiency by streamlining processes and reducing redundancy. It provides clear documentation, ensuring all employees understand their roles and responsibilities. Standardized procedures and automated forms minimize errors and save time. The template also includes process flowcharts and checklists, enabling teams to focus on core activities. By implementing a structured QMS, organizations can improve workflow, reduce delays, and allocate resources more effectively, leading to overall business performance improvements and better alignment with strategic goals.

How to Choose the Right Quality Manual Template

Selecting the right quality manual template involves ensuring it aligns with your organization’s needs, is scalable, and complies with ISO standards. Choose templates that are customizable, user-friendly, and tailored to your industry for effective QMS implementation.

4.1 Factors to Consider in Template Selection

When selecting a quality manual template, consider its alignment with your organization’s goals, scalability for future growth, and compliance with ISO standards. Ensure the template is user-friendly, customizable, and includes essential sections like process maps and audit checklists. Industry-specific features and compatibility with your QMS are crucial. Additionally, evaluate the provider’s reputation, customer support, and updates to ensure long-term usability. The template should also be cost-effective and adaptable to your company’s unique requirements.

4.2 Popular Types of Quality Manual Templates

Popular quality manual templates include ISO 9001:2015, ISO 14001:2015, and ISO 45001:2018, catering to different management systems. Industry-specific templates, such as IATF 16949 for automotive and AS9100D for aerospace, are also widely used. Additionally, templates for ISO 13485 (medical devices) and ISO 22000 (food safety) are common. These templates are designed to address unique industry requirements while ensuring compliance with international standards, making them versatile tools for organizations across various sectors.

Customizing the Quality Manual Template

Customizing a quality manual template involves tailoring its content to meet specific organizational needs, ensuring alignment with the company’s mission and operational processes while maintaining compliance with ISO standards;

5.1 Tailoring the Template to Organizational Needs

Tailoring a quality manual template involves aligning it with the organization’s specific goals, structure, and processes. This ensures the document reflects the company’s unique requirements and complies with ISO standards. Organizations should include details such as their mission statement, quality objectives, and key processes. The template should be adapted to cover roles, responsibilities, and operational procedures. Regular reviews and updates are essential to maintain relevance and effectiveness in supporting the organization’s quality management system.

5.2 Best Practices for Effective Customization

Effective customization of a quality manual template involves maintaining clarity and conciseness while ensuring alignment with organizational goals. Involve key stakeholders in the customization process to ensure relevance and buy-in. Use clear language and avoid jargon to make the document accessible. Regularly review and update the manual to reflect changes in processes or standards. Incorporate visual aids like flowcharts or diagrams to enhance understanding. Ensure compliance with ISO standards while tailoring content to meet specific organizational needs. Always test the customized manual with a small group before full implementation.

Common Mistakes to Avoid When Using a Quality Manual Template

Common mistakes include overlooking specific organizational requirements, failing to regularly update the manual, and using overly generic content without proper customization to meet ISO standards effectively.

6.1 Overlooking Specific Organizational Requirements

One common mistake is failing to tailor the quality manual template to an organization’s unique needs. Using a generic template without customization can lead to non-compliance with ISO standards and operational inefficiencies. It is crucial to ensure the manual aligns with the company’s specific processes, policies, and objectives. Overlooking organizational requirements can result in a mismatch between documented processes and actual practices, undermining the effectiveness of the Quality Management System (QMS). Regular reviews and updates are essential to maintain relevance and compliance.

6.2 Failing to Regularly Update the Manual

Failing to regularly update the quality manual can lead to non-compliance with ISO standards and operational inefficiencies. As organizations evolve and standards like ISO 9001:2015 are updated, the manual must reflect these changes. Outdated documents can misguide employees and auditors, leading to gaps in processes. Regular reviews and updates ensure the manual remains relevant and aligned with current practices. Neglecting this step risks losing certification and undermines the effectiveness of the Quality Management System (QMS). Proactive maintenance is essential for sustained compliance and efficiency.

A quality manual template is essential for establishing and maintaining an effective QMS. Organizations should implement it, train staff, and regularly update processes to ensure compliance and efficiency.

7.1 Final Thoughts on the Importance of a Quality Manual Template

A quality manual template is indispensable for streamlining QMS implementation and ensuring compliance with ISO standards. It provides a structured approach to documenting processes, policies, and procedures, enhancing operational efficiency and aligning organizational goals. By using a template, businesses can avoid costly mistakes and ensure consistency across all departments. Regular updates and customization are crucial to maintain relevance and effectiveness. Ultimately, a well-crafted quality manual template serves as a cornerstone for achieving certification and fostering a culture of continuous improvement.

7.2 Additional Resources for Further Learning

Explore extensive resources online to deepen your understanding of quality manual templates. Websites like Quality Manual Templates and ISO 9001 Help offer comprehensive guides, templates, and checklists. Free templates for ISO 9001, ISO 14001, and other standards are available, along with gap analysis tools and user-friendly instructions. These resources provide practical support for implementing and maintaining a Quality Management System, ensuring compliance and operational efficiency. Utilize these tools to enhance your knowledge and streamline your QMS implementation journey.