Bionaire humidifiers provide effective solutions for maintaining optimal indoor humidity levels‚ ensuring comfort and health․ Proper setup‚ operation‚ and maintenance are essential for efficient performance and longevity․
Overview of Bionaire Humidifiers
Bionaire humidifiers are designed to provide efficient and reliable moisture control‚ enhancing indoor air quality for comfort and health․ Available in various models‚ including the BU7000 and BUL9500-U‚ these devices offer features like 16-hour timers‚ energy-saving modes‚ and adjustable settings․ They cater to different spaces and needs‚ ensuring optimal humidity levels․ Bionaire humidifiers are known for their quiet operation‚ easy maintenance‚ and user-friendly interfaces․ Many models include advanced features such as humidistats and multiple speed settings․ Regular maintenance is crucial for their longevity and effectiveness․ With a focus on innovation and customer satisfaction‚ Bionaire humidifiers are a popular choice for households seeking to combat dry air and improve overall well-being․
Importance of Proper Usage and Maintenance
Proper usage and maintenance of Bionaire humidifiers are crucial for optimal performance‚ health‚ and safety․ Regular cleaning prevents bacterial growth and mineral buildup‚ ensuring clean mist output․ Following guidelines helps extend the product’s lifespan and prevents operational issues․ Improper use can lead to inefficiency or damage‚ while neglecting maintenance may compromise air quality․ Daily checks and weekly deep cleaning are essential to keep the unit functioning effectively and safely․ Adhering to instructions ensures the humidifier operates efficiently‚ providing the intended benefits without risks․ Proper care also helps maintain warranty validity and ensures consistent performance over time․

Pre-Operating Instructions
Before using your Bionaire humidifier‚ ensure proper setup by unpacking‚ inspecting for damage‚ and placing it on a level surface away from heat sources․ Follow filling guidelines to prepare for operation․
Unpacking and Initial Inspection
When you receive your Bionaire humidifier‚ carefully unpack all components‚ including the base‚ water tank‚ and accessories․ Inspect for any visible damage or defects․ Ensure all parts are included and match the contents listed in the manual․ Place the unit on a level‚ stable surface away from heat sources like radiators or heaters․ Before first use‚ rinse the water tank and base with clean water to remove any manufacturing residue․ This step ensures proper function and prevents contamination․ If any damage or missing parts are found‚ contact customer support immediately․ Proper unpacking and inspection are crucial for safe and effective operation․
- Check for any visible damage or defects․
- Ensure all parts are included and undamaged․
- Rinse the water tank and base before use․
- Place the humidifier on a level‚ stable surface․
Placement Guidelines
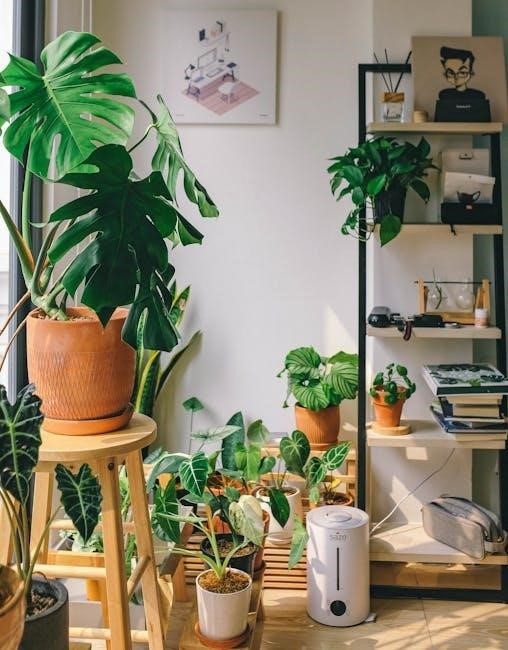
Proper placement of your Bionaire humidifier is essential for optimal performance and safety․ Position the unit on a level‚ stable surface at least 4 inches away from walls to ensure proper air circulation․ Avoid placing it near heat sources such as radiators‚ heaters‚ or stoves‚ as this can interfere with humidity control․ The humidifier should be located on an inside wall near an electrical outlet to minimize cord exposure․ Keep it out of reach of children and pets to prevent accidental tampering or tipping․ Do not place the humidifier in a closed room or area with poor ventilation‚ as this can lead to over-humidification․ Ensure the surface is water-resistant to protect against moisture damage․
- Place on a level‚ stable surface․
- Keep at least 4 inches away from walls․
- Avoid heat sources and closed spaces․
- Position near an electrical outlet․
- Ensure the surface is water-resistant․
Proper placement ensures efficient operation and safety․

Filling the Water Tank
Filling the water tank of your Bionaire humidifier is a straightforward process that requires attention to detail to ensure proper function and safety․ First‚ turn off the humidifier and unplug it to prevent any accidental operation during the process․ Locate the water tank‚ typically positioned on top of the unit‚ and open it according to the manufacturer’s design—some tanks may have a detachable lid or a compartment that swings open․ Use clean‚ cool water to fill the tank‚ preferably distilled water to minimize mineral buildup and maintain optimal performance․ Be sure not to exceed the maximum water level indicated on the tank to avoid overfilling‚ which can lead to leaks or inefficiency; Once filled‚ securely close the tank and place it back on the humidifier․ Plug in the device and turn it on to resume operation․ Regularly checking the water level and refilling as needed will ensure continuous humidity control and prevent the growth of bacteria or mold․ Additionally‚ cleaning the tank periodically is crucial for maintaining hygiene and the longevity of your humidifier․
- Turn off and unplug the humidifier before filling․
- Use clean‚ preferably distilled water to prevent mineral buildup․
- Do not exceed the maximum water level to avoid leaks․
- Securely close the tank after filling;
- Regularly check and refill the water tank․
- Clean the tank periodically to maintain hygiene․
Properly filling and maintaining the water tank ensures efficient and safe operation of your Bionaire humidifier․
Operating the Bionaire Humidifier
Operating your Bionaire humidifier involves setting the humidistat to your desired humidity level and adjusting the speed for optimal performance․ Use the Auto mode for effortless control‚ and utilize the 16-hour timer for convenience․ Ensure the water tank is filled and properly placed before turning it on․ Regular checks guarantee efficient operation and silent functionality․ Features like energy-saving modes enhance convenience‚ making it easy to maintain a comfortable environment․
Key Steps:
- Set the humidistat to your preferred humidity level․
- Adjust the speed setting for optimal mist output․
- Use the timer for automated operation․
- Ensure the water tank is filled and correctly positioned․
Proper operation ensures a comfortable and healthy indoor environment․
Setting Up the Humidistat
Setting up the humidistat on your Bionaire humidifier ensures optimal humidity levels in your space․ To activate the Auto mode‚ press the Mode button until “Auto” appears on the display․ This allows the humidifier to automatically adjust mist output based on the room’s humidity․ Next‚ choose your desired speed setting using the control panel․ Finally‚ set your preferred humidity level using the provided controls․ The humidistat will maintain this level‚ turning the unit on or off as needed․ For manual operation‚ you can bypass the humidistat and set a constant speed․ Regularly monitor and adjust the settings to match your comfort needs and environmental conditions․
Key Tips:
- Use Auto mode for hands-free humidity control․
- Adjust speed settings to customize mist output․
- Set your desired humidity level for consistent comfort․
Proper humidistat setup ensures efficient and comfortable operation․

Adjusting Speed Settings for Optimal Performance
Adjusting the speed settings on your Bionaire humidifier ensures efficient mist output and personalized comfort․ Most models feature multiple speed options‚ such as low‚ medium‚ and high‚ allowing you to customize performance based on room size and humidity needs․ For smaller spaces or lower humidity requirements‚ a lower speed setting is sufficient․ In larger areas or during dry conditions‚ higher speeds provide increased mist output․ To optimize performance‚ monitor the room’s humidity levels and adjust the speed accordingly․ This helps maintain a consistent environment and prevents over-humidification․ Regularly check and modify the settings to ensure the unit operates efficiently and meets your comfort preferences․
Key Tips:
- Choose lower speeds for smaller rooms․
- Use higher speeds for larger spaces or drier air․
- Monitor and adjust settings to maintain optimal humidity levels․
Proper speed adjustments enhance both comfort and efficiency․

Maintenance and Cleaning
Regular maintenance is crucial for optimal performance․ Empty the water tank daily‚ clean with a vinegar solution‚ rinse thoroughly‚ and dry to prevent bacteria and mold growth․ Check and replace filters as needed for efficiency․
Daily Maintenance Routine
For optimal performance‚ follow a daily maintenance routine․ Empty and rinse the water tank thoroughly to prevent bacteria and mineral buildup․ Wipe the base and tank with a soft‚ clean cloth․ Ensure all parts are dry to avoid moisture retention․ Check the filter and replace it as recommended to maintain efficiency․ Regularly inspect hoses and connections for blockages or wear․ Descale the humidifier if you notice mineral deposits‚ using a vinegar solution or descaling product․ Always unplug the unit before cleaning and avoid using abrasive materials that could damage surfaces․ By adhering to this routine‚ you can ensure your Bionaire humidifier operates effectively and lasts longer․
Weekly Deep Cleaning Process
Perform a deep clean weekly to ensure your Bionaire humidifier remains hygienic and efficient․ Start by unplugging the unit and emptying the water tank․ Mix a solution of equal parts water and white vinegar in the tank‚ then pour it into the base․ Let the solution sit for 30 minutes to break down mineral deposits and bacteria․ Use a soft-bristle brush to scrub away any stubborn buildup․ Rinse thoroughly with clean water and wipe down all surfaces with a damp cloth․ Repeat if visible residue remains․ Allow all parts to air-dry completely before refilling․ Regular deep cleaning prevents mold growth and ensures clean mist output‚ keeping your humidifier in optimal condition․

Troubleshooting Common Issues
If the humidifier stops producing mist‚ check water levels․ Low water or mineral buildup may cause issues․ Ensure proper cleaning and filter maintenance for optimal performance․
Identifying and Resolving Operational Problems
Common issues with Bionaire humidifiers include low mist output or the unit not turning on․ Check the power source and ensure it’s properly plugged in․ If the humidifier isn’t producing mist‚ inspect the water tank for low levels or blockages․ Mineral buildup from hard water can clog the system‚ requiring thorough cleaning․ Ensure the humidistat is set correctly and the fan is operational․ Regularly cleaning and replacing filters can prevent these issues․ Refer to the user manual for detailed troubleshooting steps‚ and contact customer support if problems persist․ Proper maintenance ensures efficient operation and extends the product’s lifespan․ Always follow safety guidelines during repairs․
Always place the humidifier on a stable‚ level surface and keep it out of children’s reach․ Avoid placing it near heat sources or open flames․ Ensure the area is well-ventilated to prevent mold growth․ Unplug the unit before cleaning or performing maintenance․ Never use abrasive cleaners or metal utensils‚ as they can damage the device․ Follow all manufacturer guidelines to ensure safe and effective operation․ Regular checks help prevent accidents and maintain performance․ Always store the humidifier properly when not in use‚ and refer to the manual for specific safety instructions․ This ensures safe usage and longevity of the product․ To ensure safe and effective use of your Bionaire humidifier‚ follow these essential tips․ Always place the humidifier on a stable‚ level surface away from heat sources like radiators or heaters․ Keep it out of reach of children and avoid using it in closed rooms to prevent moisture buildup․ Never operate the humidifier near open flames or sparks․ Before cleaning or maintaining‚ unplug the unit to avoid electrical hazards․ Use distilled or clean water to refill the tank to minimize mineral deposits and bacteria growth․ Avoid using abrasive cleaners or metal utensils‚ as they can damage the device․ Regularly inspect the humidifier for any signs of wear or damage․ Always follow the manufacturer’s guidelines for proper usage and maintenance to ensure safety and longevity․ By following the Bionaire humidifier instructions‚ users can ensure optimal performance‚ safety‚ and longevity of their device․ Proper setup‚ operation‚ and maintenance are crucial for achieving desired humidity levels and maintaining a healthy indoor environment․ Regular cleaning and timely replacement of parts‚ such as filters‚ will prevent issues and keep the humidifier running efficiently․ Always adhere to safety guidelines to avoid hazards and enjoy the benefits of improved air quality and comfort in your home․ Remember to refer to the troubleshooting section for resolving common issues and to consult the user manual for detailed guidance․ With proper care‚ your Bionaire humidifier will provide reliable service for years‚ enhancing your living space effectively․
Safety Precautions
Essential Safety Tips for Humidifier Usage