Month: December 2024

zone 7 vegetable planting guide

Zone 7 gardening offers a temperate climate with warm summers and mild winters, providing a long growing season of approximately 7 months․ Ideal for diverse crops․

1․1 Overview of Zone 7 Climate

Zone 7 enjoys a temperate climate with warm summers and mild winters․ The last spring frost typically occurs in late March to early April, while the first fall frost arrives in mid-November; This provides a long growing season of about 210 days, ideal for a wide variety of vegetables and crops․

1․2 Understanding the Growing Season

The growing season in Zone 7 lasts approximately 210 days, with the last spring frost around April 15th and the first fall frost in mid-November․ This extended period allows gardeners to plant cool-weather crops in early spring and late summer, as well as warm-weather crops during the summer months, maximizing yield and variety․

Best Vegetables for Zone 7

Zone 7 supports a wide variety of vegetables, including tomatoes, peppers, cucumbers, zucchini, carrots, broccoli, spinach, and kale, making it ideal for diverse and bountiful harvests․

2․1 Cool-Weather Crops

Cool-weather crops thrive in Zone 7’s moderate spring and fall temperatures․ Broccoli, spinach, kale, carrots, beets, lettuce, radishes, onions, and peas excel in these conditions․ Plant them in early spring or late summer for a bountiful harvest, as they prefer cooler climates and can tolerate light frosts, making them ideal for Zone 7’s extended growing season․

2․2 Warm-Weather Crops

Warm-weather crops excel in Zone 7’s summer heat․ Tomatoes, peppers, eggplants, cucumbers, squash, and zucchini thrive in the long growing season․ Herbs like basil also flourish․ Plant these after the last frost date, typically in late April, to ensure optimal growth and a bountiful harvest during the warmest months of the year․

2․3 Herbs Suitable for Zone 7

Zone 7 supports a variety of herbs, including basil, mint, rosemary, thyme, oregano, and parsley․ These herbs thrive in the region’s warm summers and mild winters․ Plant them after the last frost date for optimal growth, ensuring fresh flavors throughout the growing season and adding versatility to your garden and kitchen․

Seasonal Planting Schedule

Zone 7’s long growing season allows for planting cool-weather crops in spring, warm-weather crops in summer, and a second harvest of cool crops in fall․

3․1 Spring Planting

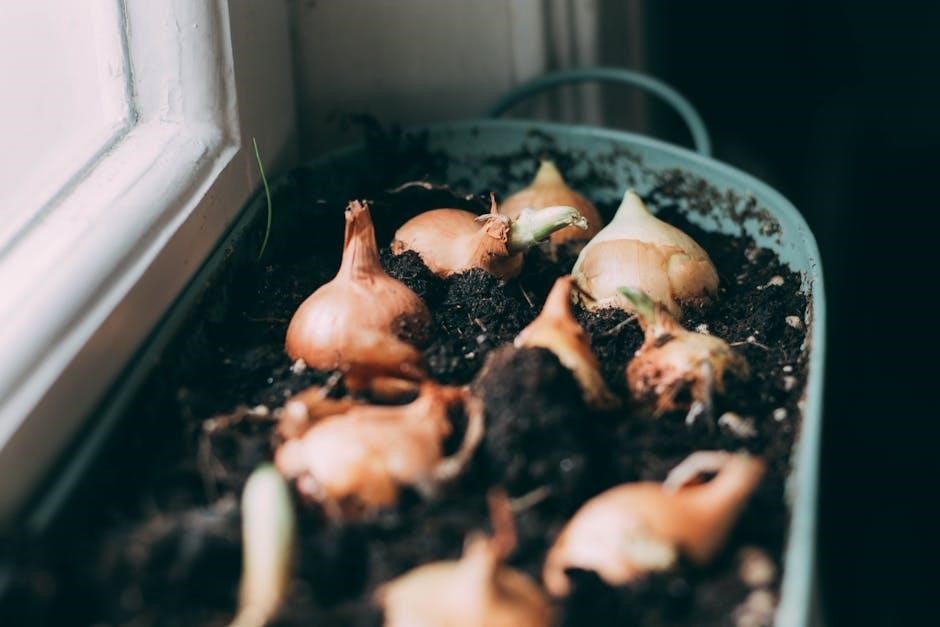
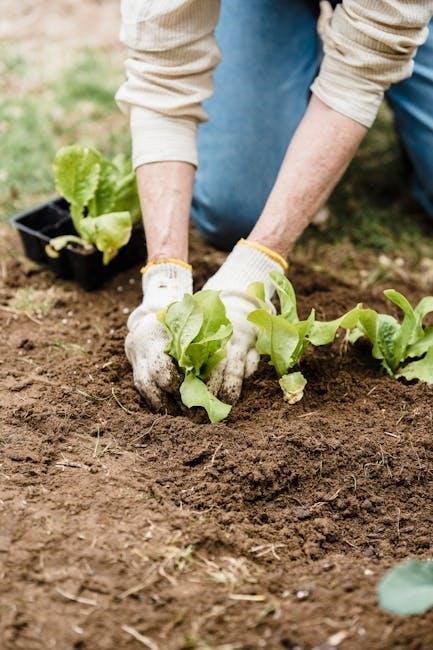
In Zone 7, spring planting begins as soon as the soil thaws․ Cool-weather crops like broccoli, spinach, and carrots thrive․ Plant onions, potatoes, and lettuce early․ By late March or early April, warmer crops such as tomatoes and peppers can be started indoors for later transfer outside after the last frost․

3․2 Summer Planting

Zone 7’s warm summers are ideal for planting tomatoes, peppers, cucumbers, zucchini, and squash․ Start seeds indoors in late spring, then transplant after the last frost․ Herbs like basil and cilantro thrive․ Plant corn and okra in well-warmed soil․ Use row covers to protect young plants from pests and retain heat for optimal growth during the season․

3․3 Fall Planting

In Zone 7, fall planting begins in late summer․ Cabbage, carrots, and spinach seeds can be sown outdoors in mid-August․ Broccoli and kale thrive in cooler weather, while radishes and lettuce mature quickly․ Plant seeds indoors for cabbage in late July, then transplant in mid-August․ Protect plants from frost with row covers as the first frost approaches in mid-November․

Companion Planting Guide

Companion planting optimizes growth and deters pests by pairing vegetables strategically․ It enhances soil health and maximizes space in Zone 7 gardens․

4․1 Benefits of Companion Planting

Companion planting enhances growth by deterring pests, improving soil health, and increasing yields․ It naturally repels harmful insects and attracts pollinators, promoting a balanced ecosystem․ This method optimizes space and supports biodiversity, making it a sustainable and efficient gardening practice for Zone 7 gardeners to achieve a thriving harvest․

4․2 Popular Companion Planting Combinations

Popular combinations include tomatoes with basil and peppers, which repel pests․ Marigolds paired with carrots and radishes deter nematodes․ Nasturtiums and cucumbers work together to repel aphids․ Planting onions near beetroot improves growth․ These pairings enhance soil health, reduce pests, and boost yields, creating a harmonious garden ecosystem for Zone 7 gardeners․

4․3 Avoiding Bad Neighbors

Some plants hinder growth when placed together․ Avoid planting fennel near tomatoes and dill close to carrots, as they can inhibit growth․ Potatoes and tomatoes should not be near each other due to disease risks․ Separating onions from beans and peas prevents stunted growth․ Proper spacing ensures healthy development for Zone 7 crops․

Common Challenges in Zone 7

Zone 7 gardeners face pests, diseases, soil preparation, and weather-related issues․ These challenges require proactive measures to ensure a thriving garden․

5․1 Pest Control

Zone 7 gardeners often battle aphids, slugs, snails, hornworms, and squash bugs․ Use organic methods like neem oil, diatomaceous earth, and hand-picking․ Companion planting with marigolds and basil can deter pests․

5․2 Disease Management

Zone 7 gardeners must manage fungal diseases like powdery mildew and leaf spot․ Regular crop rotation, removing infected plants, and ensuring good air circulation help prevent outbreaks․ Use organic fungicides like copper or sulfur․ Proper watering practices, avoiding overhead watering, reduce moisture on leaves, minimizing disease spread․ Monitor plants regularly for early detection․

5․3 Soil Preparation

Zone 7 gardeners should test soil pH and nutrient levels annually․ Amend soil with compost or manure to improve fertility and drainage․ Till the soil to a depth of 8-10 inches for root development․ Level the ground for even water distribution․ Apply balanced fertilizers based on soil test results for optimal plant growth and health․

5․4 Weather-Related Issues

Zone 7 gardeners face challenges like intense summer heat and unpredictable frosts․ Drought can stress plants, while heavy rains may cause waterlogging․ Sudden temperature drops in spring and fall can damage tender crops․ Using frost blankets and drip irrigation helps mitigate these weather-related issues, ensuring plant protection and consistent moisture levels throughout the growing season․

Succession Planting and Crop Rotation

Succession planting and crop rotation maximize garden yield and soil health․ These practices ensure continuous harvests and prevent nutrient depletion, key for Zone 7’s long growing season․

6․1 What is Succession Planting?

Succession planting involves sowing new crops after others are harvested, maximizing garden space and extending the growing season; In Zone 7, gardeners can grow multiple crops annually due to its long growing period, making succession planting an effective strategy for continuous yields and diverse harvests throughout the year․

6․2 Benefits of Crop Rotation

Crop rotation enhances soil fertility, reduces pests and diseases, and improves overall plant health․ It prevents nutrient depletion and breaks pest life cycles, promoting a balanced ecosystem․ In Zone 7, rotating crops optimizes soil health and increases yields, ensuring a sustainable and productive garden over time․

6․3 Examples of Succession Planting in Zone 7

In Zone 7, plant radishes in spring, followed by carrots in summer․ After harvesting early tomatoes, sow green beans․ In fall, spinach replaces summer crops, while kale thrives into winter․ Succession planting maximizes growing seasons, ensuring continuous harvests and efficient garden use throughout the year in Zone 7’s climate․

Using a Planting Chart

A Zone 7 planting chart provides a detailed guide for when to sow seeds, plant seedlings, and expect harvests․ It helps gardeners maximize growing seasons and crop success․

7․1 How to Read a Planting Chart

A Zone 7 planting chart is organized by months, listing vegetables and their ideal planting times․ Columns may include plant names, sowing times, spacing, and harvest periods․ Symbols or notes indicate frost sensitivity or special care․ By aligning with last frost dates (April 15) and first frost (November 15), gardeners can plan effectively year-round․

7․2 Key Features of a Zone 7 Planting Chart

A Zone 7 planting chart highlights optimal planting dates, including start and end times for sowing seeds indoors or outdoors․ It lists frost-sensitive and hardy varieties, specific spacing requirements, and expected harvest windows․ Charts often differentiate between cool-weather and warm-weather crops, ensuring gardeners maximize their growing season from April to November effectively․

Container Gardening in Zone 7

Container gardening in Zone 7 is ideal for small spaces, offering flexibility and year-round growth․ It supports a wide variety of vegetables and herbs with proper care․

8․1 Vegetables Suitable for Containers

Leaf lettuce, spinach, and green beans thrive in containers due to their shallow root systems․ Tomatoes, cucumbers, and peppers also grow well with proper support․ Zucchini and small varieties of squash are ideal for larger pots, while herbs like basil and mint add freshness to container gardens․

8․2 Tips for Successful Container Gardening

  • Use well-draining soil and containers with drainage holes to prevent waterlogging․
  • Most vegetables require at least 6-8 hours of sunlight daily for optimal growth․
  • Water deeply but avoid overwatering, as containers dry out quickly in Zone 7’s climate․
  • Fertilize regularly with a balanced fertilizer to compensate for limited soil volume․
  • Maintain proper spacing to ensure healthy air circulation and growth․
  • Monitor temperature fluctuations, as containers can heat up rapidly in summer․

Extending the Growing Season

Zone 7’s long growing season can be further extended using techniques like starting seeds indoors, protecting plants from frost, and employing succession planting strategies․

9․1 Starting Seeds Indoors

Starting seeds indoors 4-6 weeks before the last frost date extends Zone 7’s growing season․ Use seed trays, grow lights, and maintain consistent temperatures for optimal germination․ Harden off seedlings before transplanting outdoors to ensure a smooth transition and robust growth․

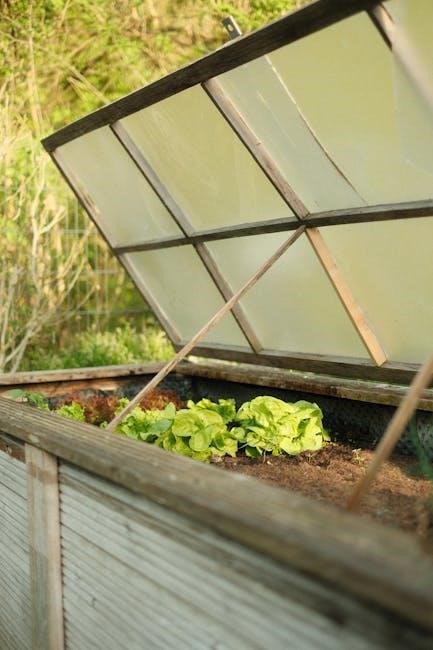
9․2 Protecting Plants from Frost

Protect plants from frost using frost blankets, row covers, or bringing containers indoors․ Mulch around bases to insulate roots․ Choose cold-hardy varieties for late-season planting․ Monitor weather forecasts to apply protective measures before frost events, ensuring plants survive Zone 7’s early fall frosts and thrive into the cooler months․

Resources and Tools for Zone 7 Gardeners

Utilize online planting charts, gardening apps, and local nurseries for Zone 7 specific advice․ Join community groups and workshops to enhance your gardening success with expert insights․

10․1 Online Planting Charts

Online planting charts provide detailed schedules for Zone 7, outlining when to sow seeds, plant, and harvest specific vegetables․ They often include frost dates, soil preparation tips, and succession planting guides․ Trusted sources like Kellogg Garden offer customizable charts, ensuring gardeners can optimize their planting strategies for crops like tomatoes, carrots, and squash․

10․2 Local Nurseries and Experts

Local nurseries and gardening experts in Zone 7 offer tailored advice for regional growing conditions․ They provide workshops, soil recommendations, and pest management tips, ensuring gardeners succeed․ Visiting these experts allows for personalized guidance, making them invaluable resources for optimizing vegetable gardens and addressing specific challenges in Zone 7’s climate․

10․3 Recommended Gardening Books

Recommended gardening books for Zone 7 provide tailored advice for regional growing conditions․ Titles focus on vegetable gardening, planting schedules, and soil preparation․ These books are invaluable for both beginners and experienced gardeners, offering insights into maximizing the Zone 7 growing season and overcoming local challenges effectively․

humerus anatomy pdf

The humerus‚ the longest bone in the upper limb‚ connects the shoulder and elbow‚ enabling diverse movements. Its anatomical structure includes a shaft‚ epicondyles‚ and vital articulation points.

Overview of the Humerus Bone

The humerus is the longest and largest bone in the upper limb‚ extending from the shoulder to the elbow. It serves as the primary structural and functional component of the arm‚ enabling a wide range of movements. The bone is divided into three main sections: the proximal end‚ shaft‚ and distal end. The proximal end features the head and greater tubercle‚ which facilitate shoulder articulation. The shaft provides attachment points for muscles‚ while the distal end includes condyles and epicondyles‚ essential for elbow function. Its anatomical features‚ such as the deltoid tuberosity and radial groove‚ highlight its role in both movement and stability‚ making it vital for upper limb mobility and prone to fractures in certain cases.

Importance of Humerus in Upper Limb Anatomy

The humerus is a cornerstone of upper limb anatomy‚ providing structural support and enabling complex movements. It articulates with the scapula at the shoulder and the radius and ulna at the elbow‚ facilitating a wide range of motions. As the longest bone in the upper limb‚ it serves as a vital attachment point for numerous muscles‚ tendons‚ and ligaments‚ essential for arm mobility and stability. Its unique anatomy‚ including the deltoid tuberosity and epicondyles‚ allows for the distribution of forces during activities‚ making it indispensable for both functional and mechanical roles in the upper extremity.

Structure of the Humerus

The humerus consists of a proximal end‚ shaft‚ and distal end‚ each with distinct anatomical features that facilitate movement and support the upper limb’s functional requirements.

Proximal End of the Humerus

The proximal end of the humerus includes the head‚ anatomical neck‚ and greater tubercle. The head articulates with the glenoid cavity of the scapula‚ forming the shoulder joint. The anatomical neck‚ located just below the head‚ is a groove that houses the shoulder capsule and ligaments. The greater tubercle‚ a bony prominence‚ serves as an attachment site for muscles like the supraspinatus‚ infraspinatus‚ and teres minor. These muscles contribute to shoulder stabilization and movement. This region is crucial for upper limb mobility and is often susceptible to fractures‚ particularly in older adults. Its intricate structure supports both stability and a wide range of motion in the shoulder joint.

Shaft of the Humerus

The shaft of the humerus is the long‚ cylindrical portion between the proximal and distal ends. It provides attachment points for muscles and ligaments‚ facilitating movement and stability. The deltoid tuberosity‚ a roughened area on the lateral side‚ serves as the insertion point for the deltoid muscle. Additionally‚ the radial groove‚ located posteriorly‚ houses the radial nerve and profunda brachii artery. The shaft’s structure allows for efficient transmission of forces from the shoulder to the elbow‚ enabling a wide range of upper limb movements. Its robust design supports both weight-bearing and dynamic activities‚ making it a critical component of the upper limb’s functional anatomy.

Distal End of the Humerus

The distal end of the humerus forms the elbow joint‚ articulating with the radius and ulna bones of the forearm. It features two condyles—trochlea and capitulum—that facilitate flexion and extension of the elbow. The medial and lateral epicondyles project from the condyles‚ serving as attachment points for muscles controlling forearm and wrist movements. The supracondylar ridge‚ a bony prominence above the condyles‚ adds strength to the distal humerus. This region is crucial for both mobility and stability‚ enabling precise movements of the elbow and forearm. Its intricate design supports daily activities‚ making it a vital component of upper limb anatomy and function.

Proximal Humerus Anatomy

The proximal humerus includes the head‚ anatomical neck‚ and greater tubercle‚ forming the shoulder joint. It enables articulation with the scapula and muscle attachments for upper limb movement.

Head of the Humerus

The head of the humerus is a rounded‚ smooth structure located at the proximal end of the bone. It articulates with the glenoid cavity of the scapula‚ forming the glenohumeral joint‚ which is essential for shoulder movement. The head is supported by the anatomical neck‚ a slight narrowing just below it. This area is crucial for shoulder flexibility and stability‚ allowing actions like abduction‚ rotation‚ and flexion. The head’s surface is covered with hyaline cartilage‚ reducing friction during joint movements. Fractures or injuries to this region can significantly impair upper limb function‚ highlighting its importance in overall mobility and anatomy. Proper alignment and health of the humeral head are vital for normal shoulder mechanics.

Anatomical Neck and Greater Tubercle

The anatomical neck of the humerus is a narrow groove located just below the head‚ marking the transition to the greater tubercle. This region is a key attachment site for muscles and ligaments. The greater tubercle‚ a prominent bony projection‚ serves as the insertion point for the supraspinatus‚ infraspinatus‚ and teres minor muscles. These muscles are essential for shoulder stabilization and rotation. The anatomical neck and greater tubercle play a critical role in facilitating complex shoulder movements while maintaining joint stability. Their precise anatomical arrangement allows for a wide range of motion‚ making them vital components of the upper limb anatomy.

Humerus Shaft Anatomy

The humerus shaft‚ or diaphysis‚ is a long‚ cylindrical structure connecting the proximal and distal ends‚ providing strength and leverage for upper limb movements and muscle attachments.

Deltoid Tuberosity

The deltoid tuberosity is a prominent‚ roughened ridge located on the lateral aspect of the humerus shaft. It serves as the insertion point for the deltoid muscle‚ which is responsible for shoulder flexion‚ extension‚ and abduction. This anatomical feature is crucial for the muscle’s attachment‚ allowing for effective movement of the upper limb. The deltoid tuberosity is positioned approximately halfway down the shaft‚ making it a key anatomical landmark for both functional and clinical assessments. Its rough texture facilitates a strong musculoskeletal connection‚ ensuring stability and mobility in the shoulder joint.

Radial Groove

The radial groove‚ also known as the spiral groove‚ is a significant anatomical feature on the posterior aspect of the humerus shaft. It is a narrow‚ elongated channel that runs diagonally downward from the greater tubercle to the posterior surface of the shaft. This groove serves as a passageway for the radial nerve‚ which innervates the extensor muscles of the forearm and supplies sensation to the back of the arm. The radial groove provides protection for the nerve as it courses along the bone‚ ensuring proper innervation and function of the upper limb. Its location and orientation are critical for both anatomical studies and clinical assessments.

Distal Humerus Anatomy

The distal humerus includes the medial and lateral epicondyles‚ condyles‚ and supracondylar ridge‚ forming the elbow joint and enabling forearm rotation and flexion.

Medial and Lateral Epicondyles

The medial and lateral epicondyles are bony projections on the distal humerus. The medial epicondyle serves as an attachment point for the flexor muscles of the forearm‚ while the lateral epicondyle anchors the extensor muscles. These epicondyles are crucial for forearm movement‚ providing stability and enabling actions like wrist flexion and extension. Their surface anatomy makes them palpable‚ aiding in clinical examinations for fractures or injuries near the elbow joint. Proper alignment and function of these structures are essential for maintaining upper limb mobility and overall musculoskeletal health.

Condyles and Supracondylar Ridge

The condyles of the humerus are located at the distal end and consist of the trochlea and capitellum. The trochlea articulates with the ulna‚ while the capitellum connects with the radius‚ enabling elbow flexion and extension. Above these condyles lies the supracondylar ridge‚ a bony prominence that serves as an attachment site for muscles like the brachialis and triceps brachii. This ridge also provides structural support to the distal humerus. Clinically‚ fractures in this region are common and can significantly impact elbow function. The condyles and supracondylar ridge are vital for upper limb mobility and stability‚ making their anatomy crucial in orthopedic treatments and rehabilitation.

Muscle Attachments and Function

The humerus serves as an attachment point for muscles like the deltoid‚ triceps brachii‚ brachialis‚ and brachioradialis. These muscles facilitate arm flexion‚ extension‚ and supination‚ enabling precise upper limb movements.

Muscles of the Upper Arm and Their Attachments

The humerus provides attachment sites for several key muscles of the upper arm. The deltoid muscle attaches near the deltoid tuberosity‚ facilitating shoulder flexion and extension. The triceps brachii originates along the radial groove‚ extending the elbow. The brachialis and brachioradialis muscles attach distally‚ aiding in forearm flexion. Additionally‚ the supraspinatus‚ infraspinatus‚ and teres minor muscles connect near the greater tubercle‚ stabilizing the shoulder joint. These attachments enable a wide range of movements‚ from arm abduction to forearm supination‚ highlighting the humerus’s critical role in upper limb mobility and functionality.

Role of the Humerus in Shoulder and Elbow Movement

The humerus plays a pivotal role in enabling shoulder and elbow movements. Its proximal end articulates with the glenoid of the scapula‚ forming the shoulder joint‚ which allows for abduction‚ rotation‚ and flexion of the arm. The distal end connects with the radius and ulna at the elbow‚ facilitating flexion and extension of the forearm. The deltoid tuberosity on the shaft serves as an attachment point for the deltoid muscle‚ aiding in shoulder movements. Additionally‚ the radial groove accommodates the radial nerve‚ which innervates muscles involved in elbow and wrist movements. This anatomical design enables the humerus to act as a structural and functional bridge between the shoulder and elbow‚ essential for upper limb mobility and dexterity.

Fractures and Treatments

Fractures of the humerus‚ often occurring at the proximal or shaft regions‚ are commonly treated with open reduction and internal fixation or locking plates‚ ensuring proper alignment and healing.

Common Fracture Types in the Humerus

The humerus is prone to various fracture types‚ including proximal‚ shaft‚ and distal fractures. Proximal humerus fractures often occur near the shoulder‚ commonly due to falls or direct blows. Shaft fractures‚ located in the middle of the bone‚ typically result from high-energy trauma‚ such as car accidents. Distal fractures occur near the elbow and may involve the condyles or epicondyles. These fractures can range from non-displaced to complex comminuted patterns‚ requiring precise treatment to restore function and alignment. Understanding these fracture types is crucial for effective diagnosis and management‚ ensuring proper healing and mobility in the upper limb.

Modern Treatment Methods for Humerus Fractures

Modern treatments for humerus fractures emphasize restoring function and alignment while minimizing complications. Surgical options include open reduction and internal fixation (ORIF) using anatomical locking plates‚ which provide stability for complex fractures. Intramedullary nailing is another approach‚ especially for shaft fractures‚ offering less invasive stabilization. Arthroscopic techniques are increasingly used for proximal fractures‚ reducing tissue damage. Non-surgical methods‚ such as immobilization with braces or splints‚ are reserved for non-displaced or stable fractures. Rehabilitation‚ including physical therapy‚ is crucial for regaining strength and mobility. Advances in materials and techniques‚ like pre-contoured plates‚ improve outcomes‚ ensuring proper healing and restoring upper limb function effectively.

free vintage dress patterns pdf

Discover the charm of vintage fashion with free PDF dress patterns, offering timeless designs and accessibility for sewists of all skill levels, perfect for creating unique garments.

1.1 The Allure of Vintage Fashion

Vintage fashion captivates with its timeless elegance, intricate details, and classic silhouettes. The allure lies in its uniqueness, offering a sophisticated alternative to modern trends. Free vintage dress patterns in PDF format allow sewists to recreate iconic designs, embracing a bygone era’s charm. These patterns empower creators to craft one-of-a-kind garments, making vintage fashion accessible and enduring for generations of sewing enthusiasts.

1.2 The Convenience of PDF Patterns

PDF patterns offer unparalleled convenience for sewists, providing instant access to vintage designs without shipping delays. Their digital format allows easy storage and organization, enabling quick retrieval on various devices. Print-only-what-you-need functionality saves paper, while scalability ensures perfect sizing. Cost-effective and environmentally friendly, PDFs make vintage sewing projects more accessible and enjoyable for enthusiasts of all skill levels, fostering creativity and efficiency in every stitch.

Popular Sources for Free Vintage Dress Patterns

Explore websites like Free Vintage Crochet, Antique Pattern Library, and Iva Rose for an array of free PDF patterns, offering classic designs and easy accessibility for sewists.

2;1 Websites Offering Free PDF Downloads

Several websites specialize in offering free vintage dress patterns in PDF format, making it easy for sewists to download and print at home. Platforms like Free Vintage Crochet, Antique Pattern Library, and Iva Rose provide an extensive collection of classic designs. These sites cater to both beginners and experienced sewists, offering patterns from various eras, including the 1920s, 1950s, and more. With instant downloads and clear instructions, these resources are perfect for creating authentic vintage-inspired garments with minimal effort.

2.2 Vintage Sewing Communities and Forums

Vintage sewing communities and forums are invaluable resources for finding and sharing free vintage dress patterns. Platforms like Cemetarian and eStitches offer extensive collections of downloadable PDFs, while forums allow members to exchange tips and advice. These communities often feature user-contributed patterns, ensuring a diverse range of styles and eras. They also provide a space for sewists to showcase their projects, share feedback, and stay updated on the latest trends in vintage sewing, making them a treasure trove for enthusiasts.

2.3 Antique Pattern Libraries and Archives

Antique pattern libraries and archives are treasure troves for vintage sewing enthusiasts. These curated collections offer free PDF downloads of historic dress patterns, meticulously preserved for modern use. Platforms like the Antique Pattern Library and Cemetarian provide rare and authentic designs from past eras, ensuring access to unique and timeless styles. These archives often feature patterns organized by era, making it easy to explore and download designs that reflect historical fashion accurately. They are a must-visit for anyone seeking authentic vintage inspiration.

Benefits of Using Vintage Dress Patterns

Vintage dress patterns offer unique, timeless designs, cost-effective sewing projects, and the opportunity to upcycle materials sustainably, making them a versatile choice for creative sewists.

3.1 Unique and Timeless Designs

Vintage patterns offer distinctive, enduring styles that captivate with intricate details and classic silhouettes, allowing sewists to craft garments that stand out with elegance and character, perfect for any occasion.

3.2 Cost-Effective Sewing Projects

Free vintage dress patterns provide an affordable way to create beautiful garments, eliminating the cost of purchasing designs. Sewists can allocate their budget to quality fabrics and notions, ensuring professional results without financial strain. These patterns are ideal for crafters seeking budget-friendly projects that still yield stunning, unique pieces, making vintage sewing accessible to everyone.

3.4 Sustainability Through Upcycling

Utilizing free vintage dress patterns promotes sustainability by encouraging upcycling. By repurposing old fabrics and materials, sewists reduce textile waste and create eco-friendly garments. Vintage patterns often require minimal fabric, making them ideal for breathing new life into discarded textiles. This approach aligns with modern environmental values, offering a creative way to contribute to a greener future while preserving classic designs.

How to Download and Print PDF Patterns

Access free vintage dress patterns effortlessly by downloading PDF files from reputable sites. Print them on standard paper, ensuring proper scale and alignment for accurate results.

4.1 Step-by-Step Download Guide

To download free vintage dress patterns, visit reputable sites like Free Vintage Crochet or Antique Pattern Library. Select your desired pattern, click the download link, and save the PDF to your device. Ensure your computer has a PDF reader installed. Open the file, review the instructions, and print the pattern on standard paper. Some files may require extraction software. Always check the paper size and printer settings for accuracy. Follow these steps to prepare your pattern for sewing successfully.

4.2 Printing Tips for Accurate Results

For precise printing, ensure your PDF is set to “Actual Size” in print settings to avoid scaling issues. Use standard paper size (A4 or Letter) and check orientation. Print a test page with a 1-inch scale to verify accuracy. Disable margins to prevent pattern pieces from being cut off. Use high-quality paper for durability. Consider printing on cardstock for stability. Always follow the pattern’s specific instructions for layout and assembly to achieve the best results for your vintage dress project.

Tips for Sewing Vintage-Style Dresses

Mastering vintage dress sewing involves selecting appropriate fabrics, understanding sizing, and using essential tools. Each step ensures authenticity and a professional finish for your unique garment.

5.1 Choosing the Right Fabric

Selecting the right fabric is crucial for achieving the desired vintage look. Opt for materials like cotton, linen, or rayon, which were popular in past eras. Consider the drape and weight of the fabric to ensure it matches the pattern’s design. For a more authentic feel, choose prints and textures reminiscent of the era, such as floral motifs or jacquard weaves. Always pre-wash your fabric to ensure proper fit and avoid shrinkage issues during sewing.

5.2 Understanding Vintage Sizing

Vintage sizing differs significantly from modern standards, as sizes were not standardized and often ran smaller. Always measure yourself and compare to the pattern’s size chart. Vintage patterns may require adjustments, especially for fit preferences. Consider making a muslin prototype to test the fit before cutting your final fabric. This step ensures a better outcome and helps you understand how the pattern will drape and fit your body.

5.3 Essential Sewing Tools for Beginners

Starting with vintage patterns requires the right tools. A sewing machine, sharp fabric scissors, and a tape measure are must-haves. Invest in quality pins, an iron, and a seam ripper for corrections. A sewing needle set, threads, and a sewing box organize your workspace. These tools ensure accuracy and efficiency, helping you achieve professional-looking results even with complex vintage designs. They are the foundation for any successful sewing project, especially when working with detailed patterns.

Common Mistakes to Avoid

Incorrect measuring, ignoring pattern adjustments, and rushing the sewing process are common errors. Ensure accurate measurements, make necessary fit tweaks, and take your time for the best results.

6.1 Measuring Incorrectly

Incorrect measurements are a common pitfall, leading to ill-fitting garments. Always use a flexible tape measure and double-check your numbers. Vintage patterns may have different sizing standards, so comparing your measurements to the pattern’s chart is crucial. Taking the time to ensure accuracy prevents costly fabric waste and frustrating alterations. For the best fit, measure yourself regularly, as sizes can vary slightly over time. This step is especially important when working with vintage patterns, as their sizing may not align with modern standards.

6.2 Ignoring Pattern Adjustments

Ignoring pattern adjustments can lead to poor fit and dissatisfaction with your finished garment. Vintage patterns often require alterations to match modern body types or personal preferences. Failing to make these adjustments can result in a dress that is either too tight or too loose, ruining the overall aesthetic. Take the time to tweak darts, sleeves, and lengths for a flattering fit. Proper adjustments ensure comfort and a professional finish, making your sewing project truly enjoyable and worthwhile.

6.3 Rushing the Sewing Process

Rushing through the sewing process can lead to errors, uneven stitching, and a less professional finish. Vintage patterns often require precision and patience, especially for intricate details like darts, sleeves, and zippers. Taking your time ensures accurate cutting, proper fabric alignment, and smooth seam construction. Avoid the frustration of reworking mistakes by pacing yourself and enjoying the creative journey. A well-made garment reflects the effort and care put into it, resulting in a piece you’ll treasure for years.

Modernizing Vintage Patterns

Blend contemporary elements with classic designs by incorporating modern fabrics, trendy silhouettes, and fresh details while maintaining the timeless elegance of vintage patterns for a fresh look.

7.1 Adding Contemporary Fabrics

Modernizing vintage patterns with contemporary fabrics breathes new life into classic designs. Choose materials like sustainable textiles, bold prints, or innovative blends to create a fresh, trendy look. While maintaining the vintage silhouette, contemporary fabrics add a modern twist, making the garment more versatile for today’s fashion. Experiment with lightweight fabrics for a flowy feel or structured materials for a sleek appearance. This fusion allows sewists to honor the past while embracing current textile trends, resulting in unique, eye-catching pieces that stand out.

7.2 Incorporating Modern Silhouettes

Incorporating modern silhouettes into vintage patterns allows for a fresh take on classic designs. Adjust proportions, embrace asymmetrical cuts, or add contemporary necklines while maintaining the vintage charm. This blend creates garments that feel both nostalgic and trendy, appealing to modern tastes. By merging timeless details with current fashion trends, sewists can craft dresses that are uniquely adaptable to today’s wardrobe needs, offering a personalized touch to every stitch. This approach ensures vintage patterns remain relevant and stylish in the present day.

7.3 Mixing Vintage and Trendy Details

Mixing vintage and trendy details creates a unique, eye-catching design. Combine classic elements like ruffles or lace with modern twists, such as bold prints or asymmetrical hems. Add contemporary accessories, like metallic buttons or sleek belts, to enhance the look. This fusion allows sewists to craft dresses that honor the past while appealing to current fashion trends; The result is a timeless yet modern garment that stands out, offering a fresh perspective on vintage patterns for today’s fashion-forward sewists.

Inspiration and Showcase

Explore galleries of finished projects and success stories from sewing enthusiasts, showcasing creative interpretations of free vintage dress patterns. These examples inspire and motivate beginners, offering a sense of community and shared creativity.

8.1 Finished Projects Gallery

A curated collection of stunning garments crafted from free vintage dress patterns, showcasing intricate details and timeless charm. These projects highlight the versatility of classic designs, from 1920s flapper dresses to 1950s full-skirted styles. Each piece demonstrates how vintage patterns can be adapted to modern tastes, featuring creative fabric choices and embellishments. The gallery serves as a visual inspiration, proving that vintage sewing patterns remain relevant and beautiful. It’s a testament to the creativity of sewing enthusiasts worldwide.

8.2 Success Stories from Sewing Enthusiasts

Sewing enthusiasts worldwide share inspiring tales of creating stunning garments using free vintage dress patterns. Many highlight how these patterns have reignited their passion for sewing, offering a creative outlet and a sense of accomplishment. From a beginner crafting a 1940s-inspired dress to an experienced sewer perfecting a 1920s flapper design, these stories showcase the joy of bringing vintage fashion to life. Each success story reflects personal growth, creativity, and the satisfaction of wearing a unique, handmade piece.

whirlpool refrigerator parts list manual

The Whirlpool Refrigerator Parts List Manual is an essential resource for technicians and homeowners, offering a comprehensive guide to components, ensuring accurate repairs and maintenance with model-specific details and safety guidelines.

Overview of the Manual

The Whirlpool Refrigerator Parts List Manual is a comprehensive guide designed to assist users in understanding and servicing their appliances. It includes detailed technical specifications, exploded views, and circuit diagrams to help identify and replace parts accurately. The manual covers various components, from control boards to door seals, ensuring a thorough understanding of each part’s function and location. Additionally, it provides troubleshooting tips and step-by-step repair procedures, making it an invaluable resource for both professionals and DIY enthusiasts. Each section is tailored to specific models, ensuring relevance and accuracy. By following the manual, users can maintain their refrigerators efficiently, adhering to safety standards and manufacturer recommendations.

Importance of Using Genuine Whirlpool Parts

Using genuine Whirlpool parts ensures optimal performance, safety, and reliability for your refrigerator. These parts are designed to meet strict manufacturer standards, guaranteeing compatibility and extending the appliance’s lifespan. Genuine components are engineered to fit perfectly, reducing the risk of malfunctions and potential safety hazards. They also maintain your refrigerator’s energy efficiency, lowering utility costs over time. Additionally, using authentic parts preserves your warranty, as non-genuine components may void it. For repairs and replacements, genuine Whirlpool parts are the best choice to ensure your appliance operates as intended, providing peace of mind and long-term durability.

Technical Specifications and Model Identification

Technical Specifications and Model Identification provides detailed information on refrigerator components, ensuring accurate repairs. It includes model-specific data, compatibility, and essential diagrams for efficient servicing and part identification.

How to Locate Your Refrigerator’s Model Number

To locate your Whirlpool refrigerator’s model number, check the identification label on the inner wall or behind the kick plate. This label contains essential details like the model number, serial number, and manufacturing date. The model number is usually a combination of letters and numbers, specific to your refrigerator’s make and type. Once identified, this number allows you to access the correct parts list, download the specific manual, or order genuine replacement parts. Always ensure the model number is accurately noted to avoid mismatches during repairs or maintenance. This step is crucial for ensuring compatibility and safety when servicing your appliance.

Understanding Model-Specific Parts Lists

Model-specific parts lists are tailored to individual refrigerator models, ensuring precise compatibility and accuracy. These lists detail every component, including part numbers, descriptions, and quantities. By referencing your refrigerator’s model number, you can access a customized list that matches your appliance’s exact specifications. This eliminates guesswork and ensures that any replacement parts or accessories you order will fit and function correctly. Exploded views and diagrams within the manual further enhance understanding, providing a visual guide to assembly and disassembly. This detailed approach minimizes errors and speeds up repairs, making it essential for both professionals and DIY enthusiasts to rely on model-specific parts lists for their Whirlpool refrigerators.

Comprehensive Parts List

The comprehensive parts list provides detailed descriptions, part numbers, and quantities for every component, ensuring accurate identification and procurement for repairs and maintenance.

Refrigerator Components and Their Functions

The Whirlpool refrigerator is composed of essential components, each serving a specific role. The compressor powers the cooling system, while the evaporator and condenser manage heat exchange. The capillary tube regulates refrigerant flow, and fans ensure proper airflow. Shelves and drawers provide storage, while door seals maintain internal temperature. Controls, such as the thermostat and display, regulate settings. Water dispensers and ice makers add convenience. Understanding these parts and their functions aids in troubleshooting and ensures efficient repairs, as detailed in the manual’s exploded views and circuit diagrams for precise identification and maintenance. This section is crucial for diagnosing issues and ordering the correct replacement parts.

Exploded Views for Assembly and Disassembly

The manual includes detailed exploded views of the refrigerator, providing a visual breakdown of components and their relationships. These diagrams are essential for understanding how parts fit together, aiding in both assembly and disassembly. Each view is accompanied by labels and numbers corresponding to the parts list, ensuring clarity. Technicians and DIYers can use these visuals to identify components, plan repairs, and verify proper reassembly. The exploded views are model-specific, offering precise guidance for various Whirlpool refrigerator configurations. They are particularly useful for complex systems, such as the cooling unit or ice maker, where correct alignment and installation are critical. This section enhances the manual’s usability, making it a valuable tool for both professionals and homeowners.

Troubleshooting and Repair Guidance

This section provides detailed guidance for identifying and resolving common refrigerator issues, including error codes and step-by-step repair solutions, ensuring effective diagnostics and maintenance.

Common Issues and Corresponding Parts

Refrigerator issues often stem from faulty sensors, ice buildup, or compressor failures. The manual links these problems to specific parts, such as temperature sensors, defrost heaters, or compressors, ensuring accurate repairs. For example, a malfunctioning water dispenser is typically tied to a faulty water inlet valve or dispenser switch. Similarly, unusual noises may indicate worn-out fan motors or door seals. By identifying the root cause and corresponding part, users can efficiently resolve issues, extending the appliance’s lifespan. This section is designed to simplify troubleshooting, guiding users to the exact components needing replacement or adjustment, thereby saving time and reducing repair costs.

Circuit Diagrams and Electrical Components

The manual includes detailed circuit diagrams to help users understand the electrical layout of their Whirlpool refrigerator. These diagrams outline the connections between components such as compressors, sensors, and control boards, making it easier to diagnose electrical issues. By referencing these schematics, technicians and DIYers can identify faulty parts like capacitors, relays, or wiring harnesses. The diagrams are model-specific, ensuring accuracy when troubleshooting or replacing electrical components. This section is crucial for addressing problems like inconsistent cooling or malfunctioning ice makers, as it provides a clear visual guide to the appliance’s electrical system. Using these diagrams, users can pinpoint issues efficiently and ensure safe, effective repairs.

Replacement Procedures

The Replacement Procedures section provides step-by-step instructions for safely replacing refrigerator parts, ensuring DIY repairs are done correctly and efficiently with model-specific guidance.

Step-by-Step Instructions for Part Replacement

The manual offers detailed, model-specific guides for replacing parts, ensuring precise and safe repairs. Each guide outlines tools needed, safety precautions, and disassembly steps. Users learn how to identify and remove faulty components, install new ones, and reassemble units properly. Clear diagrams and exploded views assist in understanding complex assemblies. Instructions emphasize shutting off power before starting work and testing functionality post-replacement. This section is designed to empower both professionals and DIY enthusiasts, providing confidence in executing repairs correctly. By following these steps, users can restore their refrigerator to optimal performance while minimizing risks of further damage or safety hazards. Proper disposal of old parts is also recommended.

Maintenance and Safety Tips

Regular maintenance is crucial for extending the lifespan of your Whirlpool refrigerator. Clean condenser coils annually to improve efficiency and prevent overheating. Check door seals for wear and replace them if they fail to close properly. Always unplug the appliance before performing repairs to avoid electrical hazards. Refer to the manual for compatibility when using genuine parts. Properly dispose of old parts to minimize environmental impact. Additionally, defrost the freezer regularly to maintain optimal performance. Following these tips ensures your refrigerator operates safely and efficiently, reducing energy consumption and potential repair costs. Always follow safety guidelines to prevent injuries and damages during maintenance or repairs.

Warranty and Customer Support Information

Whirlpool offers comprehensive warranty coverage for its refrigerators, ensuring parts and labor are covered for a specified period. Customers can review warranty terms in the manual or on the official website. For assistance, Whirlpool provides dedicated customer support through phone, email, and live chat. Certified service technicians are available for professional repairs, ensuring compliance with warranty conditions. Genuine parts purchases also come with their own warranties, protecting your investment. Visit the Whirlpool website to register your product and access support resources. Timely support and reliable warranty services aim to provide peace of mind and maintain your appliance’s performance over time. Always contact authorized representatives for authentic support and parts.

Downloading the Manual

Downloading the Whirlpool Refrigerator Parts List Manual is a straightforward process. Visit the official Whirlpool website or authorized repair platforms to access the manual. Enter your refrigerator’s model number in the provided search tool to find the corresponding manual. The manual is available in PDF format, making it easy to download and print. Ensure you only download from trusted sources to avoid unauthorized content. Additional resources, such as DIY repair guides and video tutorials, may also be available to complement the manual. Always verify the manual matches your specific model for accurate information. This ensures you have the correct parts list and troubleshooting guidance for your appliance. By downloading the manual, you gain instant access to essential information for maintenance and repairs. Always refer to the official Whirlpool website for the most reliable and up-to-date documentation.

The Whirlpool Refrigerator Parts List Manual is a comprehensive guide ensuring successful repairs and maintenance. It emphasizes the importance of genuine parts for optimal performance and longevity, serving as an invaluable resource for both professionals and homeowners. Refer to this manual for reliable information and to maintain your appliance’s efficiency and durability.

Final Thoughts on Using the Parts List Manual

The Whirlpool Refrigerator Parts List Manual is an indispensable resource for anyone aiming to maintain or repair their appliance effectively. It provides clear, detailed information on components, ensuring safety and efficiency. By using genuine Whirlpool parts, users can extend the lifespan of their refrigerator and maintain its performance. The manual’s structured approach makes it accessible to both professionals and DIY enthusiasts. Always refer to this guide for accurate part identification and reliable repair procedures. Trusting the official manual ensures compliance with manufacturer standards, safeguarding your investment and guaranteeing optimal results. It is a must-have tool for anyone seeking to keep their Whirlpool refrigerator in prime condition.

aip diet plan pdf free

The AIP Diet Plan is a nutrient-dense approach designed to eliminate triggers for autoimmune conditions. It focuses on removing inflammatory and allergenic foods to support healing. Downloading a free AIP Diet Plan PDF template provides a structured guide for meal planning, including recipes and grocery lists, making it easier to manage the diet effectively.

What is the AIP Diet?

The Autoimmune Protocol (AIP) Diet is a therapeutic, nutrient-dense dietary approach designed to help manage autoimmune conditions. It focuses on eliminating foods that may trigger inflammation and immune responses, such as nightshades, dairy, and processed foods. The diet emphasizes whole, unprocessed foods like meats, fish, and non-nightshade vegetables. By removing potentially harmful foods, the AIP Diet aims to heal the gut and reduce inflammation, promoting overall health and remission from autoimmune symptoms. It is often used alongside the Paleo Diet for enhanced therapeutic benefits.

Key Principles of the AIP Diet

The AIP Diet focuses on eliminating inflammatory and allergenic foods, such as nightshades, dairy, and processed items, to reduce immune system triggers. It emphasizes nutrient-dense foods like meats, fish, and non-nightshade vegetables. The diet follows a two-phase approach: elimination and reintroduction. Tools like free AIP Diet Plan PDF templates and meal planners help guide the process. By removing harmful foods and incorporating healing nutrients, the AIP Diet aims to promote gut health, reduce inflammation, and support autoimmune recovery. Its structured approach makes it easier to manage and track progress effectively.

Benefits of the AIP Diet Plan

The AIP Diet Plan reduces inflammation, improves digestion, and supports weight loss. It promotes overall health by eliminating harmful foods and fostering a nutrient-rich diet.

How the AIP Diet Helps with Autoimmune Conditions

The AIP Diet is specifically designed to address autoimmune conditions by eliminating foods that trigger inflammation and immune responses. By removing inflammatory triggers like nightshades, dairy, and grains, the diet helps reduce autoimmune flare-ups. It focuses on healing the gut, a common root cause of autoimmune diseases, through nutrient-dense foods. This approach supports the body in calming the immune system, reducing inflammation, and promoting healing. Many individuals report significant improvements in symptoms and overall health when following the AIP protocol consistently.

Improved Digestion and Reduced Inflammation

The AIP diet focuses on eliminating inflammatory foods that can irritate the gut, promoting healing and improving digestion. By removing nightshades, dairy, and grains, the diet reduces inflammation and supports gut health. Nutrient-dense foods like non-nightshade vegetables, coconut milk, and lean meats help restore the gut lining and balance the microbiome. This approach minimizes digestive discomfort and inflammation, fostering a healthier immune response and overall well-being. Many individuals experience reduced symptoms of digestive disorders and improved energy levels when adhering to the AIP protocol.

Weight Loss and Overall Health

The AIP diet often leads to weight loss due to its focus on nutrient-dense, whole foods and the elimination of inflammatory triggers. By removing processed foods, grains, and sugars, the body naturally sheds excess weight. The diet emphasizes lean meats, non-nightshade vegetables, and healthy fats, which support metabolic balance. Many individuals report improved energy levels and overall health as they adopt sustainable eating habits. A structured AIP meal plan, often available in free PDF guides, helps maintain consistency and promotes long-term wellness.

Understanding the Elimination Phase

The elimination phase removes inflammatory foods like nightshades and dairy to identify triggers. Free AIP Diet Plan PDF guides provide structured support for this critical step.

Foods to Avoid on the AIP Diet

The AIP diet requires eliminating inflammatory and allergenic foods to support healing. These include nightshades (like tomatoes, peppers, and eggplant), dairy, grains, soy, processed foods, and high-FODMAP foods. Natural sweeteners and certain fruits are also limited. The elimination phase removes these triggers to identify sensitivities. Free AIP Diet Plan PDF guides provide detailed lists of foods to avoid, helping you navigate this critical step effectively and plan meals that align with the protocol.

Importance of the Elimination Phase

The elimination phase is fundamental to the AIP Diet, as it removes potential autoimmune triggers, allowing the body to heal. By cutting out inflammatory and allergenic foods, individuals create a clean slate, reducing inflammation and gut damage. This phase is crucial for identifying specific food sensitivities and assessing symptom improvement. A structured plan, such as a free AIP Diet Plan PDF, guides the process, offering meal ideas and clarity on foods to avoid. Consistency is key to achieving optimal results and understanding the diet’s effectiveness for personalized health benefits.

Reintroduction Phase

The Reintroduction Phase helps identify foods that can be safely reintroduced after elimination. A free AIP Diet Plan PDF guides this process with structured steps and recipes, ensuring a gradual and safe approach to expanding your diet while monitoring for reactions. This phase is essential for personalizing the diet long-term and improving overall health outcomes.

How to Reintroduce Foods Safely

Reintroducing foods post-elimination requires careful planning. Start with one food at a time, in small portions, and monitor for symptoms. Wait 3-5 days before adding another food to identify reactions. Track symptoms daily using a food diary or a free AIP Diet Plan PDF template. Prioritize foods with high nutritional value and low inflammation risk. Consult a healthcare professional for guidance to ensure a safe and personalized approach. This method helps build a sustainable diet while minimizing autoimmune triggers and promoting long-term health. Free resources like AIP meal plans can provide structured templates for tracking progress.

Best Practices for Reintroduction

  • Use a free AIP Diet Plan PDF to track progress and reactions during reintroduction.
  • Introduce one food at a time, in small amounts, and wait 3-5 days to assess tolerance.
  • Monitor for symptoms like inflammation or digestive issues, documenting them in a food diary.
  • Start with nutrient-dense, low-risk foods and avoid highly allergenic or inflammatory options.
  • Consult a healthcare professional for personalized guidance to ensure safety and effectiveness.
  • Stay patient and avoid rushing the process, as improper reintroduction can trigger autoimmune responses.

Meal Planning and Recipes

A free AIP Diet Plan PDF offers a 7-day meal plan with easy-to-follow recipes, including options like roasted squash and Asian beef wraps, ensuring a convenient start.

Sample AIP Meal Plan

A free AIP Diet Plan PDF includes a 7-day meal plan with recipes like roasted squash, Asian beef wraps, and cod. Breakfast options include coconut porridge or sweet potato toast with avocado. Lunches feature grilled salmon with sweet potatoes or chicken salad. Dinners might include slow-cooked chicken or aromatic curry. Snacks like kale chips or fruit are suggested; The PDF also provides a grocery list and links to detailed recipes, making meal prep straightforward and organized for autoimmune protocol followers.

Delicious AIP Recipes

The free AIP Diet Plan PDF offers a variety of tasty and easy-to-make recipes, such as roasted squash with rosemary, Asian ground beef lettuce wraps, and cranberry coconut smoothies. It also includes dishes like cod with herbs, zucchini no-tomato bolognaise, and aromatic chicken curry. These recipes are designed to be nutrient-dense and flavorful while adhering to AIP guidelines. The PDF provides step-by-step instructions, making it simple to prepare meals that support healing and satisfy your palate.

Meal Prep Tools and Resources

The free AIP Diet Plan PDF offers practical tools for meal prep, including a 7-day meal plan with recipes and a printable grocery list. It also provides interactive features, allowing users to click on links for full recipes. Additionally, resources like Real Plans offer a meal planner that automates weekly plans, sends prep reminders, and tracks progress. These tools simplify meal preparation, ensuring adherence to the AIP diet while saving time and effort.

Grocery List and Shopping Tips

A free AIP Diet Plan PDF provides essential grocery lists, focusing on meats, fish, non-nightshade vegetables, and coconut milk. It simplifies shopping and meal prep.

Essential Foods for the AIP Diet

The AIP diet emphasizes nutrient-dense foods like grass-fed meats, wild-caught fish, and non-nightshade vegetables such as sweet potatoes and zucchini. Healthy fats, including coconut oil and avocado, are encouraged. Bone broth is recommended for its healing properties, while fruits like berries and citrus are consumed in moderation. Fresh herbs and garlic add flavor without inflammation. Organic produce is preferred to avoid pesticides. A free AIP Diet Plan PDF often includes detailed lists of these essentials, helping you stock your pantry and fridge with compliant foods. Avoiding processed foods is key to success.

Where to Shop for AIP-Friendly Foods

Locating AIP-friendly foods requires strategic shopping. Visit local farmers’ markets for fresh, organic produce and grass-fed meats. Health food stores like Whole Foods and Sprouts offer a variety of compliant items. Online retailers such as Thrive Market and Amazon provide convenient access to AIP staples like coconut oil, bone broth, and almond-free flours. Many AIP Diet Plan PDF guides include shopping tips and store recommendations to simplify your journey. Always check labels to ensure compliance with AIP guidelines, avoiding processed and inflammatory ingredients.

Lifestyle Tips for Success

Prioritize sleep, manage stress, and incorporate gentle exercise to support your AIP journey. These habits enhance digestion, reduce inflammation, and promote overall well-being, aiding in long-term success.

Importance of Sleep and Stress Management

Importance of Sleep and Stress Management

Sleep and stress management are crucial for AIP success. Aim for 7-9 hours of quality sleep nightly to aid healing and reduce inflammation. Chronic stress can trigger autoimmune flares, so practices like meditation, yoga, or deep breathing are essential. Balancing these lifestyle factors supports immune regulation, digestion, and overall well-being, complementing the dietary changes of the AIP plan and enhancing long-term health outcomes.

Exercise and Physical Activity

Regular physical activity is vital for overall health on the AIP diet. Moderate exercise, such as walking, swimming, or yoga, supports immune function and stress reduction. Overexertion should be avoided, as it can trigger inflammation. Gentle movements and strength training help maintain mobility and energy levels. Incorporating physical activity into your routine complements the dietary changes, promoting healing and balance. Listen to your body and adjust intensity to avoid burnout, ensuring a sustainable and beneficial approach to wellness.

Common FAQs About the AIP Diet

Common questions about the AIP diet include its duration, challenges, and where to find free PDF guides like meal plans. These FAQs offer clarity and support, helping you understand the protocol and its benefits. Consult a healthcare provider before starting.

How Long Should I Follow the AIP Diet?

The duration of the AIP diet varies depending on individual goals and health conditions. Most people follow the elimination phase for 30–90 days to identify food triggers. After this, a reintroduction phase begins, which can take several months. Some individuals adopt the AIP diet long-term for autoimmune management, while others use it as a short-term reset. It’s important to consult a healthcare provider to determine the best timeline for your needs. Tracking symptoms and progress can help guide your decision. Using a free AIP Diet Plan PDF can provide structured guidance.

What Are the Most Common Challenges?

Adhering to the AIP diet can be challenging due to its restrictive nature. Common difficulties include social pressures, meal planning, and the time required for food preparation. Many find it hard to eliminate favorite foods, and the lack of convenience foods can be frustrating. Additionally, accessing AIP-compliant ingredients in certain regions can be problematic. Staying motivated during the elimination phase is another hurdle. However, using resources like a free AIP Diet Plan PDF can simplify meal planning and provide structure, helping to overcome these challenges effectively.

The AIP diet plan is a powerful tool for managing autoimmune conditions by focusing on nutrient-dense foods and eliminating triggers. While it requires discipline, the potential benefits—reduced inflammation, improved digestion, and enhanced overall health—are significant. Utilizing resources like a free AIP Diet Plan PDF can simplify the process, offering structured guidance for meal planning and tracking progress. By adhering to the AIP protocol, individuals can take control of their health and work toward long-term wellness.

reading comprehension grade 2 pdf free download with answers

Reading comprehension is a vital skill for second-grade students‚ helping them understand and interpret texts effectively. It enhances literacy and prepares them for academic success. Free PDF worksheets provide engaging exercises to improve comprehension‚ offering a fun and structured way to learn. These resources are designed to support educators and parents in fostering a strong foundation for lifelong reading skills. Grade 2 reading comprehension activities focus on essential skills like sequencing‚ cause-and-effect‚ and distinguishing fact from fiction‚ ensuring young learners develop a deep understanding of written content.

1.1 Importance of Reading Comprehension Skills

Reading comprehension skills are essential for second-grade students‚ as they lay the foundation for academic success. These skills enable learners to understand and interpret texts‚ fostering critical thinking and vocabulary expansion. By mastering comprehension‚ students can extract meaning from various materials‚ apply knowledge in different contexts‚ and build a strong literacy base. This ability supports overall educational growth and lifelong learning‚ making it a cornerstone of early education.

1.2 Benefits of Using Worksheets for Grade 2 Learners

Worksheets provide structured practice‚ helping Grade 2 learners improve reading comprehension skills. They offer targeted exercises aligned with curriculum goals‚ ensuring focused learning. Worksheets cater to different learning styles‚ making them ideal for diverse classrooms. Additionally‚ they are accessible for parents and educators‚ offering a practical tool for reinforcing literacy at home or in school. Regular use enhances retention and builds confidence in young readers.

Top Sources for Free Grade 2 Reading Comprehension PDFs

Popular websites like essentialskills.net and games4esl.com offer free downloadable PDFs with engaging passages and answer keys. These resources are perfect for educators and parents seeking accessible learning materials.

2.1 Popular Websites Offering Free Downloads

Websites like superstarworksheets.com‚ essentialskills.net‚ and games4esl.com provide free‚ downloadable PDFs for grade 2 reading comprehension. These sites offer a variety of short passages‚ multiple-choice questions‚ and fact-and-fiction exercises. They cater to parents‚ educators‚ and students‚ ensuring accessible learning resources. Many worksheets include answer keys‚ making them ideal for home or classroom use. These platforms are trusted for their engaging and educational content.

2.2 How to Access and Download Worksheets

To access free grade 2 reading comprehension worksheets‚ visit websites like superstarworksheets.com or essentialskills.net. Browse through the available resources‚ select the desired worksheet‚ and click the download link. Many sites offer PDF formats for easy printing. Some platforms may require creating a free account or signing up for access to premium content. Ensure to review the worksheet details before downloading to match your needs.

Key Features of Grade 2 Reading Comprehension Worksheets

Grade 2 reading comprehension worksheets are designed to align with learning goals‚ ensuring age-appropriate content. They feature engaging exercises‚ including short passages‚ multiple-choice questions‚ and sequencing activities. Many worksheets are available in both printable and digital formats‚ offering flexibility for educators and parents. These resources are crafted to make learning interactive and enjoyable while fostering essential reading skills.

3.1 Alignment with Grade 2 Learning Goals

Grade 2 reading comprehension worksheets are carefully designed to match curriculum standards‚ focusing on skills like identifying main ideas‚ sequencing events‚ and understanding cause-and-effect relationships. These resources target vocabulary development and the ability to distinguish between fact and fiction‚ ensuring they meet the specific learning needs of second-grade students. Educators craft these worksheets to support academic goals effectively.

3.2 Interactive and Engaging Exercises

Grade 2 reading comprehension worksheets feature interactive exercises that make learning enjoyable. Short passages with multiple-choice questions‚ sequencing activities‚ and cause-and-effect exercises keep students engaged; Story-based comprehension and science-themed texts spark curiosity‚ while fact-and-fiction differentiation tasks enhance critical thinking. These exercises are designed to foster a love for reading and support independent learning in a fun and effective manner for young students.

3.4 Printable and Digital Formats

Grade 2 reading comprehension worksheets are available in both printable and digital formats‚ offering flexibility for educators and parents. Printable versions allow for hands-on practice‚ while digital formats provide interactive learning opportunities. These accessible resources ensure that students can engage with comprehension exercises in a way that suits their learning environment‚ whether at home or in the classroom.

Types of Reading Comprehension Exercises

Grade 2 reading comprehension exercises include short passages with multiple-choice questions‚ fact and fiction differentiation‚ and sequencing activities. These exercises help students practice identifying main ideas‚ cause-and-effect relationships‚ and understanding text structures‚ ensuring a well-rounded skill development.

4.1 Short Passages with Multiple Choice Questions

Short passages followed by multiple-choice questions are a popular format in Grade 2 reading comprehension worksheets. These exercises typically feature engaging stories or informative texts‚ followed by 3-4 questions that test understanding of details‚ main ideas‚ and vocabulary. The structured format makes it easy for young learners to practice comprehension while building confidence in selecting correct answers. These exercises are ideal for early readers‚ promoting critical thinking and foundational reading skills.

4.2 Fact and Fiction Differentiation Activities

Fact and fiction exercises help Grade 2 students learn to distinguish between real events and imaginative stories. These activities feature engaging passages followed by questions that ask students to identify whether the text is fact or fiction. This skill enhances their ability to understand different genres and prepares them for more complex reading materials in higher grades.

4.3 Sequencing and Cause-and-Effect Exercises

Sequencing exercises involve ordering events in a story‚ while cause-and-effect activities help students understand why events occur. These skills improve logical thinking and storytelling abilities. Worksheets include short passages followed by questions that ask students to identify sequences and explain cause-and-effect relationships‚ making learning interactive and enjoyable for young readers.

Tips for Parents and Educators

Parents and educators can support early literacy by establishing a daily reading routine and using worksheets to reinforce skills. Encourage interactive activities‚ discuss stories‚ and provide positive feedback to foster confidence and comprehension abilities in young learners.

5.1 Establishing a Daily Reading Routine

Establishing a daily reading routine is crucial for developing strong comprehension skills in second graders. Set a consistent time each day for reading and reviewing worksheets. Use free PDF resources to keep activities engaging. Encourage interactive discussions about the content to deepen understanding. Positive feedback and gradual progression will help build confidence and improve reading abilities over time.

5.2 Using Worksheets to Support Early Literacy Development

Grade 2 reading comprehension worksheets are invaluable for early literacy development. They provide structured exercises that focus on phonemic awareness‚ sight words‚ and sequencing skills. Parents and educators can use these resources to create engaging lessons‚ helping students build confidence and fluency. The worksheets are designed to align with learning goals‚ ensuring a strong foundation for future academic success.

Assessing Reading Comprehension Effectively

Grade 2 reading comprehension assessments are enhanced with free PDF worksheets‚ offering clear exercises to evaluate understanding and track progress. These tools ensure accurate evaluation of skills.

6.1 Identifying Main Ideas and Vocabulary Inferences

Free printable PDF worksheets for Grade 2 focus on identifying main ideas and making vocabulary inferences. These exercises help students understand the core message of a text and use context clues to define unfamiliar words. By practicing these skills‚ young learners enhance their ability to interpret and analyze stories effectively‚ building a strong reading foundation. This approach ensures they grasp both literal and inferential meanings‚ fostering deeper comprehension and critical thinking.

6.2 Verbal and Written Question-Answering Techniques

Free Grade 2 reading comprehension PDFs often include both verbal and written question-answering exercises. Verbal techniques encourage students to discuss and explain their understanding aloud‚ fostering communication skills. Written exercises‚ such as short answers or essays‚ help students organize their thoughts clearly. These methods enhance their ability to articulate ideas effectively‚ preparing them for more complex reading tasks in higher grades.

Additional Skills Covered in Worksheets

Beyond comprehension‚ worksheets often include exercises in phonemic awareness‚ phonics‚ and sight word recognition. These activities strengthen foundational reading skills‚ ensuring well-rounded literacy development in young learners.

7.1 Phonemic Awareness and Phonics Practice

Grade 2 reading comprehension worksheets often include phonemic awareness and phonics exercises to help students recognize and manipulate sounds in words. These activities improve decoding skills‚ enabling learners to read more accurately. Worksheets typically feature word families‚ rhyming games‚ and sound blending exercises‚ reinforcing foundational literacy skills that are crucial for reading comprehension. These exercises are designed to be engaging and easy to follow‚ supporting young learners in developing a strong reading foundation.

7.2 Sight Word Recognition Exercises

Sight word recognition exercises in Grade 2 reading comprehension worksheets focus on high-frequency words that students should memorize for fluent reading. These exercises provide practice in identifying and applying sight words within sentences‚ improving reading speed and accuracy. Worksheets often include word searches‚ matching games‚ and fill-in-the-blank activities‚ making learning engaging and effective. Regular practice with sight words enhances overall reading comprehension and vocabulary development‚ offering robust support for early literacy growth.

Interactive and Fun Learning Opportunities

Engage students with story-based comprehension activities and science-themed passages‚ fostering a love for learning. Interactive exercises like sequencing events and cause-and-effect analysis make reading fun and meaningful. These activities align with Grade 2 goals‚ ensuring educational value while keeping young minds entertained and eager to explore.

8.1 Story-Based Comprehension Activities

Story-based comprehension activities engage students with relatable narratives‚ fostering a deeper connection to texts. These exercises often include questions about characters‚ settings‚ and plotlines‚ encouraging critical thinking. By integrating fun and imaginative stories‚ students develop the ability to analyze and interpret texts effectively. Such activities also promote a love for reading while building essential comprehension skills in a creative and interactive way.

8.2 Lifecycles and Science-Based Passages

Lifecycles and science-based passages introduce students to non-fiction reading‚ enhancing their understanding of the natural world. Topics like insect lifecycles or plant growth are presented in engaging texts‚ followed by comprehension questions. These activities not only improve reading skills but also spark curiosity about science and the environment‚ making learning both educational and enjoyable for young students. Interactive elements further reinforce these learning objectives effectively.

How to Use Worksheets Effectively

Use worksheets to save time with pre-designed passages and encourage independent reading. Guide students to analyze texts and answer questions confidently‚ fostering a deeper understanding of content.

9.1 Saving Time with Pre-Designed Passages

Pre-designed passages in free PDF worksheets save educators and parents considerable time. They offer ready-to-use content aligned with grade 2 learning goals‚ ensuring consistency and relevance. These passages cover various topics‚ such as insects‚ lifecycles‚ and engaging stories‚ making learning both efficient and enjoyable. The structured format allows for quick implementation in daily routines‚ maximizing teaching efficiency and student engagement. This resource is invaluable for busy educators seeking quality material.

9.2 Encouraging Independent Reading and Analysis

Free PDF worksheets promote independent reading and analysis by providing engaging passages and questions. Students can read texts on their own‚ fostering autonomy and confidence. Interactive exercises‚ such as identifying main ideas or sequencing events‚ encourage critical thinking. These resources empower learners to develop essential skills without constant supervision‚ making them ideal for both classroom and home learning environments.

Reading comprehension is essential for Grade 2 students’ academic growth. Free PDF worksheets provide valuable practice‚ helping children master skills like sequencing and cause-and-effect. Establishing a daily reading routine and using interactive exercises fosters a lifelong love for learning. Parents and educators play a key role in supporting early literacy development with these resources.

10.1 Summary of the Importance of Grade 2 Reading Comprehension

Reading comprehension is foundational for Grade 2 students‚ enhancing literacy and cognitive development. It improves critical thinking‚ vocabulary‚ and understanding of complex texts. These skills support academic success and lifelong learning. Free PDF worksheets provide structured practice‚ aiding educators and parents in fostering early literacy. Regular practice with engaging exercises ensures students develop essential reading abilities‚ preparing them for future challenges.

10.2 Final Tips for Maximizing Learning Outcomes

To maximize learning outcomes‚ establish a consistent reading routine and provide positive feedback. Encourage interactive discussions about texts to deepen understanding. Use free PDF resources to practice regularly‚ ensuring exercises align with Grade 2 goals. Celebrate progress and adapt strategies to meet individual needs‚ fostering a love for reading and learning. This approach ensures long-term academic success and confidence.

statistics final project examples pdf

Statistics final projects exemplify the practical application of data analysis, enabling students to explore real-world problems. PDF examples provide guidance on methodologies, tools, and presentation, showcasing how statistical techniques solve contemporary issues and promote data-driven decision-making.

Overview of the Importance of Final Projects in Statistics

Final projects in statistics are crucial for applying theoretical knowledge to real-world scenarios, fostering analytical and problem-solving abilities. These projects enable students to demonstrate their mastery of statistical techniques, encouraging critical thinking and effective communication of data insights. By engaging in hands-on data collection, analysis, and interpretation, students bridge the gap between academic concepts and practical application, preparing them for professional challenges. These projects also enhance collaboration and creativity, equipping students with skills essential for tackling complex data-driven problems in various fields. Ultimately, final projects serve as a comprehensive assessment of a student’s ability to translate statistical theory into actionable solutions.

Key Features of a Well-Structured Statistics Final Project

A well-structured statistics final project should exhibit clear objectives, a focused research question, and a logical workflow. It should incorporate a robust methodology, including data collection, analysis, and interpretation, supported by appropriate statistical tools and software. Effective visualization of data through charts and graphs is essential for conveying insights. Additionally, the project should demonstrate a deep understanding of statistical concepts and their application to real-world problems. Proper documentation, including clear explanations of processes and results, is vital. Finally, adherence to academic standards, such as proper citation and ethical considerations, ensures the project’s credibility and professionalism.

Popular Topics for Statistics Final Projects

Popular topics include analyzing health trends, environmental impacts, economic indicators, and sports analytics, offering practical insights into real-world data applications and fostering deeper understanding of statistical methodologies.

Exploring Data Analysis and Visualization Techniques

Data analysis and visualization are cornerstone skills in statistics, enabling the transformation of raw data into actionable insights. Final projects often focus on techniques like regression analysis, hypothesis testing, and predictive modeling. Tools such as Excel, R, Python, and Tableau are commonly used to create interactive and dynamic visualizations. Students learn to present complex data through charts, graphs, and heatmaps, making findings accessible to broader audiences. These projects emphasize the importance of clear communication in statistics, ensuring that insights are both accurate and interpretable. Real-world case studies and datasets are frequently incorporated to illustrate practical applications of these techniques.

Investigating Relationships Between Variables

Exploring relationships between variables is a fundamental aspect of statistical analysis, often involving correlation, regression, and causal inference. Final projects frequently examine how variables interact, such as analyzing the impact of temperature on crop yield or the relationship between income and education levels. Techniques like scatter plots, covariance, and coefficient analysis are employed to visualize and quantify these connections. Advanced methods, including multivariate analysis and machine learning models, are also applied to uncover complex interactions. These investigations provide insights into patterns, trends, and predictive relationships, enabling informed decision-making in fields like business, healthcare, and social sciences.

Applying Statistical Models to Real-World Scenarios

Statistical models are essential for solving real-world problems, enabling predictions, forecasts, and informed decisions. Final projects often apply models like regression, time series analysis, or machine learning to datasets from healthcare, finance, or environmental science. For example, predicting disease spread using epidemiological models or analyzing customer purchasing behavior with logistic regression. These applications demonstrate how statistical techniques can address complex challenges, such as optimizing resource allocation or identifying risk factors. By selecting appropriate models and validating their accuracy, students showcase the practical relevance of statistics in driving real-world solutions and fostering data-driven insights across diverse industries.

Data Collection and Analysis Methods

Data collection involves gathering primary or secondary sources, while analysis applies statistical tools like Excel or Python for descriptive and inferential insights, ensuring reliable results.

Primary vs. Secondary Data Sources

In statistics projects, data sources are categorized into primary and secondary. Primary data is collected firsthand through surveys, experiments, or observations, offering tailored insights. Secondary data is sourced from existing records, such as books, reports, or online databases, often more accessible but less specific. Both sources are valuable, but primary data ensures originality and relevance, while secondary data saves time and resources. Understanding their differences is crucial for selecting the most appropriate data type for your project, ensuring reliability and validity in your analysis. Proper citation is essential when using secondary data to avoid plagiarism and maintain academic integrity.

Sampling Techniques for Reliable Results

Sampling techniques are essential for ensuring reliable results in statistical analysis. Common methods include random sampling, stratified sampling, cluster sampling, and systematic sampling. Random sampling reduces bias by giving every individual an equal chance of being selected. Stratified sampling divides the population into subgroups for more precise results. Cluster sampling targets specific groups to simplify data collection. Systematic sampling involves selecting individuals at regular intervals. Each method has its advantages and should be chosen based on research objectives and population characteristics. Proper sampling ensures data accuracy, reduces costs, and enhances the validity of conclusions drawn from the analysis, making it a cornerstone of robust statistical research.

Descriptive and Inferential Statistics in Project Contexts

Descriptive statistics summarize data, highlighting central tendencies and variability, while inferential statistics draw conclusions about populations from samples. In projects, descriptive methods provide clear data overviews, using measures like mean and standard deviation. Inferential techniques, such as hypothesis testing, enable predictions and comparisons. Together, they offer a comprehensive analysis, enhancing the reliability and depth of insights in statistical projects.

Tools and Software for Statistics Projects

Statistics projects utilize tools like Excel, R, Python, and graphical software for data analysis and visualization, enhancing efficiency and providing professional, clear insights.

Using Excel for Basic Statistical Analysis

Excel is a versatile tool for basic statistical analysis, offering functions for calculating mean, median, and standard deviation. Its charting features help visualize data trends, making it ideal for initial exploratory analysis. Students often use Excel for descriptive statistics, creating histograms, and scatter plots. Add-ins like Analysis ToolPak extend its capabilities for regression and hypothesis testing. While not as advanced as R or Python, Excel’s user-friendly interface makes it accessible for beginners. Many final projects start with Excel for data cleaning and preliminary insights before transitioning to more complex tools. Its simplicity and widespread availability make it a popular choice for foundational statistical work.

R and Python for Advanced Data Processing

R and Python are powerful tools for advanced statistical analysis, offering extensive libraries like Pandas, NumPy, and Matplotlib for data manipulation and visualization. R excels in statistical modeling with packages like dplyr and ggplot2, while Python’s versatility in machine learning makes it ideal for complex data processing. Both languages support big data handling and integration with databases. Their scripting capabilities allow automation of repetitive tasks, enhancing efficiency in data pipelines. Many final projects leverage R and Python for predictive modeling, hypothesis testing, and data visualization, producing insightful and actionable results. These tools are essential for modern data-driven decision-making in academic and professional settings.

Graphical Representation Tools for Effective Communication

Effective communication of statistical findings relies heavily on graphical representation tools. Software like Tableau, Power BI, and Excel enable the creation of interactive and dynamic visualizations, making complex data accessible. Tools such as ggplot2 in R and Matplotlib in Python offer customizable plots, enhancing the clarity of results. Infographics and dashboards provide a structured way to present data, aiding in the interpretation of trends and patterns. These tools ensure that insights are conveyed clearly, making them indispensable for final projects. Proper use of graphical tools can elevate the impact of statistical analysis, ensuring that conclusions are both understandable and actionable for diverse audiences.

Examples of Successful Statistics Final Projects

Successful statistics final projects often involve real-world applications, such as analyzing public health trends or economic indicators. These examples demonstrate how data drives meaningful insights and solutions.

Case Studies from Academic and Professional Settings

Case studies from academic and professional settings provide real-world insights into statistical applications. Examples include analyzing public health trends, economic indicators, and business performance metrics. These studies, often documented in PDF format, demonstrate the practical value of statistical methods like regression, hypothesis testing, and data visualization. They highlight how professionals and students can apply these techniques to solve complex problems. Accessible online, these case studies serve as valuable resources for understanding how to structure and execute impactful statistical projects. They also offer lessons on interpreting data and communicating findings effectively, making them indispensable for both learning and professional development in statistics.

PDF Examples of Well-Executed Projects

PDF examples of well-executed statistics final projects are invaluable resources for students and professionals. These documents showcase clear structuring, detailed methodologies, and effective communication of results. They often include data analysis, visual representations, and interpretations that demonstrate mastery of statistical concepts. Many PDF examples highlight the use of tools like R, Python, or Excel for data processing and visualization. Accessible online, these examples serve as templates for formatting and presenting complex statistical findings. They provide practical insights into transforming raw data into actionable conclusions, making them indispensable for learning and professional development in applied statistics.

Lessons Learned from Real-World Applications

Statistics final projects highlight key lessons from real-world applications, emphasizing the importance of data quality, clear communication, and practical relevance. Many examples demonstrate how improper sampling or bias can skew results, while others showcase the value of iterative analysis. Collaboration and critical thinking are consistently emphasized, as well as the need for transparency in methodology. Additionally, these projects underscore the importance of selecting appropriate tools, such as Excel, R, or Python, to match the complexity of the problem. Finally, they illustrate how well-structured reports and visualizations can transform complex data into actionable insights, making statistics accessible and impactful in diverse contexts.

Best Practices for Presenting Statistics Projects

Effective presentation of statistics projects involves clear structure, concise language, and visual aids. Use charts and graphs to highlight key findings, ensuring readability and impact in PDF formats.

Structuring Your Report for Clarity and Impact

A well-structured statistics final project report begins with a clear introduction that outlines the problem, objectives, and significance. The methodology section should detail data collection and analysis processes, ensuring transparency. Results are presented using visual aids like charts and tables to enhance understanding. Conclusions must be concise, summarizing key findings and their implications. Proper formatting, including headings, subheadings, and references, enhances readability. PDF examples often highlight the importance of logical flow, making it easier for readers to follow complex statistical concepts. By adhering to these guidelines, students can produce a polished, professional report that effectively communicates their analysis and insights.

Formatting and Design Tips for PDF Outputs

Creating a visually appealing PDF for your statistics final project is crucial for professional presentation. Use clean, readable fonts like Arial or Times New Roman in sizes 10-12 points. Ensure consistent margins and spacing throughout the document. Incorporate high-resolution images, charts, and tables to illustrate findings, ensuring they are properly labeled. Use color sparingly to highlight key points without overwhelming the reader. Include a table of contents for easy navigation and add page numbers for clarity. Tools like Excel, R, or Python can help design visually appealing graphs. Maintain consistency in formatting styles to ensure a polished, professional output that enhances readability and understanding.

Common Mistakes to Avoid in Final Submissions

When finalizing your statistics project, avoid common mistakes such as data entry errors, incorrect application of statistical tests, and poor interpretation of results. Ensure all visualizations are clear and appropriately labeled. Avoid overwhelming the reader with excessive charts or tables. Properly cite all sources and ensure consistency in formatting. Proofread your report to eliminate grammatical and typographical errors. Avoid vague conclusions and ensure recommendations are data-driven. Adhere to submission guidelines, including file format and page limits. Lastly, ensure ethical standards are maintained, especially when dealing with sensitive data. Addressing these issues will enhance the professionalism and credibility of your final submission.

marvel roleplaying game pdf

The Marvel Roleplaying Game PDF offers an immersive tabletop experience‚ allowing fans to embody iconic Marvel heroes. Its digital format enhances accessibility and convenience for players worldwide‚ enabling easy sharing and updates. The PDF includes detailed rules‚ character creation tools‚ and official expansions‚ making it a versatile resource for both newcomers and seasoned players. With form-fillable character sheets and official feedback opportunities‚ it fosters community engagement and continuous improvement. Explore the Marvel Multiverse like never before with this essential guide to superhero roleplaying.

1.1 Overview of the Game and Its Significance

The Marvel Roleplaying Game PDF is a groundbreaking tabletop experience that lets players embody iconic Marvel heroes‚ crafting unique stories within the vast Marvel Multiverse. The game’s significance lies in its accessibility and depth‚ offering a blend of strategic combat and narrative storytelling. The core rulebook provides essential guidelines‚ while expansions like the Avengers Expansion and adventures such as Revenge of the Super-Skrull enhance gameplay with new characters and scenarios. Its digital format ensures easy updates and community engagement‚ making it a must-have for Marvel fans and RPG enthusiasts alike.

1.2 Importance of the PDF Format for Accessibility

The PDF format of the Marvel Roleplaying Game enhances accessibility‚ allowing players to easily access and share the core rulebook‚ expansions‚ and adventures across devices. Digital PDFs enable quick updates and corrections‚ ensuring players always have the most current version. Features like form-fillable character sheets streamline gameplay preparation. The PDF’s availability on platforms like DriveThruRPG.com and Roll20 makes it convenient for global players to download and enjoy. This format also supports community engagement through official feedback opportunities‚ fostering a connected and evolving player base.

Core Rulebook of the Marvel Multiverse RPG

The Marvel Multiverse RPG Core Rulebook provides a comprehensive guide to gameplay‚ featuring detailed mechanics‚ character creation‚ and official feedback opportunities. It empowers players to embody Marvel heroes‚ blending storytelling and strategy seamlessly.

2.1 Key Features and Mechanics

The Marvel Multiverse RPG Core Rulebook introduces a dynamic action dice system‚ emphasizing storytelling and player agency. It features heroic abilities‚ power management‚ and a mission-based progression system. Players can craft unique heroes‚ balancing combat‚ teamwork‚ and narrative impact. The rulebook also includes official feedback mechanisms‚ allowing players to shape future updates. With its flexible mechanics‚ the game appeals to both casual and experienced players‚ ensuring an engaging experience for all Marvel fans.

2.2 Official Feedback and Rule Development

The Marvel Multiverse RPG encourages player involvement through official feedback channels‚ allowing fans to shape the game’s evolution. Players can submit input on rules and mechanics‚ ensuring the system grows with community needs. This collaborative approach fosters a dynamic and adaptive gameplay experience. The core rulebook serves as the foundation‚ while feedback-driven updates refine and expand the game. This transparent development process highlights Marvel’s commitment to creating a system that resonates with both casual and dedicated players‚ ensuring the game remains fresh and engaging for years to come.

Character Creation and Development

The Marvel Multiverse RPG offers form-fillable PDF character sheets‚ enabling easy customization and hero progression. Players can tailor abilities and backgrounds‚ creating unique Marvel heroes for their adventures.

3.1 Form-Fillable PDF Character Sheets

The Marvel Multiverse RPG provides form-fillable PDF character sheets‚ streamlining character creation and customization. These sheets allow players to easily input and track abilities‚ stats‚ and backgrounds. The digital format ensures organization and quick access to vital information during gameplay. Players can effortlessly update their characters as they progress‚ making hero development seamless. Additionally‚ the sheets are designed to be shared and edited online‚ enhancing collaboration among players and Game Masters. This feature is particularly praised for its convenience and efficiency in managing complex character builds and adventures like Revenge of the Super-Skrull.

3.2 Customization Options and Hero Progression

The Marvel Multiverse RPG offers extensive customization options‚ enabling players to craft unique heroes tailored to their playstyle. Characters can be personalized with distinct abilities‚ origins‚ and equipment‚ ensuring no two heroes are alike. As heroes progress‚ they gain experience points to unlock new powers and enhance existing ones‚ allowing for dynamic growth. The game encourages creativity‚ with rules that adapt to various playstyles. This flexibility ensures that players can shape their heroes’ journeys uniquely‚ whether they’re battling iconic villains or exploring new storylines in adventures like Revenge of the Super-Skrull.

Expansions and Adventures

The Marvel Multiverse RPG expands gameplay with new expansions and adventures‚ offering fresh stories and characters while maintaining the core game’s thrilling experience.

4.1 The Avengers Expansion and Its Content

The Avengers Expansion enhances the Marvel Multiverse RPG with iconic characters and scenarios. It includes new playable heroes‚ detailed missions‚ and expanded game mechanics‚ enriching the storytelling experience for players. The expansion bridges fan-favorite storylines with fresh RPG elements‚ offering unique adventures that deepen the Marvel universe. Players can embody Earth’s mightiest heroes‚ facing challenges that test their abilities and teamwork. This addition is a must-have for fans seeking to expand their Marvel Multiverse RPG adventures and create unforgettable memories.

4.2 Revenge of the Super-Skrull Adventure

The Revenge of the Super-Skrull Adventure is a thrilling addition to the Marvel Multiverse RPG‚ offering a fresh storyline inspired by the Skrulls’ past attempts to conquer Earth. This PDF adventure introduces new challenges‚ enemies‚ and plot twists‚ allowing players to engage in epic battles and strategic gameplay. It expands the Marvel Multiverse RPG experience‚ providing rich narrative depth and opportunities for hero progression. The adventure is designed to test players’ skills and teamwork‚ making it a compelling addition to any campaign. Fans of Marvel’s extraterrestrial conflicts will find this adventure both nostalgic and innovative.

Official Accessories and Tools

The Heroic Dice Set and digital tools like character packs and maps enhance gameplay; Official accessories provide immersive experiences‚ complementing the Marvel Multiverse RPG PDF.

5.1 Heroic Dice Set and Other Accessories

The Heroic Dice Set is a must-have for Marvel Multiverse RPG enthusiasts. Designed with Marvel’s iconic style‚ these dice enhance gameplay‚ offering a tactile experience that immerses players in the Marvel universe. Other accessories include character tokens‚ maps‚ and custom card decks‚ which add depth and convenience to the game. Officially licensed‚ these tools are crafted to align with the game’s mechanics‚ ensuring a seamless and authentic storytelling experience; They are available for purchase on platforms like DriveThruRPG and Roll20‚ making it easy for players to elevate their adventures.

5.2 Digital Tools and Resources

The Marvel Multiverse RPG supports gameplay with an array of digital tools and resources. Official PDF releases include form-fillable character sheets‚ maps‚ and adventures‚ streamlining preparation and play. Platforms like DriveThruRPG and Roll20 offer digital versions of rulebooks and expansions‚ enabling virtual tabletop experiences. Additional resources include character builders‚ adventure modules‚ and community-created content. These tools enhance accessibility and flexibility‚ allowing players to customize their experience and connect with others worldwide. Digital integration ensures the game remains dynamic‚ catering to both traditional and online players with ease and convenience.

Availability and Download Options

The Marvel Multiverse RPG PDF is available through official platforms like DriveThruRPG and Roll20. Free downloads and community resources are accessible online‚ offering flexible options for players.

6.1 Official PDF Releases and Platforms

The Marvel Multiverse RPG PDF is officially released on platforms like DriveThruRPG and Roll20‚ ensuring accessibility and authenticity; These platforms offer secure downloads‚ with some content available for free‚ such as character packs and maps. Official releases include core rulebooks‚ expansions‚ and adventures‚ providing players with a comprehensive resource; The PDF format allows for easy updates and digital convenience‚ making it a preferred choice for tabletop enthusiasts. Fans can trust these platforms for high-quality‚ official Marvel Multiverse RPG content tailored for immersive gameplay experiences.

6.2 Free Downloads and Community Resources

Players can access free PDF downloads for the Marvel Multiverse RPG‚ including character sheets and select adventures. Community platforms like DriveThruRPG and Roll20 offer these resources‚ fostering accessibility. Fan-created content‚ such as custom character packs and maps‚ is also available‚ enriching the gameplay experience. These free downloads provide a gateway for new players to join the Marvel Multiverse while allowing veterans to expand their campaigns. The community-driven resources highlight the collaborative spirit of the RPG‚ ensuring all players can enjoy the game regardless of their budget or experience level.

Community and Player Engagement

The Marvel Multiverse RPG fosters active community engagement through official feedback channels and online platforms. Players share custom content‚ fostering creativity and collaboration within the Marvel Multiverse.

7.1 Fan Feedback and Community Contributions

Fan feedback plays a crucial role in shaping the Marvel Multiverse RPG‚ with players actively contributing through official channels and online forums. The community creates custom adventures‚ character packs‚ and resources‚ fostering creativity and collaboration. Platforms like DriveThruRPG and Roll20 host user-generated content‚ enabling players to share and discover new material. Additionally‚ fan discussions often highlight areas for improvement‚ such as the occasional blurry text in PDFs‚ which developers address to enhance the overall experience. This collaborative environment ensures the game evolves with the community’s input and passion.

7.2 The Role of Online Platforms in Sharing Content

Online platforms have revolutionized how players engage with the Marvel Multiverse RPG‚ enabling effortless sharing of content. Websites like DriveThruRPG and Roll20 host official PDF releases‚ expansions‚ and community-created resources. These platforms allow players to access character packs‚ maps‚ and adventures instantly. Digital tools enhance gameplay‚ offering form-fillable sheets and interactive maps. Online forums and communities further facilitate collaboration‚ with fans exchanging custom content and strategies. This digital ecosystem fosters a vibrant‚ connected player base‚ ensuring the game remains dynamic and accessible to enthusiasts worldwide. The ease of sharing content has become a cornerstone of the RPG’s success and popularity.

Future Prospects and Updates

The Marvel Multiverse RPG continues to expand with new expansions and digital tools‚ promising fresh adventures and enhanced gameplay. Upcoming content includes the Spider-Verse Expansion‚ introducing new characters and storylines. Official feedback remains crucial for shaping the game’s future‚ ensuring it evolves based on community input. Players can look forward to more form-fillable PDFs and interactive features‚ making it a dynamic tabletop experience.

8.1 Upcoming Expansions and Adventures

The Marvel Multiverse RPG promises exciting upcoming expansions‚ including the highly anticipated Spider-Verse Expansion‚ which introduces new characters and immersive storylines. Players can expect fresh adventures like Revenge of the Super-Skrull‚ expanding the game’s narrative depth. These expansions will include new form-fillable PDF content‚ ensuring accessibility and ease of use. The game’s developers are also working on digital tools to enhance gameplay‚ offering fans more ways to engage with the Marvel Multiverse. With a focus on community feedback‚ future updates aim to deliver dynamic and player-driven experiences‚ keeping the game fresh and exciting for years to come.

8.2 Continuous Development and Improvement

The Marvel Multiverse RPG is committed to continuous development‚ with regular updates based on community feedback. Players can contribute through official channels‚ helping shape the game’s future. Digital tools and resources are being refined‚ ensuring a smoother and more immersive experience. The development team focuses on enhancing gameplay mechanics‚ expanding character options‚ and addressing player concerns. With a dedication to quality‚ the game evolves to meet the demands of its growing fan base‚ offering fresh content and improvements to keep the Marvel Multiverse RPG exciting and dynamic for years to come.

mainstays 12 cup programmable coffee maker manual

The Mainstays 12 Cup Programmable Coffee Maker is a convenient and easy-to-use appliance designed for coffee lovers. It brews up to 12 cups‚ features an 18-liter capacity‚ thermal carafe‚ programmable timer‚ and Bold Brew option for customized strength. Perfect for home or office use.

Key Features of the Mainstays 12 Cup Programmable Coffee Maker

The Mainstays 12 Cup Programmable Coffee Maker offers a 12-cup capacity‚ programmable timer‚ thermal carafe‚ Bold Brew option‚ water level indicator‚ and drip stop feature for convenience.

2.1 Programmable Timer

The programmable timer allows you to set the brew time up to 24 hours in advance‚ ensuring fresh coffee is ready when you need it. With a 24-hour clock‚ you can schedule brewing conveniently. This feature is ideal for busy mornings‚ enabling you to wake up to the aroma of freshly brewed coffee. It’s easy to set and offers precise control over your brewing schedule.

2.2 Thermal Carafe

The thermal carafe is designed to keep your coffee hot for hours without reheating. Made of high-quality glass‚ it retains heat effectively and ensures your coffee stays warm throughout the day. The carafe is large enough to hold 12 cups‚ making it perfect for serving multiple people. Its airtight design prevents heat loss and maintains the flavor of your freshly brewed coffee.

2.3 Bold Brew Option

The Bold Brew Option allows you to customize your coffee’s strength by adjusting the brewing time for a richer‚ more intense flavor. Perfect for those who prefer a robust cup‚ this feature extracts more oils and flavors from the coffee grounds. It ensures a bolder taste while maintaining the convenience of programmable brewing. This option is ideal for coffee enthusiasts seeking a stronger morning brew.

2.4 Water Level Indicator

The Water Level Indicator provides clear visibility of the water reservoir‚ ensuring you never run out mid-brew. It helps you maintain the perfect water level‚ essential for optimal brewing. This feature simplifies the brewing process‚ allowing you to refill only what’s needed. It’s a practical solution for consistent coffee quality and hassle-free operation. The indicator is easy to read and use.

2.5 Drip Stop Feature

The Drip Stop Feature allows you to pause the brewing cycle‚ enabling you to pour a cup of coffee before the pot is fully brewed. This convenient option prevents spills and drips‚ making it easy to enjoy your coffee without waiting for the entire cycle to complete. It’s designed to provide flexibility and reduce mess during the brewing process.

How to Use the Mainstays 12 Cup Programmable Coffee Maker

Using the Mainstays 12 Cup Programmable Coffee Maker is straightforward. Simply add water‚ ground coffee‚ and select your preferred settings. Refer to the manual for detailed brewing instructions and customization options to ensure optimal performance and flavor.

3.1 Step-by-Step Brewing Instructions

To brew coffee‚ add fresh‚ cold water to the reservoir. Insert a U-type paper filter into the filter basket and fill with ground coffee. Close the water tank cover‚ select your desired brew settings‚ and press Start. The machine will begin brewing. Once complete‚ carefully pour coffee from the thermal carafe. Always handle hot surfaces with care and avoid immediate cleaning after brewing to prevent scalding.

3.2 Setting the Programmable Timer

To set the programmable timer‚ press the Time button until the display shows the current time. Use the Hour and Minute buttons to set your desired brew time. Press Start to confirm. The coffee maker will automatically start brewing at the scheduled time‚ ensuring your coffee is ready when you need it. This feature allows for convenient scheduling and perfect mornings every day.

3.3 Using the Bold Brew Option

The Bold Brew Option allows for a stronger‚ richer coffee flavor. To activate it‚ press the Bold button before starting the brew cycle. This feature extends the brewing time‚ ensuring a more intense extraction of coffee grounds. For optimal results‚ use slightly more coffee grounds than usual. This customizable option caters to those who prefer a bolder taste‚ making every cup more satisfying and flavorful.

Customization Options

The Mainstays 12 Cup Programmable Coffee Maker offers programmable brewing‚ allowing users to set brew times and strength preferences. The Bold Brew option enhances flavor intensity‚ while the thermal carafe keeps coffee hot for hours. These features provide flexibility and convenience for a personalized coffee experience.

4.1 Adjusting Brew Strength

The Bold Brew option on the Mainstays 12 Cup Programmable Coffee Maker allows users to customize the strength of their coffee. By selecting the bold setting‚ coffee grounds steep longer‚ intensifying the flavor. This feature ensures every cup meets individual taste preferences‚ whether you prefer a robust or standard brew. The adjustable settings provide flexibility for a personalized coffee experience.

4;2 Scheduling Brew Time

The programmable timer allows you to set brew time up to 24 hours in advance‚ ensuring fresh coffee whenever you need it. Simply select the desired start time‚ and the coffee maker will automatically begin brewing at the scheduled time. This feature offers convenience for busy mornings‚ letting you wake up to a perfectly brewed pot of coffee.

Maintenance and Cleaning

Regularly clean the coffee maker and carafe with mild soap and water. Descale every 3-6 months to prevent mineral buildup. Wipe surfaces dry after cleaning.

5.1 Cleaning the Coffee Maker

Clean the coffee maker regularly to maintain performance and hygiene. Wash the carafe and filter basket with mild detergent and warm water after each use. Wipe the exterior with a damp cloth. Descale every 3-6 months to remove mineral buildup. Run a mixture of water and white vinegar through the machine to clean internal parts. Rinse thoroughly to ensure no residue remains. Avoid harsh chemicals to prevent damage.

5.2 Replacing Parts

Replace worn or damaged parts to maintain optimal performance. The water filter‚ heating element‚ and seal may need periodic replacement. Order genuine parts from the manufacturer or authorized retailers. Refer to the manual for specific instructions on disassembly and installation. Regular part replacement ensures longevity and prevents leaks or malfunction. Always unplug the coffee maker before attempting any repairs or replacements to avoid injury or damage.

Troubleshooting Common Issues

Common issues include the coffee maker not turning on‚ slow brewing‚ or the carafe not keeping coffee hot. Check the power cord‚ water levels‚ and ensure proper cleaning.

6.1 Common Problems and Solutions

If the coffee maker doesn’t turn on‚ ensure the power cord is securely plugged in and the outlet is functioning. For slow brewing‚ descale the machine and check water flow. If coffee isn’t staying hot‚ clean the thermal carafe and ensure the lid is closed tightly. Regular maintenance can prevent many issues and extend the product’s lifespan.

Safety Precautions

Always handle hot parts with care‚ avoid touching hot surfaces‚ and ensure the outlet voltage matches the coffee maker’s rating. Keep children away from the appliance.

7.1 Handling Hot Surfaces

Avoid touching hot surfaces‚ such as the carafe and heating elements‚ as they can cause burns. Always use handles or knobs to handle the coffee maker. Be cautious of steam during brewing‚ as it can also cause scalding. Keep the appliance out of children’s reach to ensure safe operation. Proper handling prevents accidents and ensures longevity of the coffee maker.

7.2 Electrical Safety

Ensure the coffee maker is used with a suitable electrical outlet matching its voltage. Avoid overloading circuits and keep cords away from water. Do not submerge the appliance in water or use it near flammable materials. Regularly inspect cords for damage. Never operate the coffee maker if it malfunctions or shows signs of electrical issues. This ensures safe and reliable performance.

Accessing the User Manual

The Mainstays 12 Cup Programmable Coffee Maker user manual is available as a free PDF download‚ essential for troubleshooting and maintenance. It is easily accessible online.

8.1 Downloading the PDF Manual

The PDF manual for the Mainstays 12 Cup Programmable Coffee Maker is readily available online. Users can easily download it for free to access detailed instructions‚ troubleshooting guides‚ and maintenance tips. The manual is a comprehensive resource to ensure optimal performance and address any operational queries. It is available on various platforms‚ including the official website and trusted third-party sources.

8.2 Contents of the Manual

The PDF manual of the Mainstays 12 Cup Programmable Coffee Maker includes detailed setup instructions‚ brewing guidelines‚ maintenance tips‚ and troubleshooting solutions. It covers safety precautions‚ programmable timer setup‚ and the Bold Brew feature. The manual also provides parts information and warranty details‚ ensuring users can fully utilize their coffee maker with confidence and ease. It is organized for quick reference.

User Reviews and Feedback

The Mainstays 12 Cup Programmable Coffee Maker has received positive reviews‚ with a 4.6-star rating from 175 users‚ praising its performance‚ ease of use‚ and value.

9.1 Customer Satisfaction

The Mainstays 12 Cup Programmable Coffee Maker has garnered high satisfaction rates‚ with a 4.6-star rating from 175 reviews. Users praise its ease of use‚ compact design‚ and reliable performance. Many appreciate the programmable timer and Bold Brew option for customizable coffee strength. The thermal carafe and drip stop feature also receive positive feedback for convenience and efficiency. Overall‚ it’s a great choice for everyday coffee brewing.

9.2 Tips from Experienced Users

Experienced users recommend using fresh‚ cold water for optimal flavor and ensuring the filter is properly seated. Regular cleaning of the brew basket and carafe is advised to prevent residue buildup. For stronger coffee‚ users suggest using slightly more grounds or activating the Bold Brew option. Always allow the machine to cool slightly before cleaning to avoid burns.

Comparison with Similar Coffee Makers

The Mainstays 12 Cup Programmable Coffee Maker offers a great balance of affordability and features‚ rivaling more expensive models with its programmable timer and thermal carafe.

10.1 Value for Money

The Mainstays 12 Cup Programmable Coffee Maker offers exceptional value‚ combining affordability with essential features like a programmable timer‚ thermal carafe‚ and Bold Brew option. It competes well with more expensive models‚ providing a budget-friendly solution for daily coffee needs without compromising on performance or convenience. Its durability and comprehensive features make it a cost-effective choice for home or office use.

10.2 Unique Features

The Mainstays 12 Cup Programmable Coffee Maker stands out with its programmable timer‚ allowing users to schedule brewing in advance. The thermal carafe keeps coffee hot for hours‚ while the Bold Brew option offers customizable strength. Additional features like the water level indicator and drip stop enhance convenience‚ making it a versatile and user-friendly choice for coffee enthusiasts seeking both quality and flexibility.

Eco-Friendly Aspects

The Mainstays 12 Cup Programmable Coffee Maker promotes eco-friendly use with energy-efficient brewing and recyclable components. Its programmable timer reduces unnecessary energy consumption‚ making it environmentally conscious.

11.1 Energy Efficiency

The Mainstays 12 Cup Programmable Coffee Maker is designed with energy efficiency in mind. It features a programmable timer that allows you to schedule brewing‚ reducing unnecessary energy use. The automatic shut-off function turns the coffee maker off after brewing‚ further conserving power. These features make it an eco-friendly choice for coffee lovers.

11.2 Recyclable Components

The Mainstays 12 Cup Programmable Coffee Maker incorporates recyclable materials‚ including its plastic components and metal parts. The thermal carafe and filter basket are also recyclable‚ making it an eco-friendly option. Users can disassemble the coffee maker and recycle its parts‚ contributing to sustainability. Always check local recycling guidelines for proper disposal and material acceptance. This feature aligns with environmentally responsible practices.

The Mainstays 12 Cup Programmable Coffee Maker offers a perfect blend of functionality and affordability. Its programmable timer‚ thermal carafe‚ and customizable brewing options make it ideal for daily use. With features like a water level indicator and bold brew setting‚ it caters to diverse preferences. Eco-friendly aspects and easy maintenance add to its appeal. This coffee maker is a reliable choice for coffee enthusiasts seeking convenience and quality in one device.

milwaukee router edge guide

The Milwaukee Router Edge Guide is a versatile accessory designed to enhance precision and control when performing edge routing tasks. It attaches seamlessly to Milwaukee routers‚ offering a reliable solution for achieving straight‚ consistent cuts. While Milwaukee officially discontinued their edge guide‚ the community has found creative alternatives‚ such as using Porter-Cable guides or crafting custom solutions‚ ensuring compatibility and functionality for various projects.

1.1 Overview of the Milwaukee Router Edge Guide

The Milwaukee Router Edge Guide is a precision-enhancing accessory designed for accurate edge routing. It attaches to compatible Milwaukee routers‚ offering a stable platform for consistent cuts. Although Milwaukee discontinued their official edge guide‚ its design allows for universal compatibility with third-party options like Porter-Cable guides or custom DIY solutions. This versatility ensures users can still achieve professional results‚ even without the original accessory‚ making it a valuable tool for woodworking projects requiring precise edge control.

1.2 Importance of Edge Guides in Routing

Edge guides are essential for maintaining precision and consistency in routing tasks. They prevent the router from drifting‚ ensuring straight cuts and reducing the risk of errors. For Milwaukee routers‚ while the official edge guide is discontinued‚ compatible alternatives or DIY solutions provide the same benefits. Edge guides are particularly valuable for intricate projects‚ enabling precise control and professional finishes‚ making them indispensable for both hobbyists and professionals seeking flawless results in woodworking and cabinetry.

Features and Benefits of the Milwaukee Router Edge Guide

The Milwaukee Router Edge Guide offers precise control and ease of use‚ ensuring straight cuts and professional finishes. While Milwaukee’s official guide is discontinued‚ alternatives like Porter-Cable guides or DIY solutions provide versatility for various projects‚ maintaining compatibility and delivering consistent results for woodworking tasks.

2.1 Design and Compatibility

The Milwaukee Router Edge Guide features a durable design with adjustable rods and a universal mounting system‚ ensuring compatibility with various Milwaukee router models. Its sleek construction allows for easy attachment to the router base‚ providing stability and precision. While Milwaukee’s official edge guide is discontinued‚ compatible alternatives like Porter-Cable guides or DIY solutions offer similar functionality. The design emphasizes versatility‚ making it suitable for both professional and hobbyist woodworking projects‚ ensuring consistent results and ease of use.

2.2 Key Features for Precise Routing

The Milwaukee Router Edge Guide offers key features that ensure precise routing‚ including adjustable alignment knobs and a sturdy guide rail system. These features allow for accurate edge alignment‚ reducing the risk of errors. The guide rail is designed to maintain consistent contact with the workpiece‚ enabling smooth‚ straight cuts. Additional features like locking mechanisms and fine-tuning adjustments further enhance control‚ making it ideal for intricate woodworking tasks and professional-grade finishes. These elements combine to deliver exceptional precision and versatility in routing applications.

Compatibility with Milwaukee Routers

The Milwaukee Router Edge Guide is compatible with select Milwaukee router models‚ including the 5615‚ 5616‚ and 5619‚ when equipped with specific sub-bases like the 49-54-1040 or 49-54-1026.

3.1 Milwaukee Router Models Supporting Edge Guides

Specific Milwaukee router models‚ such as the 5615‚ 5616‚ and 5619‚ are designed with mounting holes for edge guides‚ enhancing compatibility with optional accessories. These models often require specific sub-bases‚ like the 49-54-1040 or 49-54-1026‚ to ensure proper fitment and functionality. While Milwaukee’s official edge guide is discontinued‚ these routers’ designs accommodate universal or third-party edge guides‚ allowing users to maintain precision and versatility in their woodworking projects. This compatibility ensures that users can still achieve professional results without relying solely on Milwaukee’s discontinued accessories.

3.2 Universal Fitment Options

While Milwaukee’s edge guide is discontinued‚ universal fitment options offer versatility. Porter-Cable edge guides are often compatible‚ providing a reliable alternative. Additionally‚ users can opt for guide bushes or create custom solutions using steel rods and plywood‚ ensuring adaptability across various projects. These options maintain precision and ease of use‚ catering to different router models and woodworking needs‚ proving that functionality isn’t limited by discontinued accessories.

Step-by-Step Guide to Assembling the Edge Guide

Attach the guide rail to the router’s base‚ align it with the edge‚ and secure it firmly. Ensure proper alignment and tighten all screws for stability.

4.1 Attaching the Guide Rail

Start by aligning the guide rail with the Milwaukee router’s base‚ ensuring it fits into the designated mounting holes. Secure the rail using the provided screws‚ tightening them evenly to prevent any wobble or misalignment. Make sure the rail is flush with the router’s edge for accurate cuts. Double-check the alignment before final tightening to ensure proper fitment and functionality. This step is crucial for maintaining precision during routing tasks.

4.2 Aligning and Securing the Guide

After attaching the guide rail‚ align it with your desired cutting edge or reference line. Use clamps or a straightedge to ensure accuracy. Loosen the guide’s adjustment screws‚ position it flush against the workpiece‚ then tighten firmly. For stability‚ move the router in the direction opposite the bit’s rotation—left to right on the right edge‚ right to left on the left edge. Double-check alignment before cutting and consider a test run without the bit to confirm the guide’s stability and position.

Using the Edge Guide Effectively

For smooth cuts‚ align the guide flush with the workpiece’s edge and maintain consistent router movement. Always move counterclockwise on outside edges and clockwise on inside edges for optimal results.

5.1 Basic Techniques for Edge Routing

Start by clamping a straight edge to your workpiece‚ ensuring it aligns with your desired cut. Use the router’s base or an edge guide to maintain consistent alignment. For plunge routers‚ guide the base along the clamped edge. Always move the router in the direction where the bit’s rotation pushes it into the cut‚ typically counterclockwise for outside edges. Keep the router steady and apply gentle‚ even pressure for smooth results. Proper setup and alignment are key to achieving precise‚ professional-looking edges.

5.2 Tips for Achieving Smooth Edges

Ensure the edge guide is securely attached and aligned with the router’s base. Use a consistent feed rate to avoid uneven cuts. Clamp a straight reference edge to guide the router‚ reducing drift. For tight tolerances‚ consider guide bushes or jigs. Maintain sharp router bits to prevent tear-outs. Test cuts on scrap wood first to refine your technique. Proper setup and alignment are key to achieving smooth‚ professional-looking edges every time.

Alternatives to the Milwaukee Edge Guide

Porter-Cable edge guides are compatible with Milwaukee routers‚ offering precise adjustments. DIY solutions‚ such as using steel rods or clamped straight edges‚ provide cost-effective alternatives. Universal fitments ensure versatility.

6.1 Using Porter-Cable Edge Guides

Porter-Cable edge guides are a popular alternative for Milwaukee routers‚ offering compatibility with models like the 5616-24. These guides attach securely using adjustable rods‚ fitting the router’s mounting holes. They provide precise control‚ enabling smooth‚ consistent cuts. Porter-Cable guides are known for their durability and ease of use‚ making them a reliable option for woodworkers seeking alternatives to Milwaukee’s discontinued edge guides. Users praise their versatility and compatibility‚ ensuring they meet the needs of various routing projects effectively.

6.2 DIY Edge Guide Solutions

DIY edge guide solutions offer a cost-effective and customizable alternative for Milwaukee routers. Woodworkers can craft their own guides using precision steel rods‚ plywood‚ and hardware. By attaching rods to the router base and clamping straight edges‚ users achieve precise control. This method is adaptable to various projects‚ allowing for tailored setups. DIY guides are particularly useful when commercial options are unavailable‚ providing a flexible solution for achieving professional results without additional expenses.

Tips for Getting the Best Results

Ensure proper setup and alignment for precise cuts. Regular maintenance and correct storage preserve tool performance‚ enhancing overall results with the edge guide.

7.1 Proper Setup and Alignment

Proper setup and alignment are crucial for achieving precise cuts with the Milwaukee Router Edge Guide. Start by attaching the guide rail to the router’s base‚ ensuring it is flush and secure. Tighten all screws firmly to prevent movement during operation. Align the guide with your workpiece‚ double-checking its position before cutting. Proper alignment ensures smooth‚ consistent edges and prevents errors. Take your time during setup to guarantee accurate results and maintain control throughout the routing process.

7.2 Maintenance and Storage

Regular maintenance ensures the Milwaukee Router Edge Guide remains accurate and functional. Clean the guide rail and components with a soft cloth to remove dust and debris. Inspect for wear or damage‚ replacing parts as needed. Store the edge guide in a dry‚ secure location to prevent rust or misalignment. Avoid exposing it to moisture or extreme temperatures. Proper storage and upkeep will extend its lifespan and maintain precision for future projects.

Common Mistakes to Avoid

8.1 Incorrect Alignment

Incorrect alignment of the edge guide can lead to uneven cuts and ruined workpieces. Always ensure the guide rail is properly secured and aligned with the router’s base before cutting. Rushing the setup or failing to double-check alignment is a common error. Use clamped straight edges or guide bushes as alternatives if alignment issues persist. Proper alignment ensures precise results and avoids costly mistakes. Double-checking your setup will save time and materials in the long run.

Incorrect alignment is a common mistake when using the Milwaukee Router Edge Guide. Misaligning the guide rail can result in uneven cuts and damage to the workpiece. Always ensure the guide rail is securely attached and properly aligned with the router’s base before cutting. Failing to double-check alignment or rushing the setup can lead to costly errors. Using clamped straight edges or guide bushes as alternatives can help maintain accuracy. Proper alignment is crucial for achieving smooth‚ precise results and avoiding wasted materials. Double-checking your setup ensures professional-grade outcomes.

8.2 Overlooking Proper Tightening

Overlooking proper tightening is a common mistake when using the Milwaukee Router Edge Guide. If the guide rail or adjustment screws are not securely tightened‚ the guide may shift during use‚ leading to uneven cuts or misalignment. Always ensure all screws and bolts are tightened firmly before starting your work. Loose components can cause instability‚ affecting the accuracy of your cuts. Double-checking the tightness of all parts is essential for maintaining control and achieving consistent results with your router and edge guide setup.

The Milwaukee Router Edge Guide enhances precision and control‚ offering versatile solutions for edge routing. Its compatibility and adaptability make it a valuable tool for woodworking projects.

9.1 Final Thoughts on the Milwaukee Router Edge Guide

The Milwaukee Router Edge Guide offers exceptional precision and versatility for edge routing tasks. Despite its discontinuation‚ its compatibility with various routers and adaptability to custom solutions highlight its enduring value. Woodworkers praise its ability to deliver smooth‚ consistent results‚ making it a sought-after accessory. While alternatives like Porter-Cable guides or DIY setups exist‚ the Milwaukee Edge Guide remains a popular choice for its reliability and ease of use‚ solidifying its place in woodworking projects.

9.2 Encouragement to Explore Further

Exploring further into the world of edge routing opens up endless possibilities for creativity and precision. Discover new techniques‚ experiment with different guides‚ and uncover the full potential of your Milwaukee Router. The woodworking community offers a wealth of resources‚ tutorials‚ and innovations to enhance your skills. Whether you’re a seasoned pro or a hobbyist‚ continuous learning ensures your projects stand out. Dive deeper‚ and you’ll find that the Milwaukee Edge Guide is just the starting point for your woodworking mastery.