
Welcome to the Shatterpoint Build Instructions guide, your gateway to mastering the assembly of Star Wars: Shatterpoint miniatures and terrain. This comprehensive resource is designed to help both new and experienced players navigate the process of building their miniatures effectively, ensuring optimal customization and gameplay readiness. Whether you’re assembling character miniatures, terrain pieces, or exploring advanced techniques, these instructions will provide clear, step-by-step guidance to bring your Shatterpoint models to life. Follow along to unlock the full potential of your miniatures and create stunning, battle-ready units for your next game.
Overview of Shatterpoint and Its Miniature Assembly
Star Wars: Shatterpoint is a character-focused skirmish game where players assemble and customize miniatures to create unique strike teams. The assembly process involves carefully removing components from frames, cleaning mold lines, and gluing parts together. Each miniature offers customization options, such as alternate poses or weapon swaps, allowing players to tailor their units. The modular terrain system enhances gameplay by enabling dynamic battlefield layouts. This hands-on approach ensures every model is battle-ready and reflects the player’s personal style, blending creativity with strategic gameplay.
Importance of Following Official Assembly Guides
Following official assembly guides ensures that your Shatterpoint miniatures are built correctly and function as intended. Proper assembly is crucial for maintaining the structural integrity and visual consistency of the models. By adhering to the instructions, you minimize errors and ensure compatibility with the game’s terrain and accessories. This also helps preserve the aesthetic quality of the miniatures, enhancing your overall gaming experience. Official guides provide clear, step-by-step instructions, making the assembly process smoother and more enjoyable for players of all skill levels.
Gathering Materials and Tools
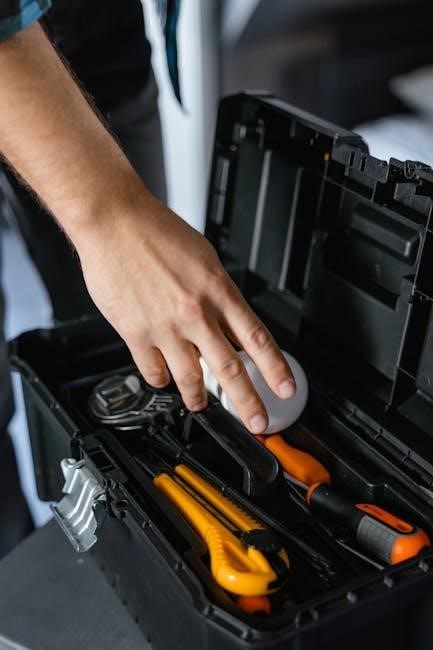
Essential tools include hobby clippers, a sharp knife, and plastic glue. Sandpaper and files help smooth rough edges for a seamless fit.
A clean, stable work surface is crucial. Refer to official guides for specific material recommendations to ensure the best assembly results.
Necessary Tools for Assembly
The essential tools for assembling Shatterpoint miniatures include sharp hobby clippers, a hobby knife, and plastic glue. Sandpaper or files are also recommended to smooth rough edges and mold lines.
A clean, well-lit workspace is vital for precision. Optional tools like tweezers can aid in handling small parts, while a magnifying glass helps with intricate details. Ensure all tools are within reach to streamline the assembly process.
Recommended Adhesives and Materials
For assembling Shatterpoint miniatures, hobby plastic glue is the most recommended adhesive due to its compatibility with plastic components. A small amount ensures a strong bond without excess. Sandpaper or files are essential for smoothing rough edges and mold lines, while tweezers can help handle small parts. Optional materials like super glue can be used for extra durability, though sparingly to avoid damage.
Always use adhesives in a well-ventilated area and follow manufacturer instructions. Clean the workspace thoroughly before gluing to ensure proper fit and alignment.
Understanding Shatterpoint Assembly Diagrams
The Shatterpoint assembly diagrams provide clear visual guides for constructing miniatures and terrain. They include numbered parts, assembly sequences, and symbols to ensure accurate and efficient building. By following these diagrams, players can easily identify components, understand assembly order, and achieve professional-looking results. The diagrams are especially helpful for complex builds, making the assembly process straightforward and enjoyable for all skill levels.
How to Read and Interpret Diagrams
Shatterpoint assembly diagrams are detailed visual guides that use numbered parts and color-coded sections to indicate assembly order. Symbols denote specific actions like gluing or aligning pieces. Start by identifying each component and its corresponding number, then follow the sequence step-by-step. Pay attention to highlighted areas for critical connections. Use the diagrams to ensure proper alignment and avoid mistakes. Always check the fit of parts before gluing to guarantee a seamless build. These diagrams are designed to be intuitive, catering to both beginners and experienced builders.
Key Symbols and Notations in Instructions
Shatterpoint instructions use specific symbols and notations to guide assembly. Common symbols include a glue droplet for bonding parts, alignment arrows for proper fitting, and numbered sequences for assembly order. Color-coded sections highlight optional or variant components. Look for circles or boxes around numbers to identify matching parts. Notations like “optional” or “variant” indicate customization choices. Pay attention to warnings, often marked with an exclamation point, to avoid common mistakes. These symbols ensure clarity and precision during the assembly process, making it easier to follow the instructions accurately.
Step-by-Step Assembly Process
Begin by preparing your tools and sorting components. Follow the diagrams to identify parts, ensuring proper fit before gluing. Start with base pieces, then add details, aligning carefully for accuracy.
Assembling Character Miniatures
Begin by carefully removing miniature components from the frame using sharp hobby clippers. Clean excess material and mold lines with a hobby knife. Check each part’s fit before gluing to ensure proper alignment. Use a small amount of plastic glue to secure components, starting with the base and core body parts. Follow the assembly diagrams for specific character builds, noting optional poses or weapon swaps. Patience and precision are key to achieving a sturdy, detailed final product ready for painting and gameplay.
Assembling Terrain Pieces
Shatterpoint terrain pieces are designed for modularity, allowing players to create diverse battlefield layouts. Start by identifying components and their connections. Use clips or glue to secure parts, ensuring stability. Plan your layout before final assembly to maximize playability. Mix and match components from different sets to craft unique environments. Terrain assembly enhances gameplay immersion, offering strategic advantages. Follow diagrams for specific configurations, or experiment freely for custom designs. This system encourages creativity, making every battlefield distinct and visually engaging.

Customization Options in Shatterpoint
Customization is a core feature in Shatterpoint, allowing players to tailor poses, swap weapons, and add optional parts to create unique miniatures and terrain pieces, enhancing gameplay and aesthetics.
Custom Poses and Weapon Swaps
Star Wars: Shatterpoint offers extensive customization options, allowing players to craft unique poses and weapon configurations for their miniatures. These modifications not only enhance visual appeal but also provide tactical advantages in gameplay. Official assembly guides detail how to swap weapons and adjust poses, ensuring compatibility and structural integrity. Players can explore various combinations to create one-of-a-kind characters, making each miniature truly personalized. This flexibility empowers players to tailor their strike teams to suit their preferred playstyles and battlefield strategies.
Optional Parts and Variants
Shatterpoint miniatures often include optional parts and variants, enabling players to personalize their models. These extras may include alternate weapons, heads, or accessories, allowing for unique character customization. Official assembly guides provide clear instructions on how to incorporate these optional components, ensuring they fit seamlessly with the base model. By exploring these variants, players can create distinct versions of their favorite characters, adding depth and individuality to their strike teams. This feature enhances both visual appeal and tactical flexibility in gameplay.
Terrain Assembly and Modularity
Shatterpoint terrain is designed for modularity, allowing players to mix and match components to create diverse battlefield layouts. The system offers versatile pieces that can be easily reconfigured, enabling unique and dynamic environments for every game. This adaptability enhances gameplay by providing endless possibilities for terrain setup and customization, making each battle visually distinct and strategically engaging.
Building Modular Terrain Components
Shatterpoint terrain components are crafted for seamless modularity, allowing players to construct diverse battlefield layouts. Each piece is designed to connect effortlessly with others, creating dynamic environments. By combining walls, floors, and elevated platforms, players can build intricate structures. The High Ground terrain pack, for example, offers rail-free designs, preventing unintended intersections. This modular system ensures no two battlefields are alike, enhancing both visual appeal and strategic depth. With these components, players can craft unique scenarios, from urban skirmishes to industrial showdowns, effortlessly adapting to any gameplay need.
Creating Unique Battlefield Layouts
Shatterpoint terrain modularity allows players to craft unique battlefield layouts tailored to their strategic preferences. By combining modular components, such as walls, platforms, and floors, players can design intricate environments that reflect iconic Star Wars settings. The High Ground terrain pack, for instance, enables the creation of elevated structures without restrictive rails, offering limitless possibilities. This flexibility ensures every battlefield is distinct, whether it’s a bustling urban area or a remote industrial site, enhancing both visual and tactical gameplay experiences.
Painting and Finishing Your Miniatures
Painting enhances your Shatterpoint miniatures, bringing characters and terrain to life. Use recommended schemes and techniques like base coating, highlighting, and weathering effects for a professional finish. Follow Atomic Mass Games’ guidelines to ensure authenticity and elevate your miniatures’ visual appeal for immersive gameplay.
Recommended Paint Schemes and Techniques
For a professional finish, use base coats, washes, and highlights to create depth and detail. Apply weathering effects to add realism to your miniatures. Follow Atomic Mass Games’ official paint guides for iconic Star Wars color schemes. Layering and blending techniques will enhance the visual appeal of your models. Start with a primer, then build up colors gradually. Use high-quality acrylic paints and thin coats to avoid obscuring details. These methods ensure your miniatures stand out on the battlefield, capturing the essence of the Star Wars universe.
Adding Weathering and Details
Elevate your miniatures with realistic weathering effects. Use washes to add shading and depth to recesses. Apply edge highlighting to create sharp, defined lines. For battle-worn looks, incorporate light scratches or chips using a fine brush. Add dirt and rust effects with pigments or weathering powders. Details like holsters, belts, and lightsabers can be enhanced with subtle highlights. These techniques bring authenticity to your models, making them stand out on the battlefield. Practice on test models to refine your skills before applying to final pieces.
Rules for Building a Strike Team
Master the art of creating a formidable strike team by selecting units strategically, ensuring era consistency, and optimizing for tactical superiority on the battlefield.
Squad Composition and Era Restrictions
When building a strike team in Shatterpoint, each team must consist of exactly 2 squads. Each squad can include multiple units, but all units within a squad must belong to the same era. This ensures thematic consistency and balanced gameplay. Additionally, a strike team must include a single commander to lead the squad, adding strategic depth. These rules help players craft cohesive and historically accurate teams while maintaining the game’s competitive edge and immersive Star Wars experience.
Optimizing Your Strike Team for Gameplay
To optimize your Shatterpoint strike team, focus on selecting units that complement each other’s abilities and align with your playstyle. Ensure a balance between offensive and defensive capabilities while adhering to era restrictions. Synergize unit abilities to maximize effectiveness in combat. Consider the battlefield layout and mission objectives when choosing your team composition. This strategic approach enhances your chances of success and makes your strike team versatile for various gameplay scenarios, ensuring a competitive and enjoyable experience in Star Wars: Shatterpoint.
Advanced Assembly Techniques
Explore expert-level Shatterpoint assembly methods, including custom poses, weapon swaps, and terrain integration. These advanced techniques elevate your miniatures’ appearance and functionality, enhancing gameplay and visuals.
Converting Miniatures for Unique Looks
Take your Shatterpoint miniatures to the next level with custom conversions. Use hobby tools like files and sculpting putty to modify poses or swap weapons. Kitbashing with spare parts can create unique characters. Reposition arms, swap heads, or add accessories for personalized designs. Paint schemes can also be customized for distinct aesthetics. Follow Atomic Mass Games’ assembly guides for inspiration, and experiment with creative techniques to make your miniatures truly one-of-a-kind. This ensures your figures stand out on the battlefield.
Integrating Terrain with Miniatures
Shatterpoint’s modular terrain system allows seamless integration with miniatures, creating immersive battlefields. Use terrain components to elevation changes, hide miniatures, or block line of sight. Blend terrain pieces with character miniatures for strategic gameplay. Experiment with layouts to create unique environments, enhancing both aesthetics and functionality. Ensure terrain aligns with your strike team’s playstyle for optimal performance. This integration elevates gameplay and visual appeal, making your battles more dynamic and engaging.
Congratulations! You’ve successfully navigated the Shatterpoint build instructions. With your miniatures and terrain assembled, you’re ready to immerse yourself in strategic battles and storytelling. Enjoy your gaming journey!
Final Tips for Successful Assembly
For a seamless assembly experience, ensure all parts fit perfectly before gluing. Use sharp clippers to remove components cleanly and avoid excess material. Lightly sand mold lines for smooth joints. Apply a small amount of plastic glue to avoid spills. Refer to official Shatterpoint guides for complex pieces. Double-check diagrams for correct part orientation. Work in a well-lit, organized space to prevent losing small components. Patience and attention to detail will yield professional-looking miniatures. Happy building!
Resources for Further Assistance
For additional support, visit Atomic Mass Games’ official website for comprehensive Shatterpoint assembly guides and diagrams. Their resources include detailed PDFs and tutorials covering every unit and terrain piece. Join the Shatterpoint subreddit and Discord community for troubleshooting, tips, and inspiration from experienced players. Check out video tutorials on YouTube for visual step-by-step instructions. Lastly, consult the Shatterpoint rulebook and FAQ section for clarification on specific assembly or gameplay queries. These resources ensure a smooth and enjoyable building experience.