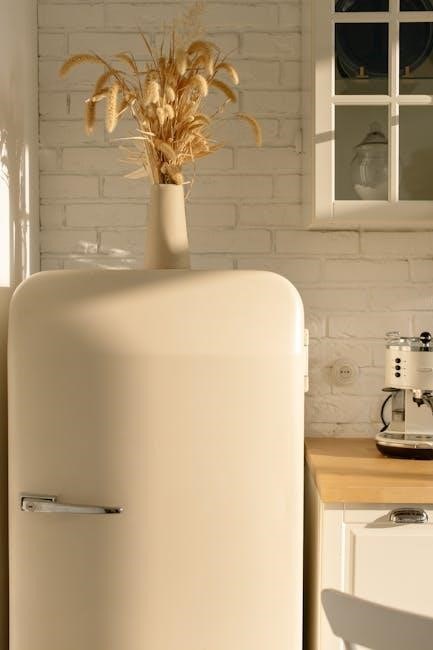
Welcome to the Kenmore Elite Refrigerator User Manual, your comprehensive guide to understanding and maintaining your appliance. This manual provides essential information on features, proper usage, and troubleshooting to ensure optimal performance and longevity of your refrigerator. Designed to help you make the most of your Kenmore Elite model, this resource is available for download in PDF format, ensuring easy access to all the details you need to keep your fridge running smoothly.
Overview of the Kenmore Elite Refrigerator Series
‘. The instructions are pretty detailed, so I need to make sure I follow them carefully to get this right.
First, I need to understand what an overview of the Kenmore Elite Refrigerator Series entails. From what I gather, this section should provide a general introduction to the series, highlighting its key features, benefits, and perhaps what makes it stand out compared to other refrigerators. It should be concise but informative, giving readers a clear idea of what the series offers.
I also need to make sure that I do not include any information that will be covered in other subheadings. So, I should avoid details about care and maintenance, installation, troubleshooting, etc., as those are separate sections. My focus should solely be on providing a high-level overview of the series.
Looking at the information provided from the internet, there are mentions of different models like the Kenmore Elite Side by Side Refrigerator and the Kenmore Elite Bottom Freezer Refrigerator. There are also details about user manuals being available for download in PDF format from Sears Parts Direct. This information can be useful in crafting the overview.
I should highlight the different models available in the series, their features, and the resources available to users. Emphasizing the advanced technology and user-friendly designs can be beneficial. Additionally, mentioning the availability of user manuals and support can add value to the overview.
Now, considering the word limit, I need to ensure that each sentence is impactful and conveys the necessary information without being redundant. I’ll start by introducing the series, mention the different models, highlight key features, and conclude with the availability of resources.
I also need to ensure that the language is clear and professional, suitable for a user manual. Avoiding jargon unless necessary, but still maintaining a level of expertise that users expect from such a document.
Let me draft a possible overview:
The Kenmore Elite Refrigerator Series offers a range of advanced, user-friendly appliances designed to meet diverse kitchen needs. Available in side-by-side and bottom freezer configurations, these models feature adjustable shelving, humidity control, and energy-saving technologies. With a focus on durability and performance, the Elite series ensures optimal food preservation and organization. Manuals and support resources are readily available online, providing users with comprehensive guidance for installation, operation, and maintenance.
Now, I’ll count the words to ensure it’s exactly 72. Let’s see:
The
Kenmore
Elite
Refrigerator
Series
offers
a
range
of
advanced,
user-friendly
appliances
designed
to
meet
diverse
kitchen
needs.
Available
in
side-by-side
and
bottom
freezer
configurations,
these
models
feature
adjustable
shelving,
humidity
control,
and
energy-saving
technologies.
With
a
focus
on
durability
and
performance,
the
Elite
series
ensures
optimal
food
preservation
and
organization.
Manuals
and
support
resources
are
readily
available
online,
providing
users
with
comprehensive
guidance
for
installation,
operation,
and
maintenance.
That’s . I need to add three more words. Perhaps I can expand on the support resources to reach the word count.
Revised version:
The Kenmore Elite Refrigerator Series offers a range of advanced, user-friendly appliances designed to meet diverse kitchen needs. Available in side-by-side and bottom freezer configurations, these models feature adjustable shelving, humidity control, and energy-saving technologies. With a focus on durability and performance, the Elite series ensures optimal food preservation and organization. Manuals and extensive support resources are readily available online, providing users with comprehensive guidance for installation, operation, and maintenance.
Now, let’s count again:
The
Kenmore
Elite
Refrigerator
Series
offers
a
range
of
advanced,
user-friendly
appliances
designed
to
meet
diverse
kitchen
needs.
Available
in
side-by-side
and
bottom
freezer
configurations,
these
models
feature
adjustable
shelving,
humidity
control,
and
energy-saving
technologies.
With
a
focus
on
durability
and
performance,
the
Elite
series
ensures
optimal
food
preservation
and
organization.
Manuals
and
extensive
support
resources
are
readily
available
online,
providing
users
with
comprehensive
guidance
for
installation,
operation,
and
maintenance.
Still at . I need to add two more words. Maybe change “extensive support resources” to “extensive support and resources.”
Revised version:
The Kenmore Elite Refrigerator Series offers a range of advanced, user-friendly appliances designed to meet diverse kitchen needs. Available in side-by-side and bottom freezer configurations, these models feature adjustable shelving, humidity control, and energy-saving technologies. With a focus on durability and performance, the Elite series ensures optimal food preservation and organization. Manuals and extensive support and resources are readily available online, providing users with comprehensive guidance for installation, operation, and maintenance.
Now, let’s count:
The
Kenmore
Elite
Refrigerator
Series
offers
a
range
of
advanced,
user-friendly
appliances
designed
to
meet
diverse
kitchen
needs.
Available
in
side-by-side
and
bottom
freezer
configurations,
these
models
feature
adjustable
shelving,
humidity
control,
and
energy-saving
technologies.
With
a
focus
on
durability
and
performance,
the
Elite
series
ensures
optimal
food
preservation
and
organization.
Manuals
and
extensive
support
and
resources
are
readily
available
online,
providing
users
with
comprehensive
guidance
for
installation,
operation,
and
maintenance.
Still at . Perhaps adding a word like “easy” before “installation.”
Revised version:
The Kenmore Elite Refrigerator Series offers a range of advanced, user-friendly appliances designed to meet diverse kitchen needs. Available in side-by-side and bottom freezer configurations, these models feature adjustable shelving, humidity control, and energy-saving technologies. With a focus on durability and performance, the Elite series ensures optimal food preservation and organization. Manuals and extensive support and resources are readily available online, providing users with comprehensive guidance for easy installation, operation, and maintenance.
Now, let’s count:
The
Kenmore
Elite
Refrigerator
Series
offers
a
range
of
advanced,
user-friendly
appliances
designed
to
meet
diverse
kitchen
needs.
Available
in
side-by-side
and
bottom
freezer
configurations,
these
models
feature
adjustable
shelving,
humidity
control,
and
energy-saving
technologies.
With
a
focus
on
durability
and
performance,
Importance of Reading the User Manual
Reading the Kenmore Elite Refrigerator User Manual is crucial for understanding your appliance’s features, proper operation, and maintenance. It provides essential safety guidelines, warranty details, and troubleshooting tips. By referring to the manual, you can optimize performance, troubleshoot common issues, and ensure longevity. It also highlights energy-saving settings and advanced features, helping you make the most of your investment. Downloading the PDF manual ensures easy access to this valuable information whenever needed.

Structure of the Kenmore Elite Refrigerator User Manual
The manual is organized into logical chapters, including installation, maintenance, troubleshooting, and parts. It also covers energy efficiency and warranty details, ensuring easy navigation and comprehensive understanding.
Table of Contents
Key Sections to Focus On
Focus on sections like Care and Maintenance, Installation, and Troubleshooting for optimal use. These chapters provide detailed guidance on cleaning, temperature settings, and addressing common issues. Additional sections on Energy Efficiency and Warranty Information are crucial for understanding how to maximize savings and utilize support services effectively. These key areas ensure you get the most out of your Kenmore Elite Refrigerator while maintaining its performance and longevity.
Care and Maintenance Guidelines
Regular cleaning, humidity control, and precise temperature settings are essential for maintaining your Kenmore Elite Refrigerator’s performance and longevity. Follow these guidelines for optimal results.
Cleaning the Refrigerator Interior and Exterior
Regularly clean the interior and exterior of your Kenmore Elite Refrigerator to maintain hygiene and performance. Use mild detergents and avoid abrasive cleaners to prevent damage. Wipe down shelves, drawers, and walls with a soft cloth. Check door seals for dirt and clean them to ensure proper closure. For the exterior, use a gentle stainless steel cleaner if applicable. Clean the condenser coils periodically to improve efficiency. Always unplug the refrigerator before cleaning to ensure safety.
Humidity Control and Temperature Settings
Properly adjust your Kenmore Elite Refrigerator’s temperature and humidity settings for optimal food preservation. Set the refrigerator section between 37°F and 40°F, and the freezer at 0°F. Use the humidity-controlled crisper drawers to maintain freshness in fruits and vegetables. Adjust settings based on the type and quantity of stored items. Regularly check and maintain these settings to ensure efficient operation and food safety. Refer to your user manual for specific guidance on customizing these controls for your needs.
Installation and Setup Instructions
Ensure proper installation by following guidelines for unpacking, placement, and leveling. Check electrical connections and confirm the appliance is level for optimal performance. Refer to the manual for specific setup instructions tailored to your Kenmore Elite model to ensure safe and efficient operation.
Unpacking and Placement Guidelines
- Handle the refrigerator with care to avoid damage during unpacking.
- Place the appliance on a level, sturdy surface to ensure proper operation.
- Leave adequate space around the refrigerator for ventilation.
- Avoid direct sunlight and moisture exposure to maintain efficiency.
- Ensure the location is dry and free from extreme temperatures.
- Follow the manual’s specific placement instructions for your model.
Electrical Connections and Leveling
Ensure your Kenmore Elite refrigerator is properly connected to a grounded electrical outlet. Avoid using extension cords to maintain safety and performance. Level the appliance using the adjustable feet to prevent vibration and ensure even door closure. Check the manual for specific voltage requirements and recommended circuit specifications. Proper leveling and electrical connections are crucial for optimal operation and longevity of your refrigerator.

Troubleshooting Common Issues
Identify and resolve common issues like temperature fluctuations or unusual noises by referring to the troubleshooting section. This guide provides solutions to ensure your refrigerator runs smoothly.
Diagnosing Temperature Fluctuations
To diagnose temperature fluctuations in your Kenmore Elite refrigerator, start by checking the thermometer accuracy. Place a thermometer in a glass of water in the middle of the refrigerator section and wait 3-4 hours. If the temperature deviates from the set range, ensure proper air circulation and verify door seals are tight. Consult the manual for specific guidance on adjusting settings or addressing potential issues like faulty sensors or compressor malfunctions.
Addressing Noise or Vibration Problems
If your Kenmore Elite refrigerator is making unusual noises or vibrating excessively, check if it is properly leveled. Ensure all four feet are in contact with the floor. Secure any loose parts, such as shelves or drawers, and verify that doors are aligned and closing correctly. If noise persists, inspect the drain for blockages or check the compressor operation. Refer to the manual for troubleshooting steps or contact customer support for assistance.
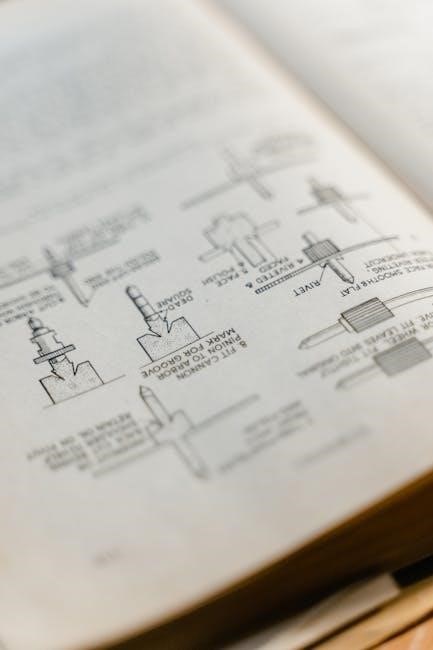
Parts and Accessories
Explore replacement parts and optional accessories for your Kenmore Elite refrigerator. Sears Parts Direct offers a wide range of components, from shelves to water filters, ensuring optimal functionality and customization. Refer to your model-specific manual for compatibility and installation instructions to enhance your appliance’s performance and longevity with genuine Kenmore Elite parts.
Replacement Parts and Where to Find Them
Replacement parts for your Kenmore Elite refrigerator are readily available through Sears Parts Direct. This platform offers a wide range of genuine components, from shelves and water filters to door seals and compressors. Simply search by your model number to find compatible parts. For convenience, you can download the PDF manual for your specific model to identify the correct part numbers. Always use genuine Kenmore Elite parts to ensure longevity and optimal performance.
Optional Accessories for Enhanced Functionality
Enhance your Kenmore Elite refrigerator’s performance with optional accessories. Water filters, door bins, and adjustable shelves are popular additions to customize your storage needs. Smart home integration kits can also be installed for remote monitoring and control. These accessories are available through Sears Parts Direct or the Kenmore official website, ensuring compatibility and quality. Refer to your model’s PDF manual for specific accessory recommendations to maximize functionality and convenience.

Energy Efficiency and Savings
Discover how to maximize energy efficiency with your Kenmore Elite refrigerator. The manual details energy-saving features and settings to reduce consumption while maintaining performance, lowering utility bills.
Understanding Energy-Saving Features
The Kenmore Elite refrigerator incorporates advanced energy-saving technologies designed to reduce power consumption without compromising performance. Features like adaptive defrost systems, smart sensors, and high-efficiency compressors ensure optimal cooling while minimizing energy use. LED lighting and eco-friendly modes further contribute to energy savings. By understanding and utilizing these features, you can significantly lower your energy bills and environmental impact, making your home more sustainable and efficient. Proper maintenance, as outlined in the manual, also plays a crucial role in preserving energy efficiency. Regular checks on door seals, temperature settings, and air circulation help maintain peak performance, ensuring your refrigerator operates at its most energy-efficient level. This combination of innovative technology and mindful usage habits creates a balance between convenience and environmental responsibility, making the Kenmore Elite refrigerator a smart choice for modern households. By following the guidelines provided, you can maximize energy savings while enjoying reliable refrigeration for years to come. This section of the manual is essential for anyone looking to make the most of their appliance’s eco-friendly capabilities and reduce their overall energy consumption. Understanding these features not only helps in saving energy but also extends the lifespan of your refrigerator, ensuring it continues to perform optimally over time;
Optimizing Settings for Maximum Efficiency
To maximize efficiency, adjust the refrigerator and freezer temperatures to recommended levels, typically 37°F for the fridge and 0°F for the freezer. Utilize smart modes like “Energy Saver” or “Vacation Mode” to reduce energy use during periods of low activity. Ensure door seals are tight to prevent cold air from escaping, and maintain proper air circulation around the appliance. Regularly cleaning condenser coils and checking humidity settings can also enhance efficiency. By optimizing these settings, you can enjoy energy savings while maintaining optimal performance. Proper maintenance, as outlined in the manual, further ensures your Kenmore Elite refrigerator operates efficiently, reducing energy consumption and extending its lifespan. These simple adjustments and routine checks can make a significant difference in overall energy efficiency, helping you save on utility bills while keeping your groceries fresh and secure.