Sorting Laundry by Color and Fabric Type
Sorting laundry by color prevents dye bleeding, while separating fabrics protects delicates. Whites, lights, and darks should be washed separately, as should heavy and lightweight fabrics.

1.1. Separate Colors to Prevent Bleeding
Separating colors during laundry prevents dye transfer, especially for vibrant or new t-shirts. Wash whites, lights, and darks separately to avoid discoloration. This step is crucial for maintaining the original appearance of your t-shirts and preventing unwanted color mixing. Use mesh laundry bags for extra protection, especially for brightly colored or printed fabrics. Cold water also helps reduce color bleeding, ensuring your t-shirts stay vibrant longer.
1.2. Separate Fabrics to Protect Delicates
Separating fabrics prevents damage to delicate materials like silk or lace. Wash heavy fabrics separately from lightweight ones to avoid snagging or stretching. Delicate t-shirts benefit from mesh laundry bags, protecting them from abrasion. This ensures your t-shirts remain in excellent condition, preserving their texture and longevity; Sorting by fabric type ensures each garment receives the care it needs, preventing unnecessary wear and tear.
Turning T-Shirts Inside Out
Turning t-shirts inside out before washing shields the outer surface from friction and fading. This simple step preserves prints, embroidery, and vibrant colors, extending their lifespan.
2.1. Protecting the Outer Surface
Turning t-shirts inside out shields the outer surface from abrasion and color fading. This method prevents damage to prints, embroidery, and designs, ensuring they remain vibrant. It reduces friction during washing, protecting delicate materials. Additionally, it minimizes the risk of snagging and pilling, keeping the fabric smooth and intact. This simple step significantly extends the lifespan of your t-shirts.
2.2. Preserving Print Quality
Turning t-shirts inside out before washing helps preserve the print quality by reducing friction and abrasion. This prevents fading, cracking, and peeling of designs. Cold water and mild detergents further protect prints from damage. Avoiding high heat in both washing and drying also ensures vibrant colors and clear designs. This method is especially crucial for graphic tees with intricate or sensitive artwork.
Pre-Treating Stains
Pre-treating stains is essential for effective removal. Apply a stain remover or detergent directly, gently massage, and rinse with cold water before washing. Soak if needed.

3.1. Using Stain Remover
Apply a stain remover directly to the affected area, gently massaging it in. Let it sit for 10 minutes before washing; For tough stains, soak the garment in cold water with detergent. Always rinse thoroughly with cold water after treatment. Avoid using harsh chemicals that could damage the fabric or harm the print. This method ensures effective stain removal while preserving the t-shirt’s quality.
3.2. Gently Working on Stains
Gently buff stains with a clean washcloth or work the fabric against itself to avoid damaging the material. Avoid harsh scrubbing, as it can harm the fabric or print. Rinse thoroughly with cold water to remove all detergent residue. For stubborn stains, soak the shirt in cold water with mild detergent before washing. This gentle approach ensures stains are removed without compromising the t-shirt’s quality or design.
Choosing the Right Detergent
Use heavy-duty detergent for whites to maintain brightness and mild or color-protecting detergents for colored shirts to prevent fading. Opt for eco-friendly, biodegradable options when possible.
4.1. Heavy-Duty for Whites
Heavy-duty detergents are ideal for white t-shirts to remove tough stains and retain brightness. They contain enzymes and optical brighteners that combat dinginess and maintain vibrancy. Always use the recommended amount to avoid residue buildup. For best results, pair with cold or warm water settings and avoid using bleach unless necessary. This ensures whites stay crisp and clean for longer.
4.2. Mild or Color Detergents
Mild or color-specific detergents are designed to preserve vibrant hues and prevent fading. They are gentle on fabrics, making them ideal for colored and printed t-shirts. These detergents maintain color integrity while effectively removing dirt without harsh chemicals. Opt for biodegradable options to protect the environment. Always check the care label to ensure compatibility with your t-shirt’s fabric type for optimal results and longevity.

Washing Methods
Wash t-shirts in cold water using a gentle cycle or hand wash for delicates. Always turn shirts inside out to protect designs and fabrics during washing.
5.1. Machine Washing Tips
Use a gentle cycle with cold water to protect fabrics and prevent shrinking. Turn t-shirts inside out to safeguard prints and embroidery. Select a low-spin setting to minimize wear. Avoid overloading the machine to ensure even washing. Use mild detergent suitable for the fabric type. For whites, opt for heavy-duty detergent, while colors benefit from color-protecting detergents. Always check care labels for specific instructions to ensure optimal results;
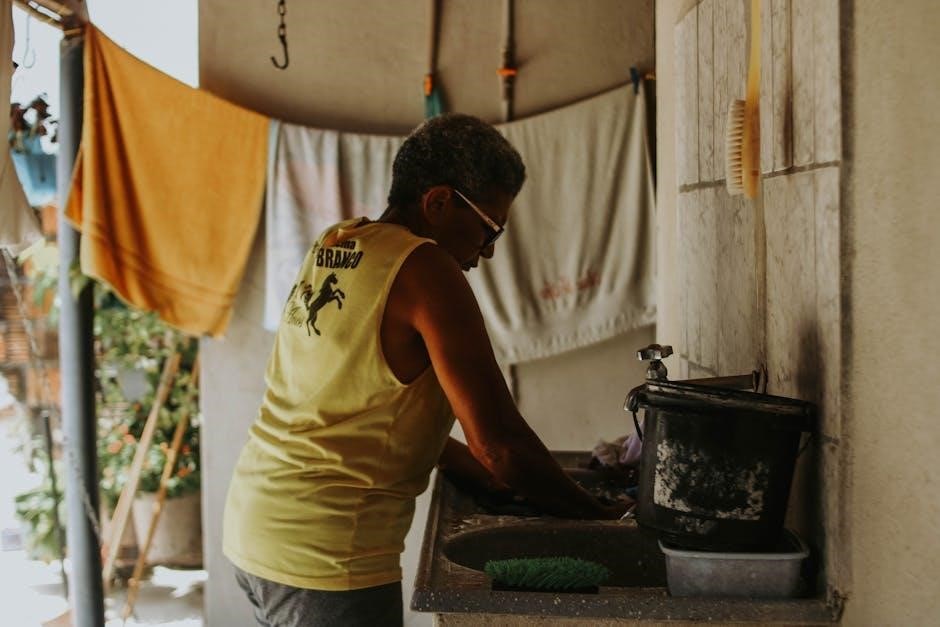
For delicate or printed t-shirts, hand washing is ideal. Fill a basin with cold water and add a small amount of mild detergent. Gently agitate the water and soak the t-shirt for about 10 minutes. Avoid scrubbing, as it may damage the fabric. Rinse thoroughly with clean, cold water until no suds remain. Gently squeeze out excess water without wringing. Lay flat or hang to air dry, ensuring the print remains intact. Air drying preserves fabric integrity and prevents shrinkage. For machine drying, use low heat settings to protect materials and maintain shape. Always turn t-shirts inside out. Air drying is the most gentle method for preserving t-shirt quality. Lay shirts flat or hang them on rounded hangers to prevent stretching. Avoid direct sunlight to minimize fading. Turn t-shirts inside out before drying to protect designs and colors; This method prevents shrinkage and maintains fabric softness, especially for delicate or printed materials. Air drying is eco-friendly and extends the lifespan of your t-shirts. Using a low heat dryer is a safer alternative to air drying. It prevents shrinkage and damage to fabrics while maintaining color vibrancy. Remove t-shirts as soon as the cycle ends to avoid wrinkles. High heat can damage prints and cause fading, so always opt for a low-temperature setting. This method balances convenience and care, ensuring your t-shirts remain in excellent condition. Care labels provide essential instructions for washing, drying, and ironing. Always check the label for specific settings and guidelines to ensure proper care and avoid damage. Care labels use symbols to guide washing, drying, and ironing. A tub icon indicates washing, with dots for temperature. A square symbolizes drying methods, while an iron icon shows allowed heat. These symbols ensure proper care, preventing damage. Always follow them to maintain your t-shirt’s quality and longevity. Fabric-specific instructions ensure optimal care for different materials. Cotton, polyester, and blends have unique needs. For 100% cotton, avoid hot water to prevent shrinking. Polyester and blends may require a gentle cycle. Always check the care label for fabric-specific guidance, such as temperature settings or detergent recommendations. This ensures your t-shirt retains its shape, color, and quality. Proper fabric care extends the life of your garment. Store t-shirts in a cool, dry place to maintain quality. Fold or hang them to prevent creases. Use breathable storage options like cotton bags to preserve fabric health. Folding t-shirts is ideal for preventing stretching and saving space, while hanging preserves their shape and reduces wrinkles. For casual tees, folding is practical, but delicate or embroidered designs benefit from hanging to maintain their appearance. Choose breathable fabric storage bags or natural fiber hangers to protect against dust and moisture, ensuring longevity and freshness. Store t-shirts in breathable materials like cotton or mesh bags to prevent moisture buildup. Avoid plastic bags, as they trap dampness and can cause odors or mildew. Fold t-shirts neatly or hang them on natural fiber hangers to maintain airflow. Keep them in a cool, dry place to prevent shrinkage and fading. This method ensures freshness and prolongs the life of your t-shirts. Opt for cold water washes to reduce energy consumption and protect fabrics. Use biodegradable detergents to minimize environmental impact. Air-drying instead of machine drying preserves shirts and saves energy. These eco-conscious practices extend the life of your t-shirts while promoting sustainability. Cold water washing is essential for eco-friendly t-shirt care. It prevents shrinking, fading, and color bleeding while saving energy. Using cold water reduces wear and tear on fabrics, extending the life of your shirts. This method is especially recommended for colored and printed t-shirts to maintain their vibrancy. Always opt for cold cycles to ensure gentle and sustainable cleaning. Using biodegradable detergents is an eco-friendly choice for washing t-shirts. These detergents are free from harsh chemicals, making them gentler on fabrics and the environment. They effectively clean without damaging prints or colors, ensuring your t-shirts remain vibrant. Opt for biodegradable options to reduce environmental impact while maintaining the quality of your clothes. This is especially recommended for colored or printed tees to preserve their design integrity. Iron t-shirts inside out on low heat to protect designs and fabrics. This prevents damage to prints and ensures a smooth finish without scorching the material. Ironing t-shirts inside out on low heat protects the design and fabric from damage. This method prevents scorching and fading, especially for printed or embroidered designs. Use a gentle touch and avoid steam, as it can harm certain materials. For best results, iron while the fabric is slightly damp and always check the care label for specific fabric instructions to ensure safe ironing practices. To protect designs on t-shirts, especially printed or embroidered ones, always iron inside out and avoid direct contact with the design. Use low heat settings and never apply steam, as it can damage the print. For machine washing, place the t-shirt in a mesh laundry bag to shield it from friction. Air drying is recommended, as high heat can cause designs to crack or fade over time.5.2. Hand Washing Techniques

Drying Techniques
6.1. Air Drying
6.2. Low Heat Dryer
Understanding Care Labels
7.1. Interpreting Symbols
7.2. Fabric-Specific Instructions

Storing T-Shirts Properly
8.1. Folding vs. Hanging
8.2. Breathable Storage
Eco-Friendly Tips
9.1. Cold Water Usage
9;2. Biodegradable Detergents

Ironing Tips
10.1. Inside Out on Low Heat
10.2. Protecting Designs