Pillowcase patterns provide a step-by-step guide to creating beautiful, custom pillowcases. Available as PDF downloads, these patterns offer ease of use and versatility for sewers of all skill levels.
From standard sizes to decorative designs, pillowcase patterns ensure professional finishes and endless customization options, making them perfect for home decor, gifts, or charity projects.
1.1 Overview of Pillowcase Sewing
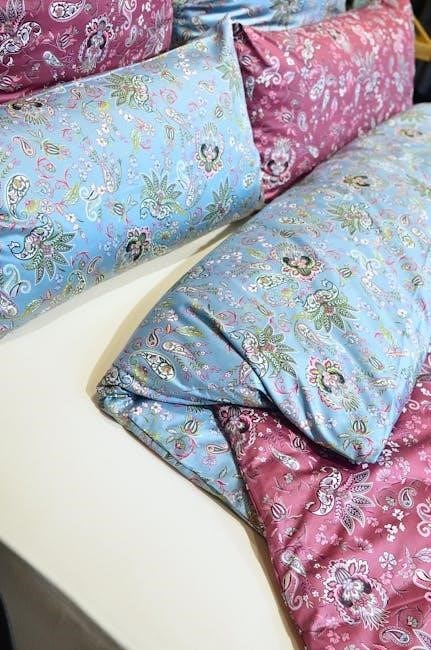
Pillowcase sewing is a popular DIY project that involves creating custom covers for pillows using fabric and basic sewing techniques. It’s a great way to personalize home decor or create thoughtful gifts. The process typically involves cutting fabric to size, sewing seams, and finishing edges for a polished look. Methods like the burrito technique or French seams are often used for professional results. Pillowcase sewing is simple enough for beginners yet versatile for experienced sewers, offering endless customization options.
1.2 Importance of Using a Pattern
Using a pillowcase pattern ensures accuracy and consistency in your project. Patterns provide precise measurements and step-by-step instructions, reducing mistakes and saving time. They also offer versatility, allowing you to create pillowcases in various sizes and styles. Whether you’re a beginner or an experienced sewer, a pattern guides you to achieve professional-looking results. PDF patterns are particularly convenient, as they are easily downloadable and printable, making the sewing process smoother and more efficient.

Materials and Tools Needed
Essential materials include fabric, thread, and notions like zippers or ribbons. Tools needed are a sewing machine, rotary cutter, ruler, and scissors. Pre-washing fabric ensures proper fit, and using a 1/2-inch seam allowance guarantees professional results.
2.1 Fabric Requirements for Different Sizes
Fabric requirements vary based on pillowcase size. A standard pillowcase typically needs 1 yard of 44/45″ wide fabric, while queen and king sizes may require 1.25-1.5 yards. Baby pillowcases use about 0.5 yards. Ensure fabric is 100% cotton for softness and durability. Directional prints may need slightly more fabric to align patterns. Pre-washing fabric ensures accurate measurements and a professional finish.
2.2 Essential Sewing Tools and Notions
To sew a pillowcase, you’ll need a sewing machine, sharp scissors, rotary cutter, and mat for accurate cutting. A 24″ ruler ensures precise measurements. Basic notions include pins, thread, and a seam ripper. Use a 1/2″ seam allowance for standard pillowcases. Optional tools like a serger can finish seams professionally. Ensure fabric is pre-washed to avoid shrinkage. Free PDF patterns often include detailed lists of required tools and materials for success.
Popular Pillowcase Sewing Methods
Popular methods include the Burrito Method, hiding seams for a clean finish, and the French Seam Technique, offering a polished, professional look. Both are widely used for pillowcase sewing.
3.1 The Burrito Method
The Burrito Method is a popular technique for sewing pillowcases, known for its quick and efficient process. It involves rolling the fabric like a burrito to hide seams, resulting in a clean finish with no raw edges. This method is ideal for beginners and experienced sewers alike, as it simplifies the construction process. Materials needed include fabric for the body, cuff, and optional accent strips. The method ensures a professional-looking pillowcase with minimal effort. Download the free PDF pattern here for a step-by-step guide.
- Body fabric
- Cuff fabric
- Accent strips (optional)
3.2 French Seam Technique
The French Seam Technique is a method that creates strong and delicate seams, perfect for pillowcases. It involves sewing the fabric twice, first with a 1/4-inch seam and then with a 1/2-inch seam, enclosing the raw edges. This technique is ideal for light fabrics and results in a polished, professional finish. It’s a bit more time-consuming but ensures durability and a clean look. Download the free PDF pattern to learn this classic sewing method.
- Creates strong, enclosed seams
- Suitable for lightweight fabrics
- Results in a professional finish
Pillowcase Sizes and Variations
Pillowcases come in standard, queen, and king sizes, with variations for baby pillows and decorative designs. Patterns often include options for one-yard magic pillowcases and zipper pencil cases.
- Standard, queen, and king sizes available
- Customizable for baby pillows
- Decorative designs for unique styles
4.1 Standard, Queen, and King Sizes
Pillowcase patterns cater to various bed sizes, ensuring a perfect fit. Standard pillowcases measure 30×20 inches, while queen and king sizes accommodate larger pillows. These patterns often include measurements for 100% cotton fabric, ensuring durability and comfort. Finished pillowcases fit standard, queen, or king pillows, making them versatile for any bedroom setting. The designs are easy to follow, even for beginners, and allow for customization to match home decor.
- Standard: 30×20 inches
- Queen: 30×30 inches
- King: 36×20 inches
4.2 Baby and Decorative Pillowcases
Baby and decorative pillowcases add charm to nurseries or living spaces. Patterns often include smaller sizes for baby pillows, typically 16×26 inches. Decorative pillowcases can feature intricate designs, appliques, or embroidery. They’re perfect for personalizing gifts or adding a unique touch to home decor. Many patterns include options for ruffles, lace, or contrasting fabrics, making them ideal for creative customization and gifting.
- Baby pillowcases: 16×26 inches
- Decorative options: ruffles, embroidery, appliques
Step-by-Step Sewing Instructions
Clear guides outline cutting, sewing, and finishing steps. Measurements and fabric prep are detailed, ensuring accurate results. Perfect for beginners or charity projects, these instructions guarantee professional finishes.
5.1 Cutting Fabric Accurately
Cutting fabric accurately is crucial for a professional finish. Measure and mark fabric according to the pattern, ensuring correct yardage and alignment. For a standard pillowcase, cut a 30×41″ rectangle from 1 yard of fabric. If using directional prints, adjust the layout to match the design. Use rotary cutters and mats for precise cuts, ensuring edges are straight and seams align properly for a polished result.
5.2 Sewing Seams and Finishing Edges
Sewing seams accurately ensures durability and a polished look. Begin by sewing the side and bottom edges with a ½” seam allowance. For a professional finish, use the burrito method to enclose seams. Alternatively, employ French seams for a clean, fray-free interior. Hem the top edge with a ¼” fold, then a 4″ fold for a decorative cuff. Secure all seams with a final stitch to prevent fraying and ensure a long-lasting pillowcase.
Customization and Embellishments
Personalize pillowcases with unique designs, embroidery, or appliqué. Mix fabric patterns and textures for a vibrant look, ensuring a custom fit for any home decor or theme.
6.1 Adding Personalized Designs
Personalized designs elevate pillowcases, making them unique and meaningful. Use embroidery, appliqué, or printed fabrics to add names, patterns, or themes, perfect for gifts or special occasions.
Custom designs allow for creative expression, ensuring pillowcases match personal styles or home decor. This personal touch makes each pillowcase a one-of-a-kind piece, adding charm and character;
6.2 Incorporating Different Fabrics and Patterns
Mixing fabrics and patterns adds texture and visual interest to pillowcases. Combine cotton for durability with satin for a luxurious touch, or blend stripes with florals for a unique look.
Using contrasting fabrics for cuffs, bands, or accents creates a personalized style. This technique allows for endless creativity, making each pillowcase a reflection of individual taste and decor.
Charity and Gifting Ideas
Join the One Million Pillowcase Challenge to donate to those in need. Pillowcases make thoughtful gifts, especially when personalized with names or special messages for loved ones.
7.1 The One Million Pillowcase Challenge
The One Million Pillowcase Challenge encourages sewers to create and donate pillowcases to those in need. This initiative supports charities, hospitals, and shelters, providing comfort and warmth. Participants can use free PDF patterns to sew pillowcases, track donations, and join a community making a difference. It’s a simple yet impactful way to give back while enjoying your sewing hobby.
7.2 Creative Ways to Gift Pillowcases
Transform pillowcases into thoughtful gifts by adding personalized touches. Use vibrant fabrics or embroidery to match recipients’ styles. Pair pillowcases with matching bedding or complementary home decor items for a cohesive look. Consider gifting sets for special occasions like birthdays or holidays. Adding a handwritten note or small memento makes it extra special. Creative packaging, such as rolling them into bundles or tying with ribbons, enhances the presentation and thoughtfulness behind the gift.
Video Tutorials and Resources
Discover step-by-step pillowcase sewing tutorials on YouTube channels like The Crafty Gemini and SewVeryEasy. Find free PDF patterns and detailed guides on websites like AllPeopleQuilt.com.
8.1 Recommended YouTube Channels
For visual learners, YouTube channels like The Crafty Gemini and SewVeryEasy offer excellent step-by-step pillowcase sewing tutorials. The Crafty Gemini showcases the burrito method, while SewVeryEasy provides guidance on sewing various sizes and techniques. These channels are perfect for mastering the craft and exploring creative variations. Additionally, Jen’s tutorials and Laura Coia’s sewing tips are highly recommended for both beginners and experienced sewers.
8.2 Free PDF Patterns and Downloads
Discover a variety of free pillowcase PDF patterns available online, perfect for sewing enthusiasts. Websites like AllPeopleQuilt.com and Fun2Bfrugal.com offer downloadable patterns for standard, queen, and king sizes, as well as baby and decorative pillowcases. These patterns often include step-by-step instructions, making them ideal for beginners. Additionally, some patterns feature customizable options, allowing you to create unique pillowcases with ease.

Tips and Tricks for Beginners
For beginners, start with simple pillowcase patterns and prewash fabrics. Use a walking foot for smooth sewing and follow instructions carefully. Begin with standard sizes and gradually explore decorative options for a polished finish.
9.1 Avoiding Common Mistakes
When sewing pillowcases, common mistakes include incorrect fabric alignment and forgetting to prewash fabrics. To avoid these, ensure patterns are mirrored and edges are aligned properly. Prewash fabrics to prevent shrinkage after sewing. Use a 1/2-inch seam allowance and press seams flat for a professional finish; Avoid stretching fabric while sewing, and double-check measurements before cutting to ensure accuracy and a perfect fit.

9.2 Time-Saving Hacks for Sewing Pillowcases
Use the burrito method to sew pillowcases quickly, as it hides seams and reduces fabric handling. Pre-cut fabric according to your pattern to save time during assembly. Utilize French seams for a clean finish without additional edge finishing. Batch sew multiple pillowcases at once to streamline the process. Invest in a rotary cutter and mat for precise, speedy cutting. Choose patterns with minimal pieces to save time and effort.